A Complete Guide to Painting RV Walls & Cabinets
This post may contain affiliate links.
Painting the walls and cabinets is one of the things that makes the biggest impact when renovating an RV. But it can also be pretty discouraging when things don’t turn out as you had planned.
In this article, I will share the exact process countless RV owners have used to achieve great-looking, professional-quality results when painting RV walls and cabinets.
I’ll also share common painting problems and tips for how to avoid these frustrating experiences when painting your RV interior.

An Overview of the Process: How to Paint RV Walls and Cabinets
Whether you’re painting RV cabinets, walls, or both, the general process is this:
1. Make a plan. Decide what colors you want to paint, and where.
Will you paint the RV ceiling? Will you paint the trim along the tops of your walls to match the walls? Or will you rent a sprayer or use rollers and brushes? These are all questions you’ll want to answer before heading to the store.
Make a list of which things you’d like to paint. Don’t forget to consider:
- Walls (by room if you’d like each room to be a different color)
- Cabinets (by room and/or by uppers and lowers)
- Trim
- Furniture (i.e. the trim around a dinette booth)
- Countertops
- Backsplash
Watch this video for an overview of the process:
2. Determine what products to use. What type of paint and primer to use depends entirely on what types of materials you’ll be painting.
Solid wood requires a different process than pressed wood covered with vinyl laminate. Later in this article, I’ll cover the best products to use for painting an RV interior.
3. Do all your prep work. Somehow prepping to paint always takes longer than actually painting!
This includes removing/covering furniture and flooring, cleaning all surfaces, removing cabinet hardware, and taping anything you don’t want to get paint on.
This is the time to repair holes and uneven spots at this stage.
4. Sand & prime (as needed). The best way to get good results when painting RV cabinets is to apply a good bonding primer before painting. You’ll also need to sand any solid wood and scuff the surface of wood veneer and laminate surfaces. Be sure to wipe off all the dust before you prime or paint.
If you’re painting walls and cabinets, you may want to prime both at the same time with a paint sprayer.

5. Actually painting!
Use a roller, brush, or sprayer to paint, follow the instructions on the label for paint drying time and climate conditions.
Note: Want to paint the outside of your RV? It’s a whole different process! Check out that guide here.
Supplies You’ll Need for Painting Your RV Interior
To paint your RV interior, you’ll need the following:
- Paint (obviously!)
- Primer, maybe (more on that in a sec)
- Sandpaper or sanding blocks
- An electric sander – optional, but it will save you a lot of time!
- Chemical stripper – optional, can help with removing varnish from cabinet doors
- Painter’s masking tape
- Plastic for covering things you don’t want to get paint on
- Paint brushes and rollers
- Paint trays and/or other containers
- A paint sprayer – This is optional, but recommended if you’re painting your entire RV interior. You can rent one at a home improvement store such as Home Depot, or you can buy a small one.

The cost to paint a camper interior can really add up. If you’ve ever painted before, you might have many of these tools already. If not, be sure to budget accordingly before beginning your project.
Painting RV Walls: The Process
RV walls are actually quite a bit easier to paint than RV cabinets. In my own RV, I decided to paint only the walls and not the cabinets.
Related: See more photos of RVs with painted walls and unpainted cabinets
To prep my RV walls for painting, I first removed the wallpaper border. I used Goo Gone to clean off the adhesive residue. Then I lightly cleaned the walls with water and a little dish soap to clean off the Goo Gone.

Then I painted the walls with two coats of Valspar Signature Latex Base Paint + Primer All-in-One in an eggshell finish. I used a roller for larger areas to avoid brush strokes and a good quality angled brush for corners, edges, and small areas.
I was happy with the results and never had any issues with the paint peeling, scratching, or fading later.

Do I need to remove my RV wallpaper before I paint? Find out how to paint RV wallpaper here.
FAQ’s About Painting RV Walls
Do You Need to Use Primer on RV Walls?
Many people start with a coat of primer on their RV walls before painting. The purpose of primer is to help paint adhere to a surface. Because my walls were slightly textured, I didn’t experience any problems with paint adhesion.
If your RV walls are totally smooth, it would not be a bad idea to play it safe and paint the walls with bonding primer before painting them your final color.
Additionally, if you are planning to paint both your walls and your cabinets, you can save time by using a sprayer to give everything a base coat of primer. before painting your walls and cabinets whatever colors you choose.

What is the best primer for RV walls?
RV renovators say Kilz Adhesion Interior & Exterior Primer is the best!
What’s the Best Paint for RV Walls?
I’ve heard every possible brand of paint recommended by different RVers! Any good brand of interior latex paint will work—especially if you have started with a good primer.
RV Flipper, Erin Cherry, says she always chooses Sherwin Williams Emerald Acrylic Latex Paint for her walls and cabinets.

“It’s pricier but it dries perfectly smooth on cupboards and they look professionally sprayed, even though I roll it on!” Erin said. Using better-quality paint saves time and the need for fancy equipment. Even though she’s flipped eight RVs in the past year, she never uses a paint sprayer.
You can skip the primer and use an interior paint + primer, as long as your RV walls have some texture to them. The only brand I have personal experience with is Valspar Signature Latex Base Paint + Primer All-in-One and I would recommend it.
Read More: The Best Paint to Use in Your RV (For Walls and Cabinets!)
Is It Necessary to Remove the Wallpaper from RV Walls Before Painting?
No!
You do NOT want to remove the wallpaper. RV manufacturers do not use wallpaper, but rather bond wall paneling with heavy-duty adhesive. It will not easily come off if you try. But no worries—you can simply paint over it.
If your walls are damaged, you will want to remove any peeling or bubbled wallpaper and repair any damage you find underneath. Then you can either replace the damaged paneling or replace the wallpaper in that one area. Or you can use spackling to smooth out the surface before painting.
Check out our guide to repairing and installing RV wallpaper here.
Should You Clean with TSP to Prep RV Walls for Painting?
Lots of people on the internet advise using trisodium phosphate, a.k.a. “TSP”, to clean RV walls before painting, but in most cases, it’s really not necessary.
- This product adds a great value
TSP is good for cutting through grease. If the walls of your RV are greasy or grimy or nicotine-stained, then TSP is a good choice for cleaning them. But if your RV walls aren’t visibly dirty, warm water and dish soap will do just fine.
Additionally, some brands of primer and paint specifically say on the can to NOT use TSP because it can cause a chemical reaction that prevents the paint or primer from adhering. Be sure to read the label on your paint can before using TSP.
If you need something stronger than water and your paint can says not to use TSP, you can use a product called “TSP Substitute” as an alternative.
We also recommend liquid sandpaper, but you probably won’t need that on your walls as much as your cabinets!
- Wipe on cleaner and de-glosser
Can I paint the glass/mirrors in my RV cabinets?
Yes, you can paint the glass and mirrors found in so many RV cabinets. This is a common, inexpensive way for people to cover up the dated mirrors.
Get more ideas: 15 Ways to Cover Those Mirrored RV Cabinet Doors
How to Paint RV Walls
Painting RV walls is not dissimilar to painting any walls in your home. You will want to apply at least two coats, waiting the proper time in between for the paint to dry.
Don’t forget to let the paint fully set before reinstalling furniture or adding anything to your walls. (Experts say this can take up to three weeks, but waiting at least a few days for the paint to cure is a good start!) If the paint hasn’t fully cured, it will be easy to nick when you bring in furniture.

I have used brushes, rollers, and a sprayer to paint and, when following all of the above notes, they have the same finish. Personally, the sprayer is heavy and too much of a workout, though it can be a little faster.
Brushes are great for around corners, windows, and trim as well as tiny places—like the gap between the bathroom cabinets and the bathroom door which seemingly only a 1″ brush can ever paint!
Rollers can be fast and effective, just be sure to choose the right roller cover for your wall texture. Smooth to semi-smooth will likely be your best bet!
How to Paint RV Cabinets, Trim, and Other Woodwork
The first step for painting any woodwork in your RV is to figure out exactly what material it is. The process will be different depending on what it is.
These are the materials most commonly used:
- Solid Wood – Most often used for cabinet doors and some decorative trim.
- Laminate Wood – Pressed wood or particle board covered with a vinyl “sticker” printed with wood grain. Often referred to as “fake wood”, and sometimes used in combination with solid wood.
- Wood Veneer – Plywood with a layer of real stained wood on top. Used more frequently than laminate wood in more expensive RVs. Often used in combination with solid wood.
Prepping Solid Wood Cabinets and Trim
If your RV cabinet doors are made from solid wood, you’ll achieve the best results by stripping and sanding them before applying primer.
I know quite a few RV renovators, and all of them remove real wood cabinet doors and thoroughly sand them before priming. Yes, this is more work. But this will ensure that you achieve a professional-looking result that will retain or increase your RV’s value instead of risking it looking like an amateur DIY project.

Prepping “Fake” Wood (Laminate and Veneer) Before Painting
The issue with painting laminate RV cabinets and veneer trim is with getting the paint to stick.
Below is a photo of what can happen if you paint RV cabinets without adequate preparation. The owner of the RV shown below painted her cabinets without using any primer, and the paint eventually began to peel.

The problem is, you can’t sand laminate or veneer the way you can sand real wood. If you sand wood veneer, you risk sanding through to the plywood or particle board, creating a rough surface. And you can’t thoroughly sand laminate because it is plastic and will tear.
The best process for painting “fake wood” is to sand it very lightly, just enough to rough up the surface a bit, and then give it a coat of bonding primer, followed by the interior cabinet paint of your choice.
The Secret to a Professional Finish
One thing most professional RV renovators do when painting RV cabinets is using a paint sprayer. This is how you achieve a smooth, even finish with no brush strokes.
You can purchase a small handheld paint sprayer that will work great for painting cabinets. But if you are planning to paint your entire RV interior, I recommend renting a larger paint sprayer from a home improvement or paint store.
- PERFECT FOR A VARIETY OF PROJECTS: The Flexio 590 paint sprayer is great for applying a superior finish on furniture, walls, ceilings, exterior siding, fences, cabinets, trim and more
If you use a handheld sprayer, you may need to thin the paint with water to prevent it from clogging the sprayer nozzle. (Follow the instructions for whatever sprayer you choose.)
Painting RV Cabinets: The Process
Combining all of the information above, these are my recommended steps for painting RV cabinets.
- Remove the cabinet doors and drawers.
- Clean all surfaces to be painted. Optional: Use TSP or TSP Substitute if needed to remove grease and grime, followed by water to remove the TSP.
- Thoroughly sand solid wood surfaces to remove varnish. A chemical stripper or liquid sandpaper can be used if desired.
- Optional: Use wood glue to repair any peeling laminate, and repair cracks, holes, and uneven surfaces using wood filler.
- Optional: Lightly sand “fake wood” surfaces to help with adhesion, then use a damp rag to wipe off dust.
- Tape off and/or cover with plastic everything you don’t want to get paint on.
- Paint all woodwork with bonding primer, including both “fake” wood and sanded solid wood. (If you’re painting your walls as well, you can paint them with the same primer to save time.)
- Use a paint sprayer (preferable) or a high-density foam roller to paint cabinets and woodwork with as many coats of paint as necessary. Be sure to follow the instructions on the paint can for proper temperature and drying time between coats.

If you’re like me and want to skip the paint sprayer, RV renovators recommend this basic process:
- Sand
- Clean with TSP
- Two coats of primer
- 1st coat of paint
- Sand very lightly
- 2nd coat of paint
Sanding lightly between coats of paint will give you that smooth professional finish. This is the exact process used in this RV kitchen:

FAQs About Painting RV Cabinets
Do I Really Have to Sand the Cabinet Doors? What About the “No Prep” Methods?
There are RV owners who have blogged about using chalk paint, “no prep” cabinet kits, and other processes to paint directly over the wood without sanding. Some of these people say they achieved good results.
But for the most part, these processes haven’t held the test of time.

Then there’s the owner of this RV, who told me she had read a blog post that said she wouldn’t have to sand her cabinets as long as she used a certain kind of paint. The paint ended up peeling, and she ended up having to sand it all off and redo the whole project. Later, she found out that the paint company’s website did say to sand first!
So regardless of what you see online, save yourself frustration and time by approaching sanding, priming, and painting the right way first.
If you really want to skip sanding, RV owner Ashley describes on her blog how she successfully used this primer on her RV cabinets after the first primer she tried would not stick and had to be removed.

What’s the Best Brand of Primer to Use for Painting RV Cabinets?
I recommend two brands of bonding primer:
- Sherwin Williams Extreme Bond Primer – Most RV renovators use this brand.
- Glidden Gripper Primer – This brand has been around longer and was the brand most RV owners chose before the Sherwin Williams primer was introduced in 2020.
What’s the Best Paint for RV Cabinets?
There’s no single answer to this question because there are several good brands of paint on the market.
I would suggest going with one that is labeled as a “cabinet enamel.” I would also recommend using latex-based paint instead of oil-based paint because the cleanup is much easier. Plus the smell isn’t as strong in a small space!

Can I Use Chalk Paint on RV Cabinets?
This is an example of one of the “no prep” types of paint some RV owners have blogged about using. Because I don’t personally have experience with using chalk paint to paint RV cabinets and none of the professional RV renovators I know use it, I can’t recommend it. Additionally, it’s more expensive than regular cabinet paint.
If you are a fan of chalk paint, I would recommend first trying it in a small area like a bathroom and seeing how it does before using it throughout your whole RV.
General Questions About RV Painting
Should I paint inside the cabinets?
That’s up to you. Some people don’t, some do. In many cases, you may find that inside of your cabinets is the same wallpaper as your walls.
One RV renovator I know uses spray paint on the insides of the cabinets because it’s easier to reach the corners. You could paint the insides of your RV cabinets in a fun contrasting color, especially if your cabinets are white.
If you spray primer throughout your RV walls and cabinets, you can leave the white primer look and avoid the extra work of painting inside of your cabinets.
Just don’t forget to remove and paint every side of your cabinet doors. I’ve seen photos of RVs with the cabinets painted white, but the backs of the doors left unpainted. It always looks unprofessional and would probably detract from the value of your RV.
Should I Paint the Ceiling of My RV?

If you paint your walls and cabinets bright white, your white ceiling may appear off-white unless you paint it to match. Most RV owners who are going for the clean, white look choose to paint it too.
If you paint your walls a darker color, leaving your ceiling unpainted will probably look just fine as long as it’s not stained or yellowed. If your ceiling does have staining, first you’ll want to be sure you’ve eliminated the cause of the stain (a leak, for example).
Clean the stain as best you can (I recommend spraying water stains with hydrogen peroxide). Then paint over it using a stain-blocking primer such as Kilz.
Can I Paint a Carpeted RV Ceiling?
You can, and many RV owners have!
The texture may end up kind of “crunchy” though. I would tend to favor cleaning it rather than painting it. Another option would be to cover it with strips of lightweight paneling so that it looks like a wood plank ceiling.
See an example of a renovated RV with a faux plank ceiling here.
Is It a Bad Idea to Paint an RV Interior White?
I often hear people say white cabinets will get dirty too easily in an RV.
If you have small kids and/or dogs, you may want to avoid white cabinets so you don’t end up spending a lot of time scrubbing fingerprints and paw prints.
But if you like the look of white walls and cabinets and don’t mind a little extra effort to keep them clean, then I would say just go for it! And maybe keep a few Magic Erasers on hand. 😉

Additional Tips for Your RV Interior Painting Project
Here are some things to consider before beginning an interior painting project in your camper.
1. Get advice from the pros.
Talk to the people at your local paint store and get their advice on the best products to use for the surface you’re planning to paint.
Another great resource is the RV renovator community on Instagram. Many professional RV renovators are happy to answer questions if you send them a message. You can find a list of RV renovators here.
2. Read all labels and instructions.
Carefully read the label of any primer, paint, or preparation product you plan to use. Make sure you follow the instructions.
Paint labels also tell you the ideal temperature range for using the paint and how long to wait between coats.Painting in an environment that’s too cold or too hot can keep the paint from drying evenly, and painting another coat of paint before the first coat has thoroughly dried can cause it to scratch or peel later.
3. Buy paint samples to test before deciding on the color.
Paint colors can look completely different on your wall than they looked in the store. Grays can appear blue, browns can appear purple, and colors can end up looking lighter or darker than you expected.
To avoid investing a lot of money and effort into a project only to end up hating the color, test your top color choices. To do this, purchase a small test amount of each color you’re considering. Use it to paint a sample area inside your space.
You will be painting over this later, but if you’re worried about painting the actual surface, you can instead paint a piece of poster board and move it to different areas. Look at the colors in different types of lighting—during the day and at night—and compare it to fabrics, flooring, and other elements in your house to see if it matches.

Paint stores will happily sell you a small test amount of multiple paint colors, usually for less than $5 per container. Lowe’s often runs half-off sales on these, often around Memorial Day and Labor Day weekend.
4. Use the right tool for the job.
Cheap paint brushes and rollers can leave bristles and lint behind in your paint and cause brush strokes to appear. Spending a little extra on a quality, soft-bristled paint brush and better-quality rollers will help you achieve a more professional-looking result.

For example, for cutting in next to trim and along the ceiling, a cheap paint brush can be difficult to control and can cause you to make mistakes, but a quality angled brush holds just the right amount of paint and easily glides along the surface.
With proper care and cleaning, a quality paintbrush can be used for multiple painting projects. I recommend Purdy and Wooster brand paintbrushes.
5. Keep in mind that your RV will be moving.
The first time the RV in the picture below was moved after the cabinets were painted, the paint covering some of the seams between cabinets and wood trim bubbled up as the RV shifted during transit. To prevent this problem, the owner of this RV suggests scoring seams where you’ve painted over a crack with a razor blade after the paint has dried and before the RV is moved.

6. Be careful with painter’s tape.
If you remove the painter’s tape while the paint is still wet, you might accidentally smudge the paint. But if you wait until it’s completely dry, the tape might peel the paint off with it, which is what happened in the RV pictured below.

By removing the tape while the paint is still tacky but not completely liquid, the tape can easily break through the paint but won’t cause it to smear. If you notice that the paint is coming up with the tape, use a razor blade to score along the edge of the tape. Then it can be pulled off without bringing a layer of paint with it.
Something else to watch out for is using painter’s tape on fake wood that may tear easily when the paint is removed.

7. Anticipate mistakes.
Even though we might try to be careful, mistakes do happen. Cover everything you don’t want to be painted with plastic. Keep a rag nearby (damp with water for latex paint and paint thinner for oil-based paint) to wipe off mistakes as soon as they happen. Use a razor blade to gently scrape off mistakes that have already dried.
Paint that has already dried will become more difficult to remove after a few days because the paint will have cured.

8. Allow plenty of time for drying and curing.
Each coat of primer or paint needs to be completely dry before another layer is applied on top. Read the label on the can to see exactly how many hours you need to wait; usually overnight is the minimum.
After the project is completely finished, it will take several days or even a week for the paint to cure, so take care when moving furniture during this time as the paint can be easily scratched. This is normal!
If the paint does get scratched accidentally, just sand the area, touch it up, and allow a little more time for it to dry and cure.
RV Interior Paint Ideas & Color Inspiration
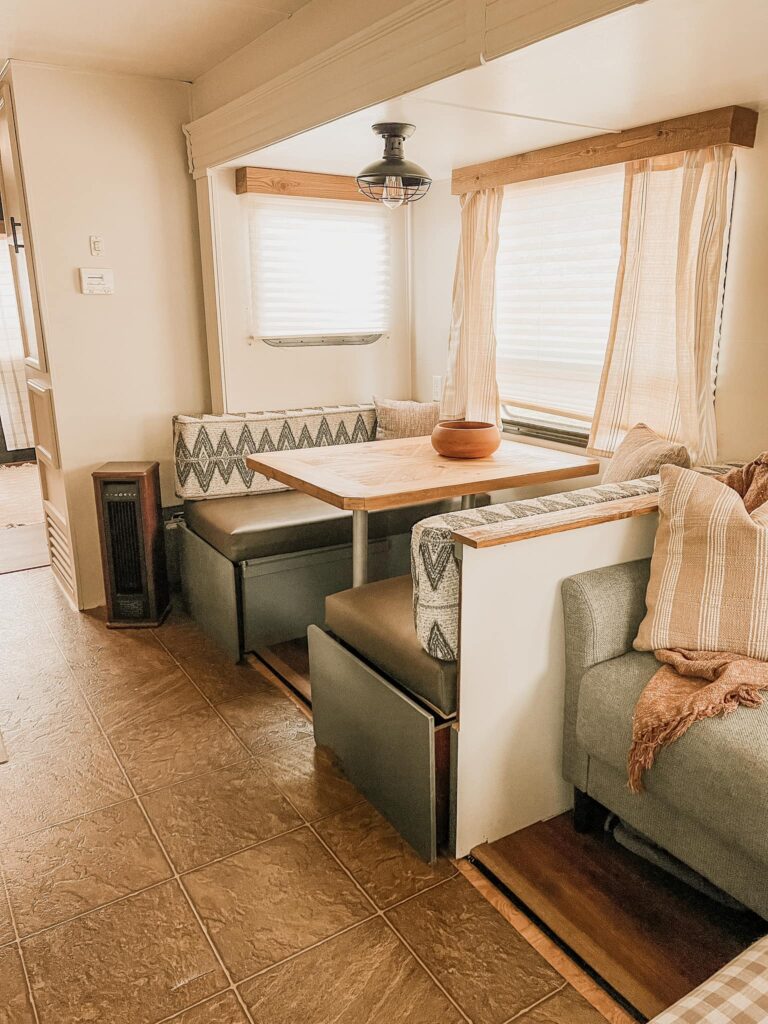
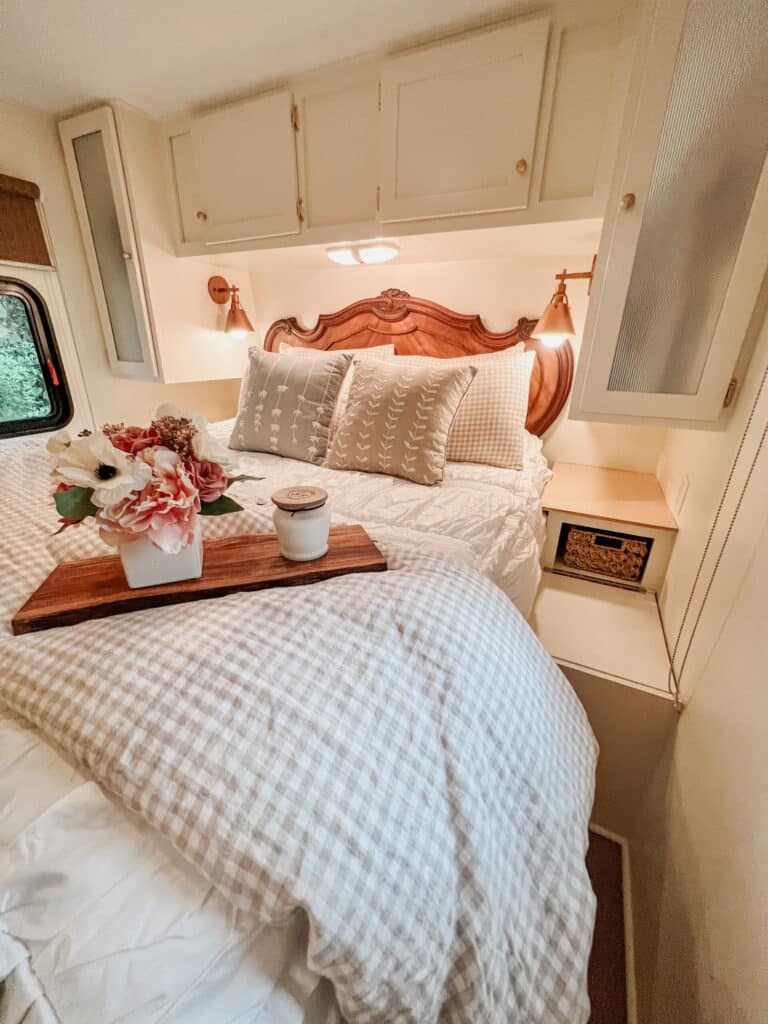
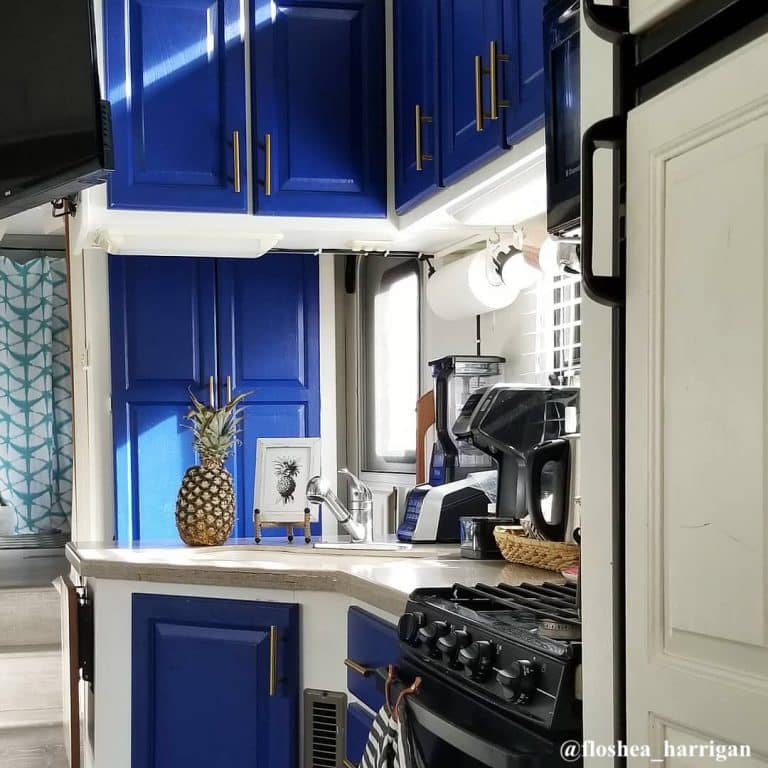
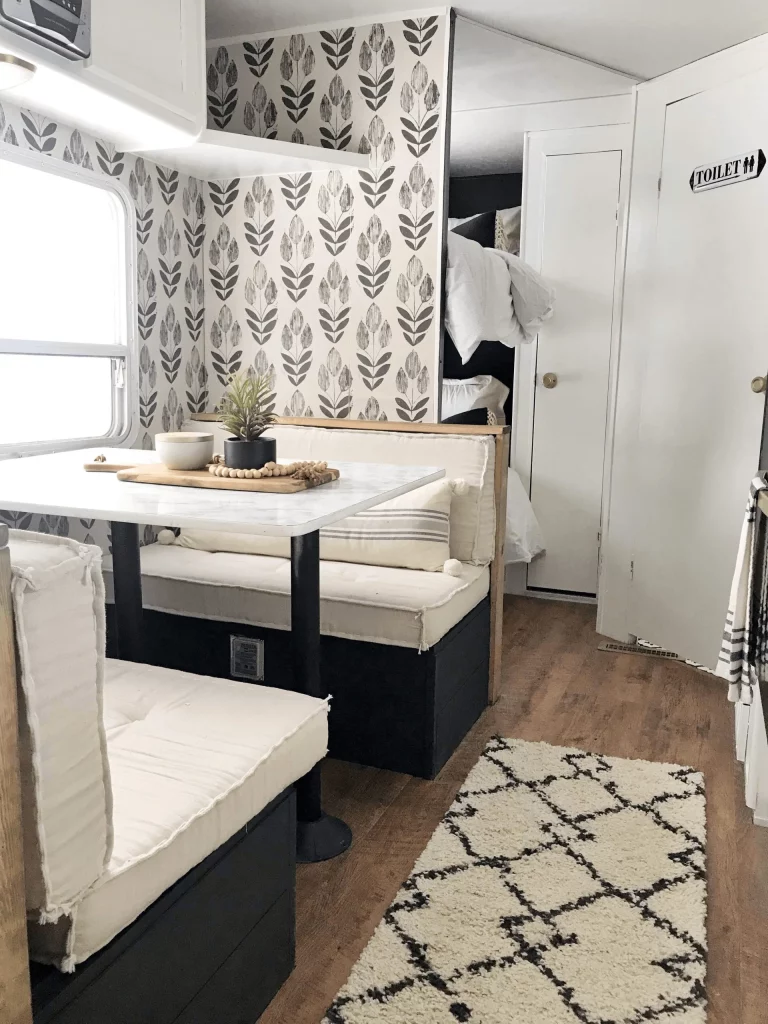
Want to see examples of RVs with painted interiors and get paint color ideas for your RV interior? Check out these other articles from RV Inspiration:
- Before and After Photos of 10 RV Makeovers
- RV Renovations with Unpainted Cabinets
- Boho-Style RV Renovations
- Farmhouse Style RV Makeovers
- Amazing RV Renovations I Found on Instagram
Ashley Mann spent three years living full time in a 38-foot, 5th-wheel RV with her husband Josiah and their cat, Kitty. Her favorite thing about RV life is the challenge of finding the perfect way to organize a space, and she loves seeing all the creative and clever ways people come up with to customize their RVs.



I am having trouble removing the glue from the boarder paper that is left on the walls. Any suggestions?
Goo Gone is what worked best for me!
Pure citrus air freshener from Walmart! The adhesive scrapes right off! It is miraculous!
Thanks for the tip!
I used EVERY THING people suggested! The only thing that worked for me was the citrus air freshener! Yep, it works with a little heat from my hair dryer it came off.
Thank you for the tip. The border in our trailer has been a nightmare to remove.
Krud Cutter is excellent. Just was and dry the surface after so pant will adhere.
What is the color that is on the cabinets on the first picture?
Sorry, I don’t know the name of the color and it appears that the owners of this RV have taken down their Instagram account since I last talked to them!
what are the steps to prepping the wall for paint after you remove wallpaper in rv
Actually it’s best not to remove the wallpaper as it’s not regular wallpaper but is instead a vinyl layer that’s bonded to the paneling with very strong glue. Most people (including myself) just paint right over it. You’ll want to make sure it’s free of dust, grime, and adhesives before painting (I just used a rag damp with water to clean mine, but if you have very grimy walls you can clean with a solution of water mixed with TSP Alternative). After cleaning I just painted with Valspar Signature latex-base paint + primer all-in-one from Lowe’s. Some people use a bonding primer first and if your walls are a smooth texture that’s probably a good idea. My RV walls were textured so primer wasn’t necessary. If you need more info I’ve written a guide to painting RV walls which you can find here!
Is there a particular paint I need to get to paint my rv cabinets?
It depends on what your cabinets are made of, and there are several good options that will work on any material. I go the options for each material in detail and suggest some specific brands in my Ultimate RV Painting Guide; if you want to check it out you can get it here!
What do you suggest if the original wallpaper in the camper is peeling quite badly? Can you still paint over it?
Hi Nicole, do you have any idea what’s causing the wallpaper to peel? If the RV is old and it’s peeling throughout the camper, it might be just due to age and the adhesive deteriorating over time. In that case I’d probably go ahead and remove it.
Wallpaper can also peel due to moisture, either because of condensation getting behind it or, even worse, a leak. If that’s a possibility, you might want to investigate and make sure there isn’t a deeper issue that needs to be fixed.
If the wallpaper is only peeling in one small area, you could try just gluing it down, but keep in mind that if you paint over the wallpaper and it continues to peel, it might be harder to remove later.
Good luck!
Re: Removing glued-on wallpaper borders
What’s always worked for me is scoring the border with a metal ChoreGirl, spraying it with 409, & giving it a minute to set. Peels right off easily.
Thanks for the tip!