
How to Stop Condensation in an RV: A Comprehensive Guide
This post may contain affiliate links.
Are you wondering how to stop condensation on your RV windows? Finding mildew in your camper’s closet? Trying to discover the cause of your damp mattress?
If you’re using your RV in winter, especially living in it full time, you may encounter these problems.
In this blog post, I am going to help you understand the causes of these common RV problems and what you can do to solve and prevent them.
What causes condensation in an RV?
Condensation occurs when warm, moist air comes into contact with a cold surface or cold air. If you want to get really scientific, you can Google terms like “dew point” and “relative humidity.” But for the purposes of RV condensation, we don’t need to get that scientific.
The main sources of condensation in an RV are:
- Warm, moist air from outside entering a cold RV and hitting cold interior walls and windows. This can happen when it’s hot and humid outside and air-conditioned inside. Or it can happen in early spring when the RV is still cold inside from being in storage all winter.
- Warm, moist air is produced inside an RV hitting cold interior walls and windows. This often happens when people use RVs with poorly insulated walls, camp in cold climates, or are using single-pane windows for winter camping.
Regardless of the cause, the results are the same: your things become damp, mold and mildew form, and airborne allergens such as dust mites thrive.

How to Prevent RV Condensation
The best way to stop condensation is to eliminate its cause. This boils down to two actions:
- Reduce indoor humidity.
- Remove cold surfaces and air pockets.
So how do you do that? Below are some ideas. If one doesn’t work for you, maybe another one will!
6 Ways to Reduce Humidity Inside an RV
First, you need to know what the humidity level inside your RV actually is. The best way to do this is to buy an inexpensive hygrometer/thermometer.
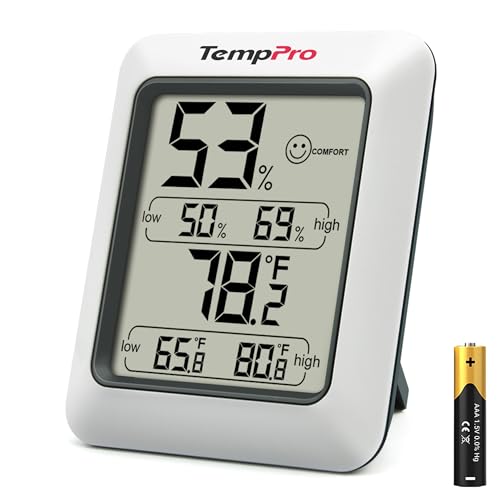
- Wellness Indicator: This humidity meter with humidity level icon indicates air conditions - DRY/COMFORT/WET, allowing this humidity sensor to ensure you’re always aware of changes to your home/household with just a quick glance
Ideally, your indoor relative humidity should be between 30%-50%. Once you’ve identified that your humidity level is indeed a problem, you can try the following.
1. Run the air conditioner.
Leaving your RV windows open in a humid climate may cut down on your electric bill, but there’s a tradeoff. Air conditioners remove moisture from indoor air, effectively lowering humidity. In some cases, running your A/C could solve your condensation problem.
2. Open a window or ceiling vent.
I know, that’s the opposite of what I just said!
But if the inside air is more humid than the outside air, opening a window or ceiling vent can help some of that humidity escape.
Keep in mind that hot air rises, so a ceiling vent is going to work better than a single window. This is especially important while doing activities that create a lot of extra water vapor, like showering, cooking on the stove, or releasing the pressure from an Instant Pot.
3. Increase airflow.
Running a fan can help evaporate condensation and evenly distribute the air temperature throughout your RV. If you have a window or vent open, a fan will help the humid air escape more quickly.
4. Run a dehumidifier.
If you aren’t wanting to cool your indoor air, a dehumidifier can help you remove moisture from the air.
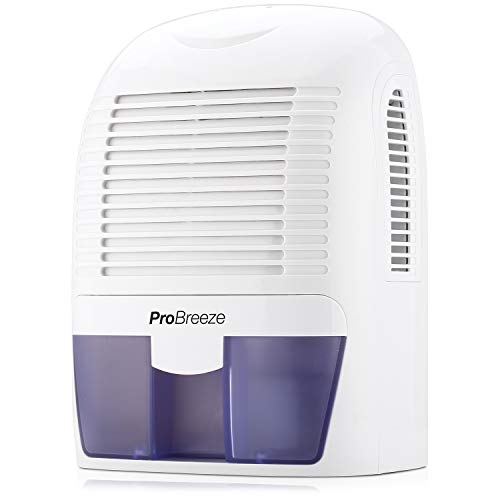
- COMPACT & SMALL DEHUMIDIFIER: Lightweight, compact, and portable, this mini dehumidifier removes up to 18 oz of water per day with a 52 oz water tank capacity. They can cover up to 3000 cubic feet (250 sq.ft), leaving ample space for the appliances to function as dehumidifiers for bathroom and moisture absorbers for closet.
Dehumidifiers come in a range of sizes and prices. You just need to make sure you get one designed for the size of space you’re using it in.
Additionally, you’ll want to pay attention to how many pints of water it holds (especially if your humidity level is extremely high). The more it holds, the less frequently you’ll have to empty it.
5. Use moisture absorbers.
Crystal moisture absorbers such as Damp Rid can help pull moisture out of the air. A dehumidifier is often more effective, but moisture absorbers work great if you’re boondocking or storing your RV in a humid climate.
6. Avoid creating extra water vapor.
Showering, cooking indoors, and hanging clothes to dry inside the RV all raise indoor humidity. If you’ve tried everything else above and your humidity isn’t lowering, try:
- Doing your laundry at a laundromat,
- Using campground shower facilities, and
- Cooking outdoors as much as possible.
Ways to eliminate cold surfaces where condensation can form
Lowering your humidity can be easy, but eliminating cold surfaces is often more effective.
Cold exterior walls, floors, and windows not only cause condensation but also mean you’re leaking costly heat. By beefing up your RV’s insulation, you’ll reduce condensation and spend less money on heating.
Here are some ways to warm up cold surfaces and other cold areas in your RV:
1. Insulate single-pane windows.
For those of you living in an RV during the winter, if you do nothing else, do this.
Many RV owners put Reflectix in their RV windows to help insulate them. I personally am not a fan for a few reasons:
- If air can get behind it, condensation can still form on the glass. To prevent air from getting behind it, you’ll probably need to tape around the edges.
- If you’ve taped around the edges, you’re keeping a wonderful source of free heat out of your RV. The sun! ☀️
- If you only use it at night, then during the day your windows will allow heat to escape and cause the RV to feel chilly.
- It’s kind of expensive!
While Reflectix is great for keeping an RV cooler in hot weather, in my opinion, there are better alternatives for insulating RV windows in cold weather.
So what are those alternatives?
- Curtains
- Heat-Activated Window Film
- Windshield Covers (for motorhomes)
- Bubble Wrap
- Clear Vinyl
- Plexiglass
For more details on how to insulate your windows, see our blog post: 6 Ways to Insulate Your RV Windows (That Don’t Block the Light!)
Funny you should ask, because it just so happens that I wrote a whole separate blog post about all the different ways I’ve tried insulating my RV windows for winter.

You can see the difference made by one of those methods, plexiglass, demonstrated above. The window on the left has no insulation and the one on the right is covered with a sheet of plexiglass.
2. Warm up the floor.
A warmer floor can help the temperature inside your trailer or motorhome stay warmer and more even. This, in combination with air circulation, can help warm up cold corners that invite condensation to form.

The best way to keep the floor warmer is to skirt your RV, but adding rugs, perhaps even with foam mats underneath, can also help.
3. Insulate RV slide-outs.
Another thing that can make a big difference is sealing any drafts around your slide seals and adding an extra layer of insulation under and/or around them.

We tape foam board to the bottoms of all our slides for winter. It makes a significant difference in the temperature of the air near the floor. And bonus: foam board is extremely cheap.
We used duct tape our first winter but have since learned to use foil HVAC tape instead to attach it. It stays sticky during all kinds of weather, but doesn’t leave behind any residue when you peel it off.)
Some custom skirting companies also sell a wrap that goes around the walls of your slides to help block wind, or you could make your own, perhaps out of billboard tarp vinyl or Reflectix.
Read next: 6 Tips on How to Stay Warm in a Cold Camper
4. Target cold closets and cabinets.
In cold weather, the air inside RV closets and cabinets typically stays colder than the rest of the RV since doors prevent the heat from entering.
Cold air has a lower dew point. This means condensation can form at a lower temperature. Even if you’re not seeing condensation in the main areas of the RV, it might be forming in the back of a closet or cabinets.
One way to prevent this is to open all your cabinets and closets regularly to equalize the temperature. I know of one RVer who opens all her cabinets every night. (In addition to helping with condensation, this is a common practice to make sure your pipes don’t freeze!)
If that sounds like too much work, another option is to put moisture absorbers (such as small containers of Damp Rid) in each cabinet. You could also try making your own DIY moisture absorbers out of old socks filled with crystal (silica) cat litter.
More effective than cutting down on moisture and equalizing temperatures is adding extra insulation. (Keeping your heating bill lower!)
I have used Reflectix for this in the past, but I’ve heard some people say moisture can get trapped behind it (causing mildew). Then, one of our readers told me about faux wood panels she used to insulate her closet. I loved the idea, so I decided to try it myself.
Now my closet looks like this:


Not only does my closet look way better now, but the walls also have an added 1/4″ of water-resistant foam covering them. If you have thin, poorly insulated walls, adding paneling like this will help stop some of the cold from coming through. I wrote a tutorial about this project if you’d like to complete this project yourself.
5. Solve damp RV mattress problems.
If you are finding the bottom of your mattress or the area under your bed damp (or worse, moldy!), here are some suggestions for dealing with the problem:
- Check the temperature of the bed platform or the floor underneath. If it’s 10-20 degrees colder than room temperature, add extra insulation to this area if possible. If you can access the area under the bed platform (or under the floor, if you have a floor under your bed), adding a layer of foam board would be a good way to do this.
- If you have an empty space under your bed, this would be a good place to set up a container of DampRid.
- If you’re not able to warm up the area under your bed, at least make sure your mattress isn’t coming in contact with a cold surface. Place something under your mattress that will allow air to pass underneath so that moisture can evaporate instead of accumulating. You can buy products designed specifically for this purpose, or you may be able to come up with your own DIY version. (If you do, I’d love to see a picture!)
- Protect your mattress and prevent moisture from your breath and body from seeping into the mattress while you sleep by using a waterproof mattress cover.
6. Buy a four-season RV (or plan to spend the winter someplace warm).
I don’t want to be “that person” because I know everyone’s circumstances are different, and with enough determination, it is possible to survive winter in just about any type of RV… Well…maybe not a pop-up camper… But who knows? Maybe there is someone out there doing it!
A four-season RV would be better equipped for the cold and struggle less with condensation. And avoiding cold as a rule of thumb helps with condensation too.
But some people enjoy the cold!
There’s actually a really helpful Facebook group I’m a part of called “Winter RVing: Let’s Stay Warm Together!” full of people living in the northern U.S. and even Canada in all kinds of campers. Some of them are even heating their RVs with wood stoves! So know that it can work.
But if you’re shopping for an RV or still trying to decide whether you can feasibly live in an RV during winter weather, having a four-season RV does make a difference.
Read Next: How We Prepare Our RV For Cold Weather Living
Key takeaways if you’re struggling with condensation or mold:
- If possible, warm up any surfaces where condensation or mold is occurring by adding extra insulation or increasing airflow to closed-off spaces.
- Measure the humidity level of your RV with a hygrometer and, if it’s higher than 50% in a warm RV or 30% in a cold RV (for example, an RV in storage), lower it with a dehumidifier (for whole rooms) and/or moisture absorbers (for cabinets, closets, or when you don’t have electricity).


Ashley Mann founded RVinspiration.com in 2017. She handed off the website to new owners in 2022 to launch a new business as an online entrepreneur coach, but she still helps out as the blog editor. Ashley spent three years living full time in a 38-foot, 5th-wheel RV with her husband Josiah and their cat, Kitty. Her favorite thing about RV life is the challenge of finding the perfect way to organize a space, and she loves seeing all the creative and clever ways people come up with to customize their RVs.


Nice job Ashley. Though all of your ideas have merit, the best one is to design your RV as a four season device in the first p;ace which will vastly reduce condensation and improve safety. Vibration from actually using your personally insulated rig will likely shake much of it loose and cause unending problems. Remember, the idea of RVing is to have fun, not babysit the RV full time to keep it habitable. Vote with your feet and purchase the all season unit that does not ruin your investment for three months of the year.
The one area you need to beef up is cooking. Open flame propane cooking dumps huge amounts of water vapor and compustion products into your living space. It is not appropriate for small enclosed spaces. Switching to electric cooking will eliminate those problems completely.
I agree that a four-season RV is definitely the best choice for winter living (that’s why we have one ourselves)! Most people I know of who are spending winter in an RV (including us) leave it set up in one place all winter; we don’t attempt to move our RV with all foam board etc. in place. Though RV’s are certainly designed for recreational use, more and more people, including us, are choosing them as a primary home for a variety of reasons including cost of living and ease of relocating to a new city for work. As far as cooking on a propane stove being a problem, I’m not sure I agree…at least it hasn’t been problematic in my experience. We love our gas range and use it every day.
I agree on the propane. Thats why we NEVER cook inside. We have a Clam with the side curtains and with them closed, even when it is cold, cooking warms it up in a heartbeat.
Do you have any solutions for the front window of a class A? I wonder if you could use some kind of plexiglass panels joined together so that you could fold it up when driving and set it in place when stopped? Maybe something like that is already manufactured? It will be a problem for us once we get or RV.
I thought of that as I was writing the blog post – wondering how I would insulate the front windows of a Class A I mean. Since we have a fifth wheel it’s not something I’ve personally had to figure out yet. I would probably try bubble wrap first (the clear kind with large bubbles, just wipe the windows with a rag damp with soapy water and stick it on, bubble side facing the window). I might also try some kind of clear vinyl cover (made from a heavy duty shower curtain) attached with Velcro.
Your sedentary winter use of your RV is fine. But it’s not an RV anymore. It’s a home. RVs should be capable of winter recreation at ski resorts, hunting, treking etc. Unless they are designed and built from the ground up, RVs are likely to fail in that mission.
To appreciate the inappropriateness of gas cooking, imagine cooking with no lingering gas smell. That smell is indoor polution that contamnates the air with unburn gas, combustion products and huge amounts of water vapor. Imagine cooking without all that. Try a portable induction cooktop for comparison.
What a beautiful home on wheels. Good article & excellent way to articulate. Keep it up.
Damp Rid is not effective, especially when it spills. Try RVSorb – it really works.
What to do for mold or mildew in wood walls? Recently bought a used motorhome and loved it until winter hit and old leaks resurfaced. We had to throw out all mattresses, peel wallpaper, and pull up carpets only to find out that the wood was showing mildew and mold! Please help!!
I’m not a professional, but my understanding is that moldy or mildewed wood needs to be replaced, and if that’s not possible, treatment by a professional mold remediation service is the only safe option. Unfortunately if it’s in your walls you might have quite a project on your hands….might have to decide whether or not it’s worth it to you.
You will have to replace the walls that have it, but home Depot has mildew cleaner and percenter that they sell.We also finally got us a travel trailer and it had leaks that was fixed but they let it set for a good while and now I’m cleaning it . I used simple green for the mildew on 2 doors and scrubbed it clean and next week I go in and spray the preventer on it.