
6 RV Window Insulation Methods (That Don’t Block the Light!)
This post may contain affiliate links.
Insulating RV windows is necessary to stay warm through the winter. Most RV windows are single pane and your biggest source of heat loss when RVing in cold weather. Adding some type of RV window insulation can make a huge difference in helping you stay comfortable without burning through your propane too quickly. In this article, I’ll share how to insulate RV windows for winter living and camping, to prepare for cold weather without blocking much-needed sunlight.
How Improving Your RV Window Insulation Can Benefit You
One of the biggest causes of heat loss in cold winter climates is single-pane windows. (Some four-season RVs will have double-pane windows and are best for winter living and camping.)
Additionally, if the RV is humid inside, condensation can form on the cold window surface, leading to mold or mildew problems. But even when a dehumidifier has lowered the humidity level inside the RV, if the windows are still cold, that means expensive heat is escaping through them. That leaves your RV drafty and your heating bill skyrocketing.
Related: How to Solve Condensation Problems in Your RV
This year I was a bit lazy about getting the windows done, and one day I was sitting on the couch and felt a bit chilly. It was around 32 degrees Fahrenheit outside, but the thermostat by our fridge read 75. I moved the thermometer to the shelf I built behind my sofa next to the window, and it read 66. Yikes! At that point, I knew I’d better get a move on with my window project.
6 Ways to Insulate RV Windows
1. Hang Heavy Curtains to add insulation for RV windows

Covering your windows with thick, insulated curtains can make a big difference in helping to retain heat. You can open them during the day to allow the warm sunshine to come through the glass. Closing them at night wards off the cold and can keep your RV a few degrees warmer.
2. Insulating RV Windows with Reflectix
Many RVers cover their RV windows with Reflectix. But sunshine is extremely important to your mood, especially during winter. Anything that blocks light isn’t a great option.
Plus, while Reflectix may help insulate, it also repels an effective free source of heat: sunlight!
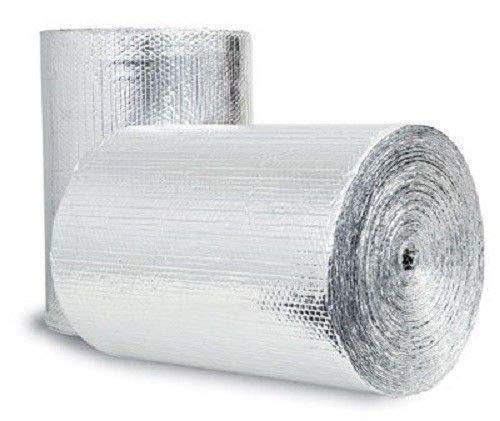
Some RVers put Reflectix in their windows at night and take it out during the day to let the sun warm the RV via the greenhouse effect. Personally, I prefer an option that keeps my heat from escaping through my windows during the day as well.

3. Insulating RV Windows with Clear, Heat-Activated Window Film
The first year I spent winter in an RV, I decided to use shrink plastic, which I had used in homes before. If you’ve never used it before, basically you put double-sided tape (included in the kit) all the way around the window frame, then cover the window with plastic stuck to the tape, and then you blow a hair dryer on it and the plastic shrinks and all of the wrinkles smooth out and the seal around the edges traps a layer of air between the plastic and the glass.

- Save on energy costs during cold weather months. This rolled window kit creates an airtight seal inside your home to block drafts and cold weather
Important: the layer of air between the glass and the window covering is actually what provides insulation against the cold.
I’ve seen some RVers ask whether they should put the plastic on the inside or the outside of the window. If you put it on the outside, the only barrier you’re adding between you and the cold is a thin layer of plastic. By trapping a layer of air between the plastic and the glass, this air is warmed by the sun during the day and takes longer to cool at night since the air has nowhere to escape to.
It may not sound like it, but this is quite effective.
Tape a piece of plastic over one of your windows on the outside. Wait a few hours, then put your hand against the glass from the inside and compare it to the temperature of an uncovered window. An insulated window shouldn’t feel cold to the touch.
I ended up leaving the shrink plastic on my hall windows all year.
In spite of my love for shrink plastic, though, it does have a few problems:
- Some RV owners have trouble getting the tape to stay stuck to the window frame due to condensation and have to use a sturdier type of tape. We did not have that problem (probably because we solved our condensation problem first!).
- Applying shrink plastic to all of the windows in an RV is a tedious, time-consuming task. It sucks to have to do it each winter.
- Our cat inevitably ends up tearing holes in the plastic with his claws, and by the end of the winter, my window is covered with clear tape patches.
4. Motorhome Windshield Insulation
Most Class A RV’s come with curtains that can be closed at night for privacy. These can be replaced with heavier fabric to help reduce heat loss as well. I’ve also seen RVers hang a thick blanket to separate their cab from the house of their RV. Adding this extra insulation can keep your RV a few degrees warmer (or cooler if you’re warding off summer heat).
During the day, you’ll want to open the curtains to allow the sun to come in and heat your RV via the greenhouse effect.

- Fits: RV windshield cover for falling leaves, ice and snow fits Class C Ford E450 1997-2026 RV, NO for all kinds of RV. Sturdy hook & loop tape fasteners around the mirrors make them more windproof. Strong Magnets do not damage the RV door and are easy to install
If you have a Class C RV, this insulated windshield cover seems like a great way to prevent heat from escaping through the front windshield at night. I haven’t found a product like this for Class A’s (that provides insulation instead of just blocking light), but if you know of one please leave a comment to let me know.
5. Insulating RV Windows with Bubble Wrap
After covering a few of the windows with shrink plastic last year, I became impatient with the process and decided to try another method for insulating RV windows against the cold: bubble wrap.
To cover a window with bubble wrap, all you have to do is dampen the glass and stick the bubble wrap to the glass with the bubble side facing the glass. A spray bottle or a damp rag works well for moistening the window. Dish soap will stick even better. Usually, this is all it takes to keep the bubble wrap up all winter, but if it comes down you can simply dampen the glass again and stick it back up. I also used Scotch tape in a few places to tape two pieces of bubble wrap together.

Here’s how I bubble wrapped the windows in my fifth wheel:
The bubble wrap method is very easy, but not very classy looking. And you can’t see out a bubble wrap-covered window, so I ended up only using bubble wrap on a few of my windows that I didn’t mind leaving covered. One of those windows, the one behind my husband’s desk, is actually still covered with bubble wrap that I never took down over the summer.

Also, I didn’t find the bubble-wrapped windows to be quite as well protected against cold as the shrink plastic windows due to the bubble wrap having perforated spots with no bubbles. But is a little easier to set up.
6. Velcro RV Window Insulation Made from Clear Vinyl
Last year I came up with a vinyl covering method for my screen windows. I made clear vinyl covers attached to the window with Velcro. I did this so that I could remove the covers and open the windows on nice days.
This method worked pretty well, and since the vinyl was sturdy, my cat didn’t tear it up. There are a couple of drawbacks:
- The vinyl I used (heavy clear shower curtain liners) had creases in it that made it not look very good. If you buy clear vinyl on a roll at a fabric store, this wouldn’t be an issue.
- The Velcro doesn’t make an airtight seal, so it might not be ideal for extreme northern climates (but it’s fine for us in Kansas City). A magnetic strip could also be a good solution!
Even with those drawbacks, I decided to reuse this technique for the windows that I might want to open. I’ll share some pictures of those window covers later in this post.
Combining RV Window Insulation Techniques

My strategy for covering my windows this year is as follows:
- Shrink film on the hall window (leftover from last year)
- Bubble wrap on the window behind my husband’s desk (leftover from last year)
- Vinyl covers attached with Velcro on my screens and smaller windows.
- And Plexiglass on my big windows.
And now for a little more detail…
How to Insulate RV Windows with DIY Plexiglass Storm Windows
I would just cover all my windows with plexiglass if I could afford it, but it’s expensive. Instead, I use it on three of my four big windows (the fourth being a bubble wrap window).
I purchased three 24″x48″ sheets from Lowe’s at about $30 apiece. They cut it to size at Lowe’s for me. But, as you will see, I ended up having to cut it myself also.
My Process
After unscrewing and removing my window shades and curtains, I cleaned my windows with a microfiber rag wet with water, followed by a dry microfiber rag.
I held up the plexiglass to the window I planned to cover…and immediately realized I had forgotten to take into account the curved corners of the window.
After watching a few YouTube videos, I learned how to cut plexiglass using a utility knife (razor blade). You can buy a tool designed for cutting plexiglass, but I didn’t want to make another trip back to Lowe’s. The razor blade method worked just fine for my purposes.
Cutting the Plexiglass
First I used a Sharpie to mark where I needed to cut. Then I scored the mark several times with the utility knife over an old cutting board.

And finally, I grasped the corner with a pair of needle-nosed pliers and easily broke it off.

I then sanded the broken edge so it wouldn’t be so sharp.

To adhere the plexiglass to the window frame, I used my favorite invention ever, clear acrylic mounting tape. This stuff is super strong, yet very easy to remove if needed.
It also works when it’s wet, as I learned when I used it for a project in my shower, so it should work even for people who have a window condensation problem.


Unfortunately the plexiglass didn’t come in a size that was tall enough for my window, so I ended up with a two-inch gap at the top. I covered this gap with a strip of clear shower curtain vinyl adhered with the mounting tape.

It doesn’t matter, though, because that part is always covered with my pull-down shades.

Here is how the plexiglass storm window looks on one of my other windows:

I really love how the plexiglass storm windows turned out. They look like they came that way. I may get plexiglass for a few more windows next year.
Difference With and Without the Plexiglass Storm Windows
Look at the photo below. The window on the left was uninsulated while the one on the right was covered in plexiglass.

Look at the difference it makes! That condensation means our expensive heat is escaping through the window. But the plexiglass isn’t cold enough for condensation to form—meaning the air between the window and the plexiglass is still warm and acting as an insulative barrier. Definitely a success in my book!
Read Next: 6 Tips on How to Stay Warm in a Cold Camper
Video of my Plexiglass RV Storm Windows
I did a little video follow-up about my plexiglass windows where you can see a little more detail:
Making DIY Velcro Vinyl Window Covers to Insulate RV Windows
Where we live in our RV, you get cold days mixed with the occasional sunny day. I love opening our windows on those days, but moving plexiglass would be impossible. So I came up with a movable solution.
I made clear vinyl covers adhered with Velcro for the screen parts of the windows.

My Process for Making Velcro Window Covers
To make the covers, first I cut 1″ Velcro with scissors so that it was 1/2″ wide. I stuck it to the window frames.

Then I cut a piece of vinyl a little bigger than the space I needed to cover and stuck it carefully to the Velcro. I stretched it as taut as possible to avoid creases along the Velcro.

Finally I trimmed the edges with a utility knife.

For this smaller window, I decided to cut the vinyl big enough to cover the entire frame. On my windows where only the inner frame is covered, the black outer frame still gets pretty cold. It doesn’t look pretty, but the shades and curtains hide most of it.

After I made these, I found out that there’s actually a similar product for sale on Amazon.
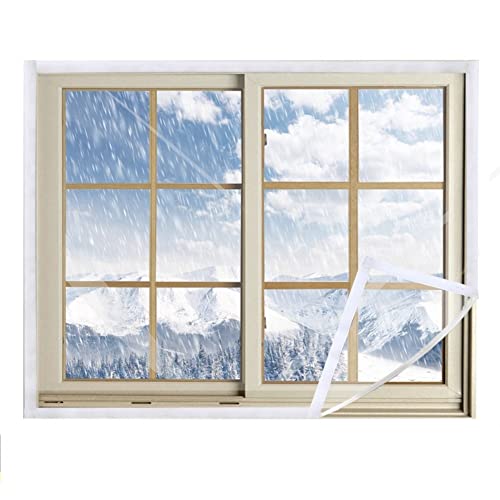
- - Window insulation film: installed indoors to prevent outdoor cold air from entering the room and increasing indoor temperature
So that’s how I made RV window insulation to prepare my RV for cold weather. Overall, plexiglass worked the best, but it is your most expensive option. Vinyl covering combined with stylish curtains makes a significant difference too.
Read Next: 6 Tips on How to Stay Warm in a Cold Camper
Should You Insulate the Outside of RV Windows?
If you live in an extremely cold climate, in addition to insulating your windows from the inside, you could also cover them with plastic from the outside. The main benefit here is to further seal the windows from drafts. There would be very little space between the plastic and the glass to trap the air needed to create insulation.
Most RV owners who do this cover their windows on the outside with clear vinyl, plastic, or plexiglass taped on with foil HVAC tape. Foil HVAC tap can be used at any temperature and comes off cleanly when removed. I think clear vinyl would work best for this purpose, since it’s sturdier and wouldn’t be likely to tear in the wind.
Just be aware if you do this that some RV windows have “weep holes” in the sill to allow condensation to drain, so you may want to leave the bottom unsealed.
Here’s a picture of an RV with plastic covering the exterior of the windows.

She can still see clearly out her windows and she’s protected from the cold.
Insulating RV Skylights
I really enjoy having a skylight in my RV shower because the sunshine helps me wake up in the morning. But during the winter the skylight is one more place for heat to escape.
AirSkirts, a company that sells inflatable RV skirting, designed the perfect solution to this problem. It’s an inflatable skylight insulator that sticks to the glass with suction cups and is made from clear vinyl that lets sunlight through. During the day, the sun warms the air inside, and this provides a buffer between the cold air outside and the warm air in your RV.

You can read more about the AirLight Skylight Insulator on the AirSkirts website.
Conclusion
Winter RVing and living in an RV in winter can be enjoyable if you make the right preparations to stay warm. Insulating your RV windows can be an easy and budget friendly way to keep the heating costs down. There are many options for every type of RV window. Try one or a combination of the RV warmth solutions listed above to keep you nice and cozy all winter long.
Looking for more ideas on staying warm in your RV for the winter? Check out how these RVers made DIY skirting out of vinyl and foam board!
Do you have any cold weather tips or hacks for keeping warm? Share them in the comments or in the RVI facebook group.
For more winter RV tips, check out our article “How We Prepare Our RV for Winter Living.”
This article was updated in December 2024 in collaboration with Brooke Moeller , from @the_path_we_take.


Ashley Mann founded RVinspiration.com in 2017. She handed off the website to new owners in 2022 to launch a new business as an online entrepreneur coach, but she still helps out as the blog editor. Ashley spent three years living full time in a 38-foot, 5th-wheel RV with her husband Josiah and their cat, Kitty. Her favorite thing about RV life is the challenge of finding the perfect way to organize a space, and she loves seeing all the creative and clever ways people come up with to customize their RVs.


I really like the vinyl idea. I too need the sunlight for emotional health. We have a big condensation problem. I am hoping we are on top of it though. Thanks for the ideas!
You’re welcome! I do want to mention that after some really cold weather this past week, I can say that the plexiglass, and probably the shrink plastic too, is definitely more effective than the vinyl with Velcro. Somebody else mentioned the possibility of using magnetic tape instead of Velcro to adhere the plastic – that might work better. Or, if you have windows you don’t mind leaving covered year round, I think the acrylic mounting tape with vinyl works really well. Another idea I’ve seen is to use HVAC tape to cover the windows from the outside instead of the inside. You could use vinyl with that technique, too.
Thanks for this awesomely helpful
class on RV condensation Ashley!
Think I’ll slap up some quick bubble wrap with plexiglass being my ultimate goal. Thanks again : )
You’re welcome! Sounds like a good plan!
It would be really nice if there were only 2 types of windows. Our 5th wheel has crank out, slide side to side, lift, and push out. The small windows on either side of the bed are lift up but you have to pull in the little tabs. They should be crank out to give you air without rain.
When I lived in my mobile home I put those packing “air pillows” in between the outer window and the “storm” window. I lived in Fraser, CO, the “Icebox of the Nation.” View is less distorted than bubble wrap but I used that too.
That’s a good idea!
W e found ourselves in suddenly cold Florida and Louisiana in our new to us Class A. We used and are still using–the foile window sun shades, cut to fit, and we slide them in behind our surrounds and in front of our pleated shades. Not see thru, but easy to take out, and store, and a lot warmer. We also used them to cover our unusual size vents and bath skylight, we used magnet strips for the fsns and cut the skylight one just to fit, and used expanding fridge bars for extra insurance. Do need to work on the kitchen window, don’t want it closed off perm, and roller vinyl shade just isnt doing it! PS You can buy bubblewrap with no tear perfs, Amazon or maybe a U Haul moving supplier might have it.
Thanks for the tip about the non-perforated bubble wrap! Glad you’re managing to stay warm this unusually cold winter!
To clean Velcro, of pet hair, just use a small pet slicker brush- such as this: http://amzn.to/2D75TnB
I use one of these to brush my cats/dogs and they love it.
If you do not have a slick brush, you can use a hair comb. Takes a little longer but will take most of the hair off.
Thank you for the tips! I’ve been living in my 32′ Motorhome for nearly 5 years. Enjoy getting tips from other RVers.
That’s a good idea! However the pet hair stuck to my Velcro window covers is stuck to the adhesive on the back of the Velcro, so not sure the brush would work for that. But I will keep that tip in mind because I’m sure it will come in handy at some point! 🙂
Thanks for all the good ideas.
Glad you enjoyed them!