
DIY: How to Add (Removable) Walls to RV Shower Shelves
This post may contain affiliate links.
My RV shower shelves looked nice and are useful when we’re parked. But with no bar to hold soaps in place, they are totally useless when the RV is in motion! I don’t know why RV manufacturers make shower shelves like this when they know RVs are meant to be driven!
Now I know that I could have easily solved this problem by moving everything to the floor of the shower while the RV was moving. But who wants to do that every time the RV moves?
I wanted to find a permanent solution to keep my soaps in place. I did some research and found a DIY solution that is easily removable and leaves no trace.
Later I did find this on Amazon that would also work!
- Adjustable Length: The RV Shower Corner Storage Bar features an adjustable length of 7.9 to 13.7 inches, making it suitable for various corner shelf sizes in RV shower areas.
Here is my DIY solution for those RV shower shelves that need to keep soaps in place. I’ll include a supply list, detailed instructions, and a video below.
My Process
First, I purchased a small piece of 24″ x 18″ plexiglass at Lowe’s. They cut it for me into three 11″ x 4″ pieces—the size I needed for the walls of my shelves. I always ask the team at Lowe’s or Home Depot to cut things for me to save me the time and tools at home!
Next, I purchased a strip of flexible silicone “h” type shower door seal, cut six 4″ pieces from it, and then cut the “leg” of the “h” off to make it a “y” shape instead.
Below, you can see what it looked like before and after cutting:


Using Acrylic Mounting Tape
The key to this project is clear acrylic double-sided mounting tape.

- XFasten Extreme Heavy Duty Mounting Tape is waterproof and can hold up to 5 lbs of mass per square inch of tape.
If you’ve visited my site before, you’ve probably heard me rave about this tape because I use it for everything! This stuff is amazingly strong, super stretchy, and flexible. It will even stick in a humid shower and still be easy to peel off with zero damage to the surface it was stuck to.
Read More: All the ways I use this acrylic mounting tape around my RV
I attached 1″-wide mounting tape to the wide, flat side of the shower seal strips and cut the tape to be the same length.

Cutting the Plexiglass
I then cut strips of the mounting tape in half lengthwise to make them 1/2″ wide and affixed them to the edges of the plexiglass.

Then I peeled the red backing off the tape on the plexiglass and attached a strip of seal to each edge, like this:

After that, I peeled the backing off of the wider strips of tape, and took it to my shower.

Now my plexiglass has easy-to-attach sides!
Attaching the Plexiglass to My Shower Walls

I stuck it to the walls of my shower, bowing the plexiglass just slightly as I pushed it into place. I left about half an inch of space for water to drain out. Notice that my shower walls are textured. This works just as well for smooth or textured shower walls.
Read Next: Why Is My RV Shower Turning Yellow? How to Fix a Yellow Camper Shower
Here are all my plexiglass walls in place:

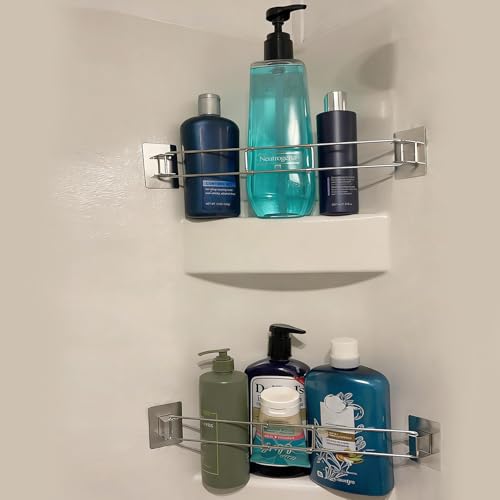
The Completed Project
Here are my shelves filled with stuff.
I purposely left the bottles on the bottom shelf, which are both nearly full, upside down and leaning up against the plexiglass to see if it would hold, and it hasn’t budged. Water and humidity haven’t affected the adhesion either.

I keep plants in my shower because I have a skylight that provides light for them. Begonia and Pothos ivy, in case you were wondering.
Read More: 9 Mobile Gardening Ideas for Full Time RVers
They are planted in a sponge caddy that I used to have hanging from Command strips on the shower walls, but I decided I liked it better sitting on the top shelf.
This project can be done for around $25-$30, or less if you already have the mounting tape. Here is a list of the materials I used for this project, as well as a step-by-step list of instructions:
Materials needed:
- plexiglass – You can get this at a place like Lowe’s or Home Depot and they will cut it for you, or you can purchase it online and cut it yourself, or you can order it custom cut to your specifications from several online suppliers.
- silicone “h” type shower door seal
- clear acrylic double-sided mounting tape
Steps:
- Cut one piece of plexiglass for each shelf to the length of the widest part of your shower shelves and whatever height you prefer.
- Cut a length of silicone shower seal for each edge of the plexiglass equal to the height of the glass.
- Cut and affix 1″ mounting tape to the wide, flat surface of the shower seal. Do not remove the backing yet.
- Cut 1″ mounting tape lengthwise to make it 1/2″ wide and affix it to edges of the plexiglass pieces. Do not remove the backing yet.
- Remove the backing from the tape along the edges of the plexiglass and attach the glass to the shower seal along the inside of the short side of the “y”.
- Remove the backing from the tape along the wide, flat side of the shower seal.
- Leaving about 1/2″ of clearance to allow water to drain out, press the plexiglass into the corner of the shower, bowing the glass slightly to create pressure against the wall along the edges.
If you do this project, please leave a comment to let me know how it goes, and if you come up with any improvements to my design!
Three Years Later
In 2019, when we moved out of our fifth wheel after living in it for three years, I made this video to follow-up and talk about my experience with the project:
Can’t see the video? Turn off your ad blocker! 🙂


Ashley Mann founded RVinspiration.com in 2017. She handed off the website to new owners in 2022 to launch a new business as an online entrepreneur coach, but she still helps out as the blog editor. Ashley spent three years living full time in a 38-foot, 5th-wheel RV with her husband Josiah and their cat, Kitty. Her favorite thing about RV life is the challenge of finding the perfect way to organize a space, and she loves seeing all the creative and clever ways people come up with to customize their RVs.


What a clever idea! Looks great too. Thanks for sharing!
Awesome mod. I couldn’t help but share it on RV Tips facebook page.
Thank you! 🙂