
How to Replace RV Light Fixtures in 7 Easy Steps
This post may contain affiliate links.
Let’s be honest: most manufacturers use basic RV lighting and/or bland “upgrades” when it comes to lighting. You may feel ready for a change and wonder how to replace RV light fixtures.
Lighting can feel overwhelming to some due to the electrical aspect. However, it’s actually a pretty simple process if you want to replace those old, dingy RV lights.
Hi! I’m Alice, a full-time RV-er with decades of interior design experience.
I’ve mastered making tasteful statements throughout a small space with a dozen+ RV renovation projects, from camper remodels to full van builds.

One of my favorite ways to do this is through light fixtures. In this article, I will walk you through installing a light fixture yourself and show you a few of my favorite fixtures from some of my RV remodels.
How to Select New Light Fixtures for Your RV
So, let’s talk about lighting options when shopping for new light fixtures in your RV.
Can You Put a Regular Light Fixture in an RV?
Often, people think you must use RV lighting in an RV. This is absolutely NOT true. There are many fun options when you look outside of typical RV lighting.

Below is a list of things to remember when shopping for new light fixtures and a step-by-step guide on replacing those boring RV manufacturer lights.
What You Need to Consider Before You Update Your RV Light Fixtures
Evaluate Your Options in Types of RV Lighting
LED is popular in RVs because it utilizes less power than incandescent and halogen bulbs, but it’s not required.
Virtually any light fixture can go into an RV. You just need to know what kind of bulb is compatible with your rig (12V, etc). (More on that below.)
Measure the Space
Make sure to check measurements before you buy for 2 reasons:
1. It needs to fit the space.
2. The base of it will need to cover the hole from the old light.
Compare Your New Bulbs Voltage to the Old Bulbs Voltage
If the light fixture you’re taking out is wired to DC (12V) and the new light fixture will fit a 12V bulb, it will work in your RV.
If you’re unsure if the light you’re changing is wired to Alternating Current (AC-110V) or Direct Current (DC-12V), you can check with a voltmeter to be safe.
Product currently sold out.
To test your wiring, touch both wires with the probes on the voltmeter. It will either read 12V (DC) or 110V (AC).
Side Note: This can get confusing since you’ll probably use an AC light with your pre-existing DC wiring. RVs have both AC and DC. The majority (if not all) of the lights in an RV run off DC (12V), while most appliances (receptacles) run off AC (110V). This is why an AC light fixture will only work if it takes a 12V bulb, making it compatible with your pre-existing DC wiring.
Prioritize Safety When Working with Electricity
Electricity should be taken seriously.
However, I’ve been shocked by 12V, and it’s like a bee sting, haha.
I wouldn’t recommend getting shocked with 110V, though, as it really hurts and can be very dangerous! Thank goodness most lighting in an RV is only 12V!
It can be confusing but try not to overthink it.
What You Will Need:
?Screwdriver or Screw Gun/Impact Driver
?Wire Strippers
?Step Stool (possibly)
?The light fixture you purchase should have screws included and any other hardware required.
A Step-by-Step Guide on How to Replace Your Dull RV Light Fixtures

1. Shut Off Your RV Power/Disconnect Your RV From its Power Supply
Turn off the power to your RV before cutting any wires.
2. Remove the Current Light Fixture
Light fixtures vary when it comes to removal.
The main thing is to find the screws that are holding the fixture to the ceiling. These can typically be found in the base of the fixture.
For example, RV dome lights have clear plastic covers over the bulbs. You simply have to squeeze them to pop the plastic teeth from the base, and they’ll come right out.
Once the cover(s) are removed, you will be able to see and easily access the screws that need to be removed with a screwdriver or (recommended) screw gun/impact driver.
This will free the base from the ceiling, and the fixture will only be attached or hanging by the wiring. This is where is can start to get technical, so check out this video to see how this process works step by step.
3. Cut and Strip the Wires
Make sure to cut the wires as close to the existing light fixture as possible to give yourself enough wire to reconnect to the new lighting.
Use wire strippers on the existing wires to splice with the new light. As in, strip around ½” of the black and white wrap/tubing so you have the copper wires inside the tubing to tie to the new light.
Product currently sold out.
4. Check if Your RV Lights are 12v or 110v with a Voltmeter
With DC (12V), most RV manufacturers make the black-wrapped wire the ground and the white-wrapped wire the hot (the opposite of a brick-and-mortar home).
Ensure this is the case in your RV with a voltmeter before installing the new light. The ground won’t have a reading while the hot will.
Match your new wires accordingly, hot to hot and ground to ground.
If your wiring is, as mentioned above (black being ground and white being hot), then all you need to do is match white to white and black to black and tie the ground from the new light fixture in with the black.
With AC (110V), the black-wrapped wire is the hot (keep that in mind; this is the opposite of DC). The white and the green-wrapped wires are both grounds.
In the rare case that you are installing a light into pre-existing AC wiring, you will need to use a 110V (NOT 12V) bulb, which is what it should come with. You will be wiring an AC light fixture into AC wiring just like in a brick-and-mortar home.
Side Note: Pendant lighting can be flush-mounted if it comes with a base, so don’t let the height of the rope/cord deter you if you really like the light. It can be adjusted.
5. Connect the New Light Fixture’s Wires Together
Use wire nuts to splice the wires together.
Product currently sold out.
Wire nuts have threading inside and will pull and twist the copper from each set of wires together, making the connection.
6. Turn on the RV’s Power to Test the Light
Turn the power to your RV back on before finishing the installation to ensure everything is wired correctly and works.
7. Replace Your RV Light Fixtures: Install
Tuck the wires back into the existing (ceiling or wall) hole and finish installing the light fixture per the instructions.
Typically, all you’ll need to do is screw the base of the light into the ceiling. You can adjust the placement of your new light fixture to your liking as long as it covers the existing hole.
Note: If you want to add or move a light fixture altogether, it requires more work, including patching the ceiling to run/adding wires to a new location, etc.
Light Fixtures from Some of My Favorite Projects
Here are examples of light fixtures I’ve used in past RV renovations:
Moravian Star Light:

You can order this light in gold or black and different sizes on Amazon here:
Product currently sold out.
Industrial Brass Semi-Flush Pendant:

Recreate this look in brass or black:
Product currently sold out.
Boho Beaded Chandelier:

Love this one? You can find the above ceiling fixture on Amazon here:
Product currently sold out.
Gold LED Vanity Fixture:

Shop this look in different colors and styles:
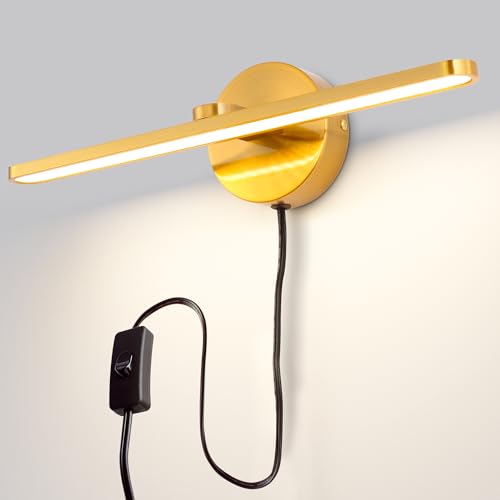
- 💡[Modern Design] Unique modern design with a minimalist style, using standard accessories and no exaggerated decorations. Size: 15.75 inches long by 4.33 inches wide, extending 4.72 inches from the wall.
Rustic/Industrial Pendant:

Recreate this look in your camper:
Product currently sold out.
Read Next: 24 Easy RV Interior Lighting Updates
Conclusion: How to Replace RV Light Fixtures
I hope this step-by-step guide has inspired you to upgrade the lights in your RV! Happy renovating!
Read Next: 10 Unique Types of Patio Lights to Hang from Your RV Awning


As a full-time RV-er with decades of interior design experience, I pour my heart and soul into rain2shine ventures. I bring passion and creativity to each project, prioritizing functionality and style. I wear many hats at r2s; not only am I running a successful business, I design every remodel, tackle much of the labor and decorate each project to bring a client’s vision to life.
Rain2shine ventures and myself have been featured on the cover of RV Enthusiast, in O’Henry Magazine, WFMY News 2, and a handful of other publications.


Thanks so much for the great article. I have had an electrician out to our RV and both he an a friend who is quite handy, have said the ceilings wont hold anything except the very basic fixtures it now has. We have a 2020 Forest River. I just cannot believe I can’t exchange my fixtures. I’m not trying to put up anything very heavy. Is there some kind of reinforcement that needs to be used. Thanks so much for your help.
You can definitely add reinforcement for a heavier fixture! It’s not commonly used, but if you want a heavier fixture or just want peace of mind, it’s a great idea.
Thanks for responding. It is appreciated. My fixtures are only about 4 pounds. Do you consider that too heavy. Also our RV is stationary. It’s parked on my son’s ranch to accommodate our visiting without having to impose on anyone, so swinging while moving is also not a problem. Do you have any ideas on how one would reinforce an RV ceiling? I know you must be very busy, so thank you again for trying to help me.
Hi Carol. You do not need to reinforce the ceiling for 4lb light fixtures especially if the camper is stationary. Simply remove the old fixtures and follow my instructions above to install the new fixtures with the proper bulbs (12V) if they’re DC.
FYI: In AC black is hot; white is neutral and green is ground. AC means alternating current and DC means direct current. One flows direct from source, the other flows continuous in what you might think of as a loop. Not the best definition but you should reword your instructions so people won’t get confused and wire the white and green together