
15 Ways to Cover Your RV Cabinet Mirrors
This post may contain affiliate links.
RV cabinets are often the cause for wanting to renovate a camper. They bring a lot of brown and quickly darken a space. But one other thing RVers tend to hate? The built-in mirrors in the RV cabinets. A note to RV manufacturers: RVers are not loving these RV cabinet mirrors. This is one of the popular requests we see in our Facebook group!

This glass and mirror trend dates back 40+ years, but even today, you’ll see new RVs with glass and mirrors built into the cabinet panels.

Particularly in older RVs, the mirrors built into the RV cabinet door are often etched with patterns, like in this 1994 Class C motorhome.

These etchings are not easily removed—though possible with glass cleaner, baking soda, a blade, and hours of your time. But even if you renovate, the mirrors will still age the RV.
In this article, we’re tackling the pesky problem of what to do with those RV cabinet mirrors! We have solutions for covering, replacing, or updating your RV cabinet mirrors to reflect your personal style.
Let’s start with covering those mirrors up!
Covering Your RV Cabinet Mirrors
One of the most popular (and easiest!) ways to get rid of your RV mirrors is to simply cover them up.
1. Paint
One of the most inexpensive ways to cover your mirrors is to slap on a coat of primer and paint while you’re painting your cabinets. You don’t have to bother removing the glass or mirrors and as long as the surface is smooth, you can’t even tell that there is a mirror under the paint.

You may consider using the same color as your cabinets, creating an accent color, or creating a mini chalkboard with chalkboard paint.
Before painting your mirror, be sure to clean it with glass cleaner and a microfiber cloth. Apply several coats, allowing for appropriate drying time between each. You can also elect to use glass paint on your mirrors, which should hold up better over time.
Look past the mess below to see before and after painting these cabinet mirrors.


If you don’t want to paint directly on your mirror or have etchings creating texture on your glass, some RVers have covered the mirror with wallpaper first before painting. This will give a smooth texture for painting and ensure that the paint sticks!
Read Next: The Best Paint to Use in Your RV (For Walls and Cabinets!)
2. Wallpaper

A layer of wallpaper directly over your mirrors is a great way to keep the visual interest in your cabinets while still covering the dated mirrors.
You can also use this method for the accents in your RV cabinets—whether they are mirrored or not!

Not only did Camp Revival add this patterned wallpaper to the cabinets, they decided to continue the pattern and frame the same wallpaper to create artwork for the bunk beds. This is a great idea for making your wallpaper accents look cohesive with the rest of your RV design.

In this RV bedroom, RVer Ashley matched a shiplap wallpaper headboard with the recessed panels in her cabinets.

Wallpaper is an inexpensive way to cover your mirrors and you won’t need much of it for this project. For more on how to hang wallpaper in an RV, check out our guide.
3. Radiator Mesh

Radiator mesh is another good way to cover (or replace) the glass and mirrors. It is mesh, so you can still see the mirror or glass behind it if you don’t remove it. Or you can paint the glass before adhering the mesh.

This gold art deco-style radiator mesh is a beautiful option we’ve seen in multiple renovations. A single sheet can be expensive ($20+) and you may need one or two sheets to upgrade your cabinets.

4. Fabric
To add texture and patterns to your cabinets, you may consider lightly covering them with fabric. In this RV renovation, the owners used a semi-sheer fabric to cover the cabinet mirrors.

The shine of the mirror is still there, but the fabric offsets it. You can use Mod Podge or similar products to adhere fabric to the glass mirrors.

Burlap is another great fabric to use that will add texture to your space and fully cover the glass and mirrors.
5. Cane Webbing
Cane webbing is by far the most popular item we see added to RV cabinets. You may leave the mirrors exposed or cover them with paint before adhering the material.

This cane webbing was secured with a 3M spray-on adhesive. The renovator, Lee Ann added that she laid the webbing under some heavy pavers so it would be completely flat before attempting application. Then, “spray heavily.”

Renovators are loving the look of cane webbing in their bedrooms particularly!

Because it is easily cut, it works great even in curvy cabinet doors.

As a bonus, cane webbing is relatively inexpensive and easy to find. When opting for cane webbing, we see people choose to cover multiple cabinets. Compared to the more expensive radiator mesh that is usually only seen on one or two cabinets in a renovation. You can find a few feet of cane webbing on Amazon for around $20.
Product currently sold out.
6. Placemats… Wait, what?
When it comes to covering your mirrors, there’s really no limit to what creative options you can use. We’ve seen Dollar Tree placements cut and glued on. Photos stuck on. Extra backsplash tiles added. Contact paper. Wire mesh. Cork. Aluminum metal sheets. Frosted paint.

As long as you clean the glass first and use the proper adhesives for your chosen material, you can cover the mirrors with just about anything!
And we mean anything. These mirrors were covered with NAPKINS.

The napkins were decoupaged with Mod Podge and they still look great!

- Multi-Purpose Use: Mod Podge serves as an all-in-one glue, sealer, and finish, eliminating the need for multiple products and making it a staple in any crafter's toolkit.
Get creative and find a product that looks great for your design style. The renovation below cut small pieces of wood and painted them to create this bold pattern covering their RV cabinets.

7. Flip Them Over
One of the fastest ways you can cover those mirrors? Flip your cabinet doors around.
This won’t work on every cabinet door. You’ll have to examine your hinges to see if they will fit. But this is a fast way to hide those mirrors. Depending on if the mirror backing is covered with a wood panel, you may not even need to lift a paintbrush!
You can read more from RV Love on how they turned their cabinet doors around for a cleaner, more modern look.
Replacing Your RV Cabinet Mirrors
Really hate the mirrors or patterned glass in your RV cabinets? Don’t you worry! Let’s get them out of there completely and replace them with something better. Here’s how to remove them.

How to Remove Mirrors from RV Cabinets
Step 1: Remove your cabinet doors from the cabinets and remove all hardware. Don’t forget to save your screws if you’ll be reinstalling the same hardware.
Step 2: If there is paneling covering the back of the mirror, use a screwdriver to pry it away. It is often stapled down and not too difficult to remove.
Note: If you would like to use the paneling to replace the gap left by the removed mirror, be careful as you remove it so as not to break it. If you break it, you can replace it with 1/8-inch paneling from a hardware store like Home Depot (or other materials we’ll share below).
Step 3: Remove the mirror. Your mirror may be held in place only by a strip of tape! Use a razor blade to loosen and remove the mirror. If glue is used to hold your mirror in place, try a heat gun (or a hair dryer works amazingly well) to loosen the adhesive first. We advice against breaking the glass by hitting it, as tempting as it may be.
Step 4: Remove any staples or adhesives left behind.
Step 5: Replace your mirror with your desired material.
With the paneling gone, we see only a few types of materials used to replace them.
1. Cane Webbing
We told you cane webbing was popular!
Interior designer Sarah Bronstein completely removed the panels in her cabinets and replaced them with cane webbing.

She loved the look so much she continued the cane webbing throughout her RV for a cohesive design.

You can find cane webbing in different sizes and patterns. Everyone we’ve asked about their cane webbing had the same answer: Got it on Amazon.
Product currently sold out.
2. Wood Accents
This RVer removed her mirrors and used them as a template to cut wooden replacements.

She used a thin cedar plank—the same cedar you see on the window valances—and adhered it with staples and Gorilla Glue.
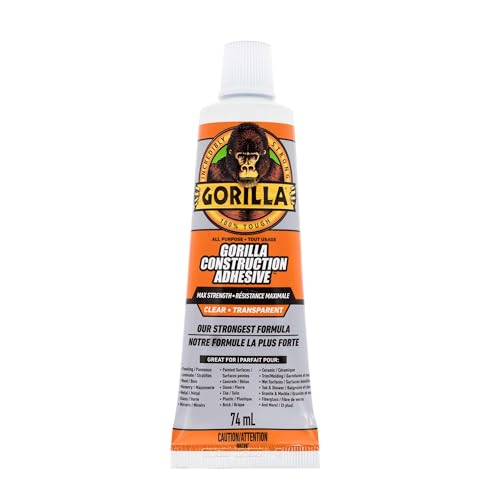
- OUR STRONGEST FORMULA: Maximum bond strength with a clear, professional finish for projects that demand maximum hold indoors and out
You can see in the corner of this picture that adding the cedar worked in larger cabinet doors as well!

You can use any wood for this replacement if it’s thin enough to fit in the cabinet door. 1/4″ plywood is an inexpensive option!

If large pieces of wood are too bold for your style, you may consider adding a small accent like this RVer:

The small sliver of wood beneath these cabinet doors is otherwise unnoticeable. But it adds a nice spot of color and texture to the white cabinets!
3. Chicken Wire
Staple in chicken wire or other wire mesh for open cabinets that will still keep your things in place. One RVer recommended spray painting the wire first to match your cabinets.

4. Don’t replace the mirrors at all!
Leave the doors off and turn your cabinet into an open shelf. Add baskets for storage or use the cabinet as an open shelf.

5. Glass
If you like the style but need better quality, you can get custom-cut glass to replace your existing glass and mirrors. This can be the most expensive option on this list.
Keep the Mirrors, Add a Little Flair
Maybe you’re reading this thinking that you actually like the mirrors on your cabinets. Great! Here are a couple ideas to zhuzh them up!
1. Add laminate strips to create a pattern.
Break up the mirror by gluing on strips of laminate.

2. Add an accent around your mirrors.
I love how these renovators kept the mirrors, but still updated the cabinets by adding a wooden accent between them.

Psst! Love this RV bedroom? This RV is currently for sale! Check out all the photos of this 27′ trailer here.
3. Add Your Own Etchings
If you can’t beat em, join em! RV owner, Bobbi, added her own design to the glass panels in her RV cabinets.

RV Cabinet Mirrors: Love them or Hate them
There are endless ways to spruce up your RV cabinets and get those dated mirrors out of the picture. Which method will you choose? Drop us a comment and share how you replaced your mirrors!


Alyssa Padgett is the author of the best-selling book, A Beginner’s Guide to Living in an RV. She loves all things #RVlife and travels full-time around the globe with her family of four.


