
How to Remove Your RV Dining Booth
This post may contain affiliate links.
Renovating your RV and ready to ditch the dinette? Removing the RV dining booth is the number one renovation we see! It’s also one of the easiest renovations you can make in an RV.
Some RVers want to remove their RV dining booth in favor of a table or a more modern seating area. Others want to create an office space with a desk. Or they want to switch the location of their couch and dining table. Whatever the reason, this is an easy project that almost anyone can do on their own.
With the right tools, you can complete this project in less than half an hour. Here’s how to remove your RV dining booth—plus what to do if you find RV systems running under your booth.
Psst…Get a glimpse at just how simple this project can be in this timelapse video!
What You’ll Need:
You can likely complete this task with tools you already have on hand. Be sure to grab these from your toolbox or borrow them from a neighbor.
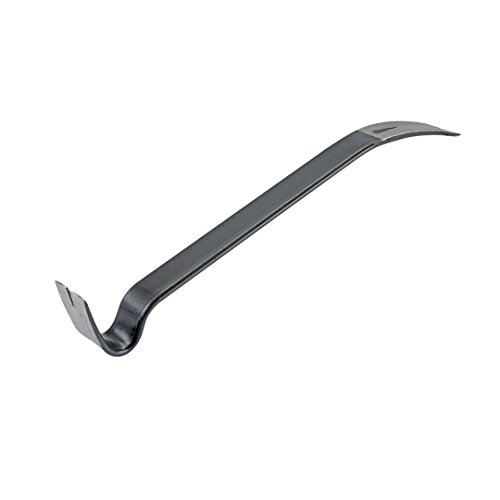
1. Small pry bar
2. Cordless Power Drill

- Adjustable torque output for every DIY job
3. Multiple drill bits
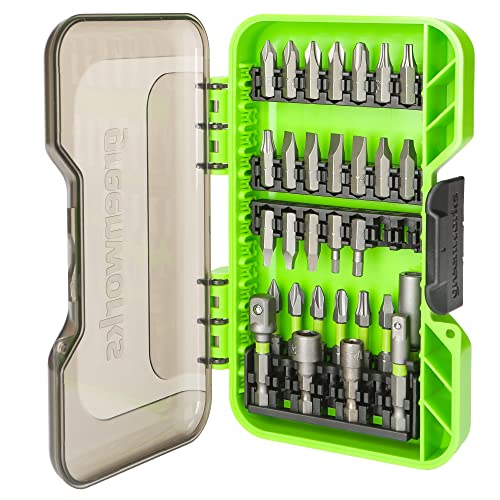
- SET INCLUDES: 30 bits, bit holder, socket adaptors, and nut drivers.
Every RV is different and many will use different heads on their screws. Remember that most RVs are assembled by humans, so don’t be surprised if you see mostly square screw heads with a few Philips heads mixed in! Keep a set of drill bits on hand so you can switch if needed.
4. A Plan!
Before you rip out your dining booth, have a plan for what you want to do with the space. Do you want to remove your booth, your table, or both?
Many RVers keep the table or the table hardware and give the tabletop a new look. Decide before you get started if you want to keep the table in place or not.
If you plan to put one or both sides of the booth back in, be careful to not damage any pieces during removal.
For dining booth replacement ideas, check out: 22 Creative Ways to Replace Your RV Dining Booth
If you don’t damage the pieces during removal, you can sell them or give them away for free on Facebook Marketplace or Craigslist. Facebook Marketplace in particular is a great way to save yourself from hauling away large items! You can also coordinate pickup with Habitat for Humanity Restore, if there is one in your area.
Contact your city or county trash services to determine the best way to haul the large pieces to the dump.
Getting Started
If you are removing the table, we will start here.
If you are not removing the table, skip step one. You may want to lower or lift your table out of the way to make removing the bench seats of the booth a little easier. (Or you may find that removing the table makes it easier to remove the booth! Just keep the screws to reinstall the table later.)

1. Remove the table.
Locate the screws holding your table into the wall. This may be easier to do if the table is lowered. Remove all screws using your drill.
Remove all the braces along the wall and the table leg holder on the floor. Grab a plastic bag to keep all the screws and wall braces together.
2. Remove cushions and seat.
Now onto the booth!
First, let’s remove any cushions. These may be velcroed or buttoned to your dining booth and can likely be lifted out easily. The piece of wood under the cushions may be lifted out as it probably isn’t screwed down.
3. Remove anything that isn’t screwed down.
If you haven’t already, now is the time to remove anything stored inside. You will likely need to sit or squat inside this tiny bench seat, so move out anything and everything you can!

If you have drawers built into your booth, lift and pull the drawers out.
4. Locate and remove screws.
Your dining booth is likely not bolted to the floor, but only held in place by a few screws. Locate the screws holding the booth to the floor and remove them with your drill.
Next, check for any screws holding your booth to the wall.
Again, every RV is different. You may find that only 4 screws held each bench in place. Or you may find that there are a dozen!
You do not need to disassemble the booth itself. Just removing the screws from the walls and floor will allow it to lift easily. You may need a pry bar to gently separate the booth from the wall or floor, particularly in older rigs.
Once disconnected, these pieces should fit through your RV door without issue.
There’s Something Under My Dining Booth…What do I do?
As you can see, removing your RV dining booth is quite straightforward. But there’s one thing that can go wrong…
What if there are wires and hoses under your booth?
It’s common for manufacturers to hide systems under the bench seats. You may have to get a little creative to protect these systems and still get the design style you like. Here are a couple of options:
1. Opt for a half booth

Keeping one side of your dining booth intact will leave a place to hide those systems while still allowing you to add in chairs or swap out your table.
Or, if you hate the look of your existing booth seats, you can build your own bench seat to match your RV’s new aesthetic.
2. Build a small box.

This small box built during an RV renovation is perfect for hiding wires and hoses without needing to reroute them. Here the small box doubles as a side table. You can make it larger and add storage or turn it into a side table, depending on where in your RV the hoses are hiding.
3. Hire a professional to reroute the systems.
You can hire someone to move whatever systems you find housed under your booth.
But…
Removing your booth is supposed to be an easy DIY project! And hiring a professional can get expensive. Unless those systems already need updating or replacing, you may find other options are more affordable.
4. Redesign the space.
For some, removing the dining booth is the starting point for reimagining an RV’s floorplan, not just swapping in new chairs. You can hide RV systems by building out a bench seat or adding a couch where the old booth sat.

We particularly love this bench seat in the back of a fifth wheel, perfect for soaking up the views around your campsite!
If you’re keen to rip out the dinette and replace it with something totally new, check out these 10 ideas after removing your dining booth. (#8 is the most popular right now!)
How to Remove RV Dining Booth
Ready to remove your RV dining booth? This is a great starting point for renovating your RV. With the booth gone, you’ll find your RV a little more spacious and ready for whatever gorgeous makeover you have headed its way.
Run into issues while removing your booth? Drop your questions in the comments!
Read Next: How to Replace RV Flooring: Tips & Resources


Alyssa Padgett is the author of the best-selling book, A Beginner’s Guide to Living in an RV. She loves all things #RVlife and travels full-time around the globe with her family of four.


Hi, we use our Class A RV for vacation not to live in. Since it would be driving, can you have regular furniture?
Absolutely you can use regular! You can anchor it with D rings and straps so it doesn’t move around while you drive.