
10 Beautiful (and Cheap!) DIY RV Backsplash Ideas
This post may contain affiliate links.
If you want to give the kitchen or bathroom in your RV a facelift, but don’t want to rent a tile saw one of these backsplashes may be perfect for you.
This list is specifically comprised of backsplash ideas that meet most or all of the following criteria:
- Easy to do: Requiring no special expertise or expensive one-time use tools.
- Affordable: Most of these ideas could be done for under $100 in a small space like your RV kitchen and/or bathroom. Many of them would probably cost under $50!
- Easy to clean: The whole point of a backsplash is to protect walls from being permanently stained with spaghetti sauce splatters.
- RV-friendly: Lightweight and durable to withstand movement during travel.
Additionally, many of these backsplashes are removable, making them an ideal choice for renters or for RV owners who don’t want to make permanent changes to their motorhome or travel trailer.
1. Painted backsplashes
Removable maybe isn’t the best word to describe painting a backsplash, but it is definitely easy to replace or cover if you ever need to!

Paint is one of the easiest ways to create a backsplash in your RV, especially if you’re handy with a paintbrush. Most RVs opt for a solid color, but I love the hand-painted pattern in the above kitchen!
Painting the Wall
High gloss or semi-gloss paint wipes clean easily, and it could be covered with plexiglass to make it even more wipeable as long as it’s not right next to a gas flame (plexiglass melts at 320° F).
2. Wallpaper Backsplash
Wallpaper is a lightweight way to create a tile-like backsplash in your RV kitchen or bathroom.

This backsplash was created wallpaper, although it definitely looks like tile!
Overwhelmed by wallpaper? Read our complete guide on how to properly install wallpaper in your RV.
This bathroom looks eerily close to real tile too, but I assure you it’s not!

See More: 27 RV Backsplash Ideas for Your Camper’s Kitchen and Bathroom
3. Faux Subway Tile Peel and Stick Backsplash
If you love the look of subway tile but want an easier alternative to having to cut and grout tile, you might consider a peel-and-stick faux subway tile like a friend of mine used in her RV renovation.

Subway tile is especially popular with farmhouse-style renovations, like this one:

Read Next: Ogle At These Gorgeous Farmhouse-Style RV Renovations
Product currently sold out.

You can find faux subway tile wallpaper or peel-and-stick tile for your kitchen. We recommend adding extra adhesive if you choose peel-and-stick, as heat and moisture can cause the stickers to peel away from the wall. If you look closely at the stove above, you can see the corners of many tiles starting to peel away from the wall.
Read more tips: How to Hang RV Wallpaper (So it NEVER falls!)
4. Faux Stone Backsplash
Try faux stone paneling for a 3-D look that can be painted to match your decor, or use stone wallpaper from Amazon.

This RV kitchen backsplash was created using stacked stone wallpaper. While this exact wallpaper is not always in stock, there are other options.
Tip: When applying faux stone wallpaper, pay attention to whether there’s a shadow under the rocks on one side, and make sure the shadow is on the bottom of each row of stone, as it would be with the light coming from above. This will look more realistic.
And it is surprisingly just how realistic this wallpaper can look!

The RV kitchen above features this wallpaper.
Product currently sold out.
5. Faux Brick
By far, this is the most popular backsplash we see in RV renovations right now! White brick is the most popular, but we love faux brick of all colors.

Here is an RV kitchen featuring a brick wallpaper backsplash.

White brick wallpaper brightens this RV kitchen.

This style is so popular right now, you can actually skip the renovation and get the style in a brand new RV shower:

6. Using Ceiling Tiles as a Backsplash
Punched tin ceiling tiles are beautiful and easy to hang, but the price can add up. One RV owner cut the cost and created the beautiful backsplash pictured below by making a mosaic using this custom sample pack.

Plastic faux tiles can save some money, but an even cheaper way to achieve the look is by using paintable tin tile wallpaper, like Debby did.

Later Debby gave the “tin” a more “aged” look. She says, “I lightly sponged a darker gray and a thin, watery black, just here and there to make it look more aged and then went over the whole thing with a clear poly to add protection and some luster back after the other technique.”
7. Beadboard Backsplash
Beadboard, used in the RV kitchen shown below, is an inexpensive option that looks especially nice with country or farmhouse decor. Learn how to install it here. You can also install it in a herringbone pattern for a different look.

It’s kind of difficult to see in that photo, but here’s another example of beadboard used in a fifth wheel kitchen/entryway.

Alternatively, you could try using paintable beadboard wallpaper.
Product currently sold out.
8. Wood Plank (“Shiplap”) Backsplash
These RVers made a wood plank wall quite cheaply from real wood:

A similar look was achieved in this bathroom by cutting underlayment into strips. Caulking between the boards prevents water from getting through to the wall underneath.

For more shiplap ideas: 7 Ways to Create a Wood Plank Wall in Your Camper
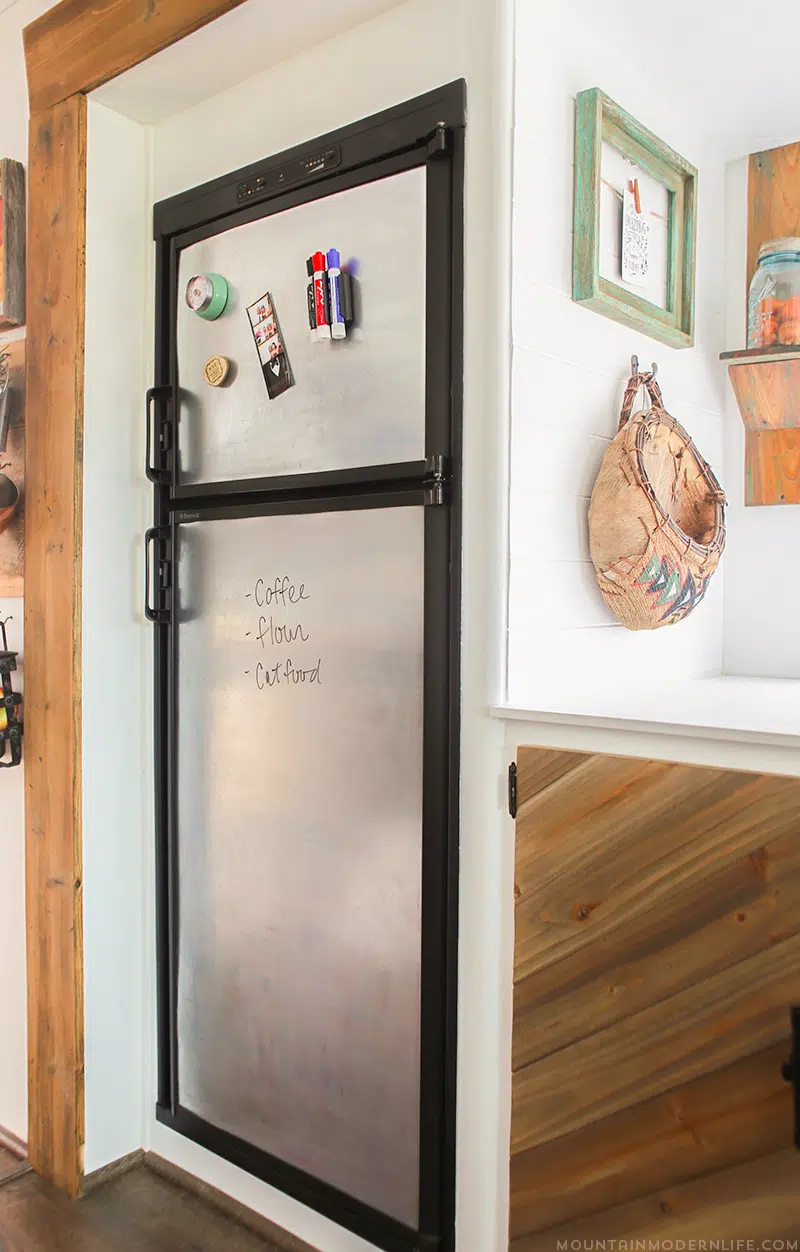
9. Aluminum Backsplash
RV owner Dan Wegh made a beautiful backsplash for his vintage camper out of inexpensive aluminum roll flashing (available at places like Lowe’s and Home Depot).

Here you can see the technique Dan used to create the diamond pattern himself:

10. Corrugated Metal Backsplash
Another affordable option for a country, modern rustic, or industrial look, corrugated metal can even be made to look old and rusty. Instructions for installation can be found here.

Looking for other ideas for updating your RV kitchen? You might enjoy my blog post about painting RV cabinets, this one about RV countertop makeover ideas, or this blog post about RV refrigerator makeovers.


Ashley Mann founded RVinspiration.com in 2017. She handed off the website to new owners in 2022 to launch a new business as an online entrepreneur coach, but she still helps out as the blog editor. Ashley spent three years living full time in a 38-foot, 5th-wheel RV with her husband Josiah and their cat, Kitty. Her favorite thing about RV life is the challenge of finding the perfect way to organize a space, and she loves seeing all the creative and clever ways people come up with to customize their RVs.


LOVE all this inspiration! Hope to travel by RV with my family one day 🙂
Hopefully you can make it happen!
Great ideas! Thanks!
You inspired me!! And I couldn’t love the results more!! Thanks so much! 🙂
Oh my goodness that is awesome!! And it looks great!!!! Thank you so much for coming back and sharing your photos! 😀
Can you use the peel and stick tiles on a textured wall?
How textured is the wall? Most RV walls have very little texture.