
29 Beautiful RV Makeovers with Unpainted Cabinets
This post may contain affiliate links.
Can you give your RV a beautiful makeover with unpainted cabinets?
One of the most common RV update ideas you see online is to paint the RV cabinets and walls.
But painting RV cabinets is A LOT of work if you do it right. The best way to achieve quality results is to do a thorough sanding of any solid wood followed by a coat of bonding primer over everything and two coats of paint after that.
So, what if you want to give your RV a makeover but don’t want to do that much work?
Or what if you like the look of your wood cabinets, but just don’t love the overall effect?
Regardless of why you don’t want to paint your wood RV cabinets, in this article, you’ll see that you can give your RV interior a makeover WITHOUT painting all of the cabinets!

Idea 1: Clean and polish your cabinets.
I know this sounds super basic, but you might be surprised at the difference this simple step can make.
A friend of mine who was considering painting the oak cabinets in her kitchen ended up loving them after she thoroughly cleaned them with Old English Wood Polish & Restorer.

- restore damaged
This trusted product has been around for decades. It blends in scratches and restores the shine to make wood cabinets look new again. It comes in a version for light wood and one for dark wood, so make sure to order the right color.
Idea 2: Add modern decor.
Some decorative touches will go a long way toward updating your RV interior. These can include new window treatments, recovering dining booth benches, replacing furniture, and adding plants and wall decor.

Bold decor can give an RV a total makeover with no permanent changes. The above RV owner’s boho-style updates include:

The RV is a Class C motorhome that has been modified for full-time living with the addition of a pull-out desk, extra storage, and a flip-down countertop extension. The decor includes a:
The owner of this RV used painter’s dropcloth fabric to make new covers for the dining booth seats as well as the window cornices/valances. Just covering outdated upholstery fabric can go a long way!

My favorite way to decorate is with plants. This isn’t practical for someone who only uses their RV occasionally, but is a popular was for full-timers to make their RV feel more homey.
For tips on growing plants inside an RV—like what to do when the RV is in motion and information on bringing them across state lines—read 9 Mobile Gardening Ideas for Full Time RVers.

Here’s another photo that shows what a dramatic difference tasteful decor can make! Decorative elements in this RV include:
- A red oriental rug in the living room
- A woven runner rug across the desk
- Macrame window valances (a long one and a short one)
- Faux brick wallpaper
- A Southwest patterned throw pillow
Idea 3: Add a trendy kitchen backsplash.

White subway tile can brighten and modernize oak or maple cabinets, making a dark kitchen seem lighter. RV owner Morgan Conner used peel-and-stick subway tile in her RV kitchen, pictured above.
I’ve also known quite a few RV owners who installed a real tile backsplash, like the one below by RV owner Patricia Pradmore. Flexible grout (available at most home improvement stores) is recommended due to the motion of the vehicle.

Of course, you don’t have to use white tiles, like this dark gray peel-and-stick subway tile backsplash.

Other popular choices with RVers include geometric or multi-colored mosaic tile backsplashes. Smart Tiles and Tic-Tac-Tiles are two brands that seem to deliver good results in RVs.
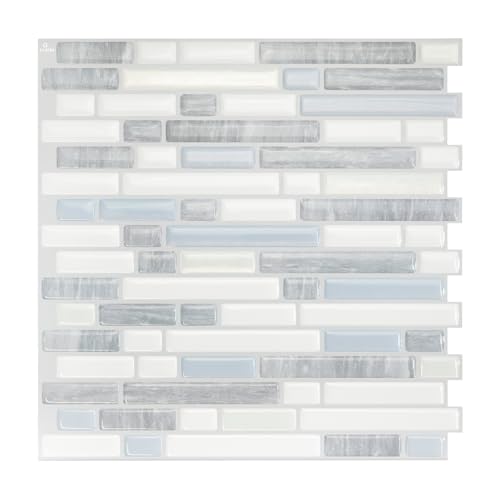
- PREMIUM PEEL AND STICK TILES MADE IN NORTH AMERICA : Buy local from the market leader in self-adhesive wall tiles. At Smart Tiles, we offer a large selection of easy to install, high quality backsplash tile designs. Each pack of 4 tiles covers 2.65 sq ft (0.24 m2).
A mosaic-style backsplash is also a great way to make an RV feel more like a residential home.
See More: 27 RV Backsplash Ideas for Your Camper’s Kitchen and Bathroom

Idea 4: Replace the cabinet hardware.
You would be amazed at how much of a difference it can make to replace dated cabinet handles with modern-looking cabinet hardware.
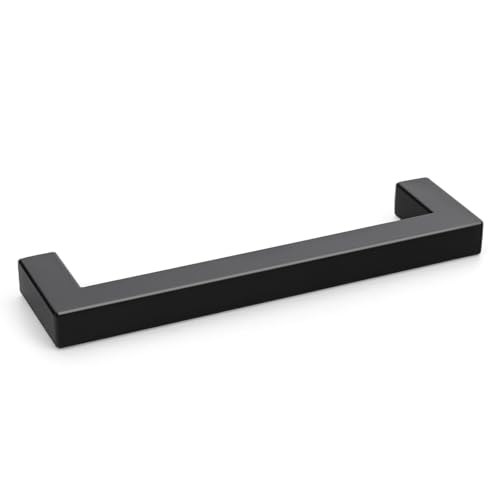
- Premium Stainless Steel Construction: Hollow yet durable, these black cabinet handles offer lightweight strength with superior corrosion resistance for long-lasting use in kitchens and bathrooms.
You can find packages of handles and pulls (usually in packs of 10) on Amazon. They generally cost $1-$3 per handle in a package versus $10+ per handle when you buy individually at Home Depot. We always buy packs from Amazon to replace cabinet handles and love them. (Currently loving these!)
A Tip to Skip: Spray Painting Cabinet Hardware

You might be tempted to spray paint your old cabinet hardware to freshen it up, but I would advise against that. It is a very cheap makeover, however, the constant use means the paint ends up chipping after a while.
Plus, often it’s the shape rather than the color that makes cabinet hardware seem dated.
Idea 5: Makeover your RV cabinet doors.
If you’re just looking for a way to reduce the amount of wood or add a little color to your RV, one way to do that is with the cabinet doors.
One RV owner who didn’t care for the frosted glass inserts in her RV cabinets scraped all of the “frost” off the back of the glass and put pretty fabric behind the glass instead.
Don’t have glass inserts in your cabinet doors? The owner of this RV added sheets of imitation black leather contact paper to the wood panels of her cabinet doors. Chalkboard contact paper or wallpaper could be used for this look as well.

Another RV owner did something similar in her RV bedroom using wood plank wallpaper:

Cane webbing is another popular way to add dimension and texture to the panels of your cabinet doors. Check out these 14 Ways to Update Your RV Cabinets to see more ways to decorate your cabinets.
Idea 6: Decorate with wallpaper.
One way to give your RV a total makeover without a drop of paint is by using wallpaper to create some accent walls in your RV.
Wallpaper can be tricky in an RV due to fluctuating temperatures. Check out our guide to hanging RV wallpaper for details on how to properly install wallpaper in your RV.

Here the RV owner used shiplap wallpaper along with some new curtains made from pillowcases to update her wood cabinets.

- [Real Shiplap Texture] White gray wood wallpaper replicates authentic wood grain, adding a simple and stylish to any space. Perfect for creating a modern atmosphere, it easily matches any room decor
What I love about the brown pineapple wallpaper in this next RV decorated by interior designer Staci is how well it matches the original cabinets.

Embracing the cabinets as they are and choosing decor to match creates a more unified feel while still getting away from the hotel-like look of the original factory decor.

This RV was decorated using this wallpaper along with some vertical subway tiles. These wall updates easily brighten up the RV even with extra dark cabinets. You can see more photos of this camper’s interior on the owner’s Instagram page @rad.ronda.rv.
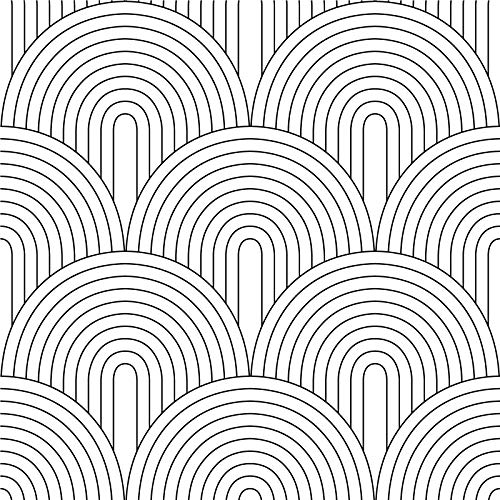
- FEATURE: Quick and easy to install - Just peel and stick to apply, pull up to remove. No water, no paste, no mess! We have used high quality textured vinyl material, matte finish, durable, removable and renter friendly. This cute black white rainbow scale design is looks simple and modern, print is very clear without any bleeding. This pattern is suite for all aesthetic room decor DIY projects. There have grid and measurements on the backing paper, you can easily cut for your needed size.
Idea 7: Paint the walls—but not the cabinets
I know you came here looking for ideas that don’t involve painting. But I want to show you how painting the walls inside your RV can make such a big difference without the trouble of painting cabinets.
My RV with Gray Walls and Unpainted Maple Cabinets
First up is a photo of my own fifth wheel.
When we first moved in, I had a hard time convincing my husband that renovating the interior was a good idea, so we compromised by painting the walls a light gray color (a Benjamin Moore color called “Into the Gloaming”) to complement the maple cabinetry.

Over time, I came to love the look and was glad I didn’t paint over our solid maple cabinets. I think it looks nicer and more unique than it would have if we had painted all of the trim and cabinetry white.
Also, painting the walls was not difficult. I used two coats of Valspar Signature Paint + Primer All-in-One from Lowe’s without any additional prep or primer. It turned out great and never scratched or peeled.
Related: A Complete Guide to Painting RV Walls
In addition to painting the walls, I also added a blue oriental rug, made curtains out of white bed sheets, added decor, replaced the sofa and other furniture, and made other little changes to make the space feel very homey.
RVs with Dark Cabinets and White Walls
White walls are even more popular than my grey ones!

This RV owner opted for white walls and a geometric peel-and-stick tile backsplash. They also added a DIY basket-turned light fixture and some greenery cascading down the side of one cabinet.

The RV above is a 2014 Grand Design Solitude 369RL with the walls painted white. The owners also:
- turned the living room into an office
- replaced the pendant light fixtures over the island
- updated the decor and window treatments in the bedroom

This 2016 Coachmen Chaparral also has original flooring and cabinetry but has been given a Boho-style makeover that in addition to white walls includes the following:
- a red oriental rug
- new furniture including a yellow velvet sofa
- geometric pendant light fixtures
- white curtains with black stripes
- white peel-and-stick subway tile and faux shiplap accent walls
- a black and white shower curtain
- brown faux fur throw pillows
They also painted the trim that goes along the ceiling, which helps open up the space. You can see more photos of this RV on the owners’ Instagram page @the.wanderpreneurs.

Here’s an RV with white walls and dark cabinets that leans more toward modern farmhouse style with its cozy decor. I love the use of baskets under the couch for extra storage! The RV owner said on Instagram that the lace curtain is cleverly hiding their cats’ litter boxes.
Related: 7 RV litter box storage ideas
This next RV was renovated and sold to a family member by professional RV renovators and renovation consultants Shaun and Renee Tilby, known on Instagram as @TheFlippinTilbys.

Some of the details I love about this Southwestern-themed makeover:
- rattan webbing inserts on the cabinet doors
- white curtains over wood blinds
- window shades rolled up and fastened with leather straps
- Southwestern print dinette cushions (I how the patterned fabric was used only for the backs and a neutral brown fabric was used for the seats.)
- faux brick paneling (painted white)
RVs with Colorful Walls and Unpainted Cabinets
If you’re not a fan of all-white, here are a few colorful RV interiors where the cabinetry and woodwork were left unpainted but the walls were painted with color.

In this first one, you can see these other decorative touches:
- Couch replaced with a mid-century-style leather sofa
- Oriental rug added
- Geometric wallpaper added to the back of shelves decorated with plants
- A sputnik-style chandelier (look above the dining table)
- New dining table and coffee table

The owner of the RV shown above loves beach and mermaid-themed decor. She painted her walls a rich blue to match her bedspread.

The colorful fifth wheel is owned by full-timers Dan and Lisa Brown. They hated their beige walls and decided to do a cheerful makeover. They covered the window cornices in addition to painting the walls in vibrant colors. You can read about all the details of their makeover in this blog post.
Interestingly, they ended up later trading in this RV. The dealer did have my friends repaint the walls a neutral color before accepting it for trade.
Idea 8: Paint the walls and some of the cabinets.
Another popular approach with RV owners is to paint just a few of the cabinets a bright accent color, which is what RV owners Ken and Steph did with their family’s camper.

Here’s a list of some of their updates:
- Lower kitchen cabinets painted bright teal
- White peel-and-stick subway tile in the kitchen and bathroom
- Black and white wallpaper added to the bunk area and dinette booth
- Recovered the dinette cushions
- Black and white rug
- DIY light fixture makeover

The owners of this RV decided to paint their bathroom cabinets a pretty shade of teal to match the accent wall in their bedroom, but they left most of their cabinets unpainted.

They tied together the dark wood trim and cabinets and the teal color by creating teal wainscoting under their bunk bed.

I love this unique way of adding personality and style to their RV by only painting the bathroom cabinet!

In this RV the walls were painted white and the island was painted light green. A modern sputnik style light fixture adds to the effect.
If you’re concerned about the floating shelves, I’ve asked some full-time RVers about this. They’ve told me they just take the stuff down and pack it in a box before traveling. Additionally, the decorative items could be left in place by sticking them to the shelf with acrylic mounting tape.
Or, if you need more storage space, build shelves inside your cabinets, as demonstrated in this video:
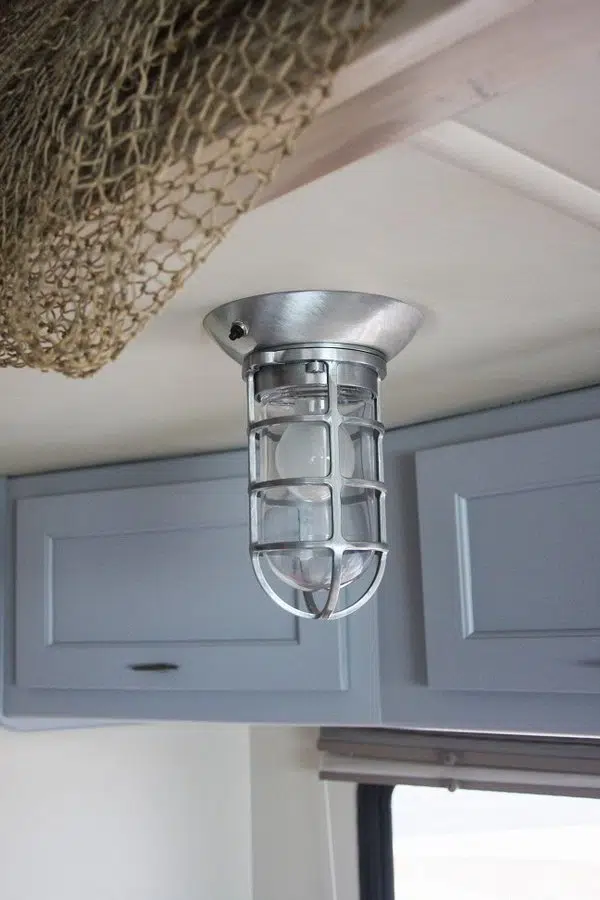
Idea 9: Update Your light fixtures
I’ve noted many light fixtures in this article, but they do wonders in modernizing wood cabinets. Check out these before-and-after photos:

Professional RV renovator Rachel of @RV.Family.Reno painted the walls white and added vinyl plank flooring. I particularly love the added hanging lights over the kitchen bar.
Must Read: How to Replace RV Light Fixtures in 7 Easy Steps
Painting the walls, ceiling, and slide-out trim bright white also makes everything feel light and spacious. Replacing the cabinet handles, kitchen faucet, and lighting gives the RV an updated look for a fraction of the work as painting!
Get More Lighting Inspiration: 24 Easy RV Interior Lighting Updates
RVs With Unpainted Cabinets
While everyone else is slaving over their paintbrushes, keep your cabinets their original color and vamp up the rest of your RV!
We think you’ll also love to tackle these DIY projects:

Tell us…Are you painting your cabinets?
Share your choice in the comments!


Ashley Mann founded RVinspiration.com in 2017. She handed off the website to new owners in 2022 to launch a new business as an online entrepreneur coach, but she still helps out as the blog editor. Ashley spent three years living full time in a 38-foot, 5th-wheel RV with her husband Josiah and their cat, Kitty. Her favorite thing about RV life is the challenge of finding the perfect way to organize a space, and she loves seeing all the creative and clever ways people come up with to customize their RVs.


So many great options. Honestly, I am far too lazy to paint the cabinets. I’m just painting the walls and that is enough work for me. 😉
That’s a big reason I haven’t wanted to paint our cabinets either! I want to wait and see if we end up keeping this RV long term before I go to all that trouble. For now I’m working with the wood, although I’m seriously considering painting our crown molding and perhaps some of our overhead cabinets to match our walls or perhaps a shade darker than the gray of our walls just to cut down on the AMOUNT of wood color.
We painted the uppers white and lower dark blue. We love the contrast.
Painting the rv is a lot of work but the results are worth the effort.
Can you share a picture of the white upper/blue lowers?
Hmmm, maybe I should have read this before updating our cabinets, haha. Great tips, especially for those who don’t want to pour a lot of time and money into a project!
Yeah well its nice to see every ones makeover ideas for a camper myself though I’m not even creative don’t and can’t get the help live on family property so camper is right here to I bought it really cheap and so had. Family worker look at roof said it was really bad and the floor inside I know needs repair I’m really just sad about the whole thing family member won’t let me bring helpers on there property to see if salvageable which they see its junk oh my shot down before the beginning ugh poor camper been sitting over 2 years before I got it lol jokes on me guess any thoughts about this dilemma please encourage its a 2006 I think pull behind needs Tlc thanks for input disabled.Military veteran with no where to turn on this one
So sorry to hear about the problems with your camper! From what I’ve seen, renovating a camper is a big job that requires some serious construction work (especially one with roof damage, which is also likely to have water damage and dangerous mold problems). Unless you’re up for that kind of a challenge or are able to get help, unfortunately I’d say it might be best to give up on that one and look for a good deal on one that isn’t quite so damaged. Best wishes and hop you can find something you love that meets your needs!
Thank you for the ideas. How did you clean the walls and remove the border wall paper before applying the peel and stick backsplash?
I would like to add that to the kitchen and possibly behind the bathroom sink.
I want to avoid problems later of it peeling off.
Any thoughts on how to remove the wallpaper border without messing up the original wall? I don’t want to paint the walls but want the border gone.
Thank you so much.
Marsha
Hi Marsha, it’s Ashley, the author. I have not personally applied a peel-and-stick backsplash in an RV (this article is a round-up of photos from other people’s RV’s). However I would recommend just using water and maybe some dish soap to clean the wall. If there are grease splatters on the wall that don’t come off with soap and water, I would recommend TSP (be sure to wear gloves) or TSP substitute (safer), followed by plain water to remove all chemical residue. As for removing the wallpaper border, I have done that before. You basically just get an edge up and start peeling. A hair dryer can be used to help loosen the glue so that it comes off more easily, and then Goo Gone is what I used to remove the residue after peeling off the border. Good luck!
Wallpaper peels off by just getting ahold of it and pulling. Get a corner or edge up and yank! Might Have to use something to get the corner up to get ahold of it.. I used a butter knife but be careful.