Turning a Dark Fifth Wheel into a Bright Contemporary RV Home
This post may contain affiliate links.
Our RV Renovations Facebook group is filled with gorgeous RVs renovated by people all over the country. As soon as I saw this particular transformation, I messaged the owner and begged her to share the details behind how she transformed this 2013 Heartland Landmark Rushmore into a much brighter contemporary RV home.
To say this renovation makes a night and day difference is an understatement. It truly went from dark and heavy to a bright, light living space. Swipe to see before and after!

This renovation was completed by Victoria and Chaz Jones who renovated the camper to live in full-time after selling their house. They have two kids under two and an Aussie mix dog all living together in this fifth wheel.
Keep scrolling to see how the family transformed this RV!
Top Design Features of this Contemporary RV Renovation
One of the best aspects of this fifth-wheel renovation is that you could definitely recreate many of these design features in your own rolling home! This family was kind enough to share some important details for anyone wanting to DIY a similar design.
1. The Hand-Built Wooden Beams

The gorgeous wooden beams bordering the slide-out were the first thing to catch my eye about this RV. Victoria and Chaz did this themselves.
“We made them from 1x8s, beat them up, and framed them to look like beams,” Victoria said. This kept the beams lightweight while looking authentic and worn.
2. Bright and Functional Kitchen
As you can see, the before photo of this RV kitchen is dark, brown, and in need of an updated style.

Victoria painted the walls white, replaced the flooring, painted the cabinets, and even redid the countertops to achieve a brighter look.

“I painted them with appliance epoxy, let them cure then buffed and polished them! I used Mothers Polish with a buffing attachment on my orbital sander,” said Victoria of her process for the countertops.
She used Sherwin-Williams “Ancient Marble” paint on her cabinets and replaced the hardware. To paint the cabinets, all the doors and drawers were removed and cleaned with TSP. They used liquid sandpaper and Zinsser 123 primer before painting.
With the cleaning, sanding, and priming, a brush and roller were used to adhere the enamel paint.
For added functionality, she hung a utensil bar above the stove and even added a spice rack, utilizing the space gap between the fridge and the wall.

Heavy-duty anchors were used to ensure the utensil bar could hold cast iron pans.
Recreate the look:

- Sturdy Farmhouse Design: This 24 inches rust proof kitchen storage rail is outstanding with its durability and well-construction that prevents the hooks from falling off. Save space with this kitchen counter organizer while creating a farmhouse wall decor!
3. Updated Living Room Seating
The living room of this RV needed a major facelift. Look at the wear and tear on that couch!

The walls (and ceilings) were painted Allibaster by Sherwin-Williams. The couch and the rest of the existing RV furniture got replaced with more modern options that matched the new contemporary style.

Recreate this look with the Article Vati sofabed.
While many renovators choose to ditch the dinette for a table and chairs, Victoria went the opposite way. She ditched the table and chairs and created a table with bench seating (with storage underneath, of course!).
One of my favorite touches in this RV is the white curtains over every window. The curtains are Ikea curtains that Victoria hemmed to the right size for each window. Keeping the look simple, she noted the family “made our own curtain rods out of wood dowels.”

A cozy rug, ottoman, and small coffee table make this RV living room feel like home.

Victoria and Chaz renovated every inch of this fifth wheel, even replacing light fixtures throughout the rig. Over the dining table, they opted for a brass flush mount dome shade.
Get a similar look:

- Frosted Glass: This flush mount ceiling light fixture is made of a frosted glass shade and surrounded by brass finish.
4. Modernized Floors & Doors
One of the biggest impacts you can make when renovating an RV is updating the existing floors. Although it is time-consuming, it is also a popular DIY task.

Here they used Buckingham Poplar vinyl planks by LL Flooring.
Read Next: How to Replace RV Flooring
One of the most underrated aspects of this particular renovation was the choice to paint the doors. Victoria chose Accessible Beige by Sherwin-Williams for the doors and updated the door handles as well.
5. A Classy Kids’ Room
As a mother of two, Victoria wanted her daughter and son to have a place to play and sleep in the RV. She converted the master into a room for the kids. (She and her husband take the sofa bed in the living room!)

She used Cherry Taupe by Valspar for the doors and cabinets in the kids’ room and painted the bottom half of the wall using the same color.


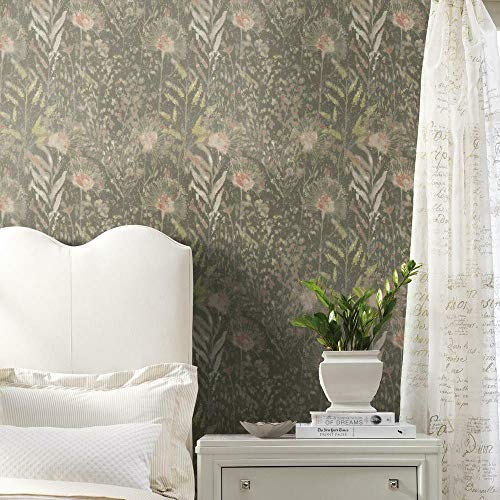
Adding patterned wallpaper to the slideout next to the bed created a fun accent wall.
Recreate the look:
- 1 roll - 20.5 inches wide x 16.5 feet
For extra storage for toys and books, a cube storage shelf was added—still leaving plenty of floor space for play!

- CUBE ORGANIZER: 6-Cube design with six square, cube openings for horizontal or vertical display orientation
6. Patterned Powder Room
One common question when renovating an RV is if you need to remove existing wallpaper before painting or hanging your own. The answer for most renovators is no.

You can paint or wallpaper directly over your RV walls—as long as you clean them properly first so that paint and wallpaper adhere properly.
In her bathroom, Victoria hung this beautiful wallpaper (found on Amazon) right on top of the existing wallpaper.

“I caulked all the seams with clear caulk after we finished,” Victoria added. This is to help the wallpaper hold on the wall even in a humid, steamy bathroom.
Get the wallpaper:
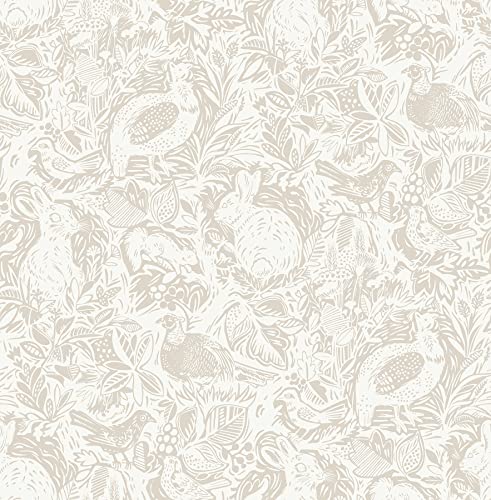
- Neutral cream forest removable peel and stick wallpaper
How long did this renovation take?
The entire renovation took about four months.
“My husband works full time and [we] had our kids with us every day we worked on it. If we didn’t have kids, it would have taken us maybe 3 weeks lol,” said Victoria.

We love how Victoria and Chaz updated their fifth wheel for their family! This contemporary RV look is a classic choice that really makes it feel like a warm and welcoming home.
What do you think? Drop your questions and thoughts in the comments!


Alyssa Padgett is the author of the best-selling book, A Beginner’s Guide to Living in an RV. She loves all things #RVlife and travels full-time around the globe with her family of four.


