How to Give the Lamp Shades in Your RV a DIY Makeover
This post may contain affiliate links.
I thought I’d share with you an idea I came up with for changing the appearance of the wall lamp in my RV by making easily removable lamp shade covers–kind of like a slipcover for an old lamp. 🙂
This idea is a wonderful way to decorate a camper or motorhome without making any permanent changes to the factory decor. You can make a cover to match every holiday for seasonal decor that takes up very little storage space, and no sewing is required!
Originally I had planned these covers as a way to change the look of my wall sconce without replacing the shade, but when I held the fabric up to see how it would look, I found that the streaked design showed through and interfered with the pattern of the fabric.
That shouldn’t be a problem for you if your lampshade is a light, solid, neutral color, but if you have the same problem I did, you might want to replace it. Unfortunately, I wasn’t able to find a replacement shade that fit my wall sconce, so I ended up removing the hardware from my old lampshade and using it to create a new lampshade by cutting up a cheap white shade I purchased. I wrote about that process in another blog post.

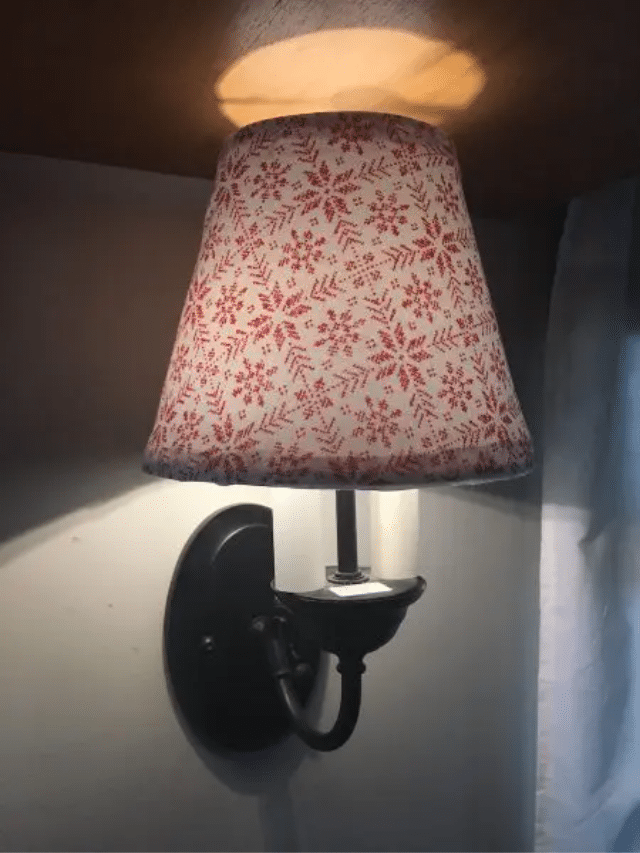
Here is my lamp with its new shade – a blank canvas for a pretty cover. 🙂

Step 1: Making a Pattern Using the Old Lampshade
The first thing I did was use a pencil to trace the shape of my lampshade onto the back of my fabric using my old lampshade as a template. If you didn’t cut up a lampshade, you can use your lampshade to make a template by following the process described in this blog post about an idea very similar to mine except that I didn’t glue my cover on as I wanted to be able to easily remove it.
It’s very important that you don’t trace your pattern too small, or else the cover will not fit. “Measure twice and cut once,” as they say.

Step 2: Cutting the Fabric
Next, I cut out the shape, leaving about half an inch of room all the way around to fold under. Leaving enough room is especially important on the ends; you do not want to end up with a cover that doesn’t quite reach all the way around your lamp shade!

Step 3: Finishing the Fabric Edge
After that, I used my iron to press the fabric down along the pencil line.

Then I “hemmed” the cover by gluing the folded edges down with my hot glue gun so that it would stay folded.

After gluing all four edges, I snipped off the excess on the corners so that the fabric would lay flat.

Here is the completed, “hemmed” lampshade cover.

Step 4: Attaching the New Cover to the Lampshade
The next step was attaching it to the lamp in a way that would be easily removable.
My first idea was to use Velcro. Let me show you how that turned out. After I finally wrestled it on, I took a long, hard look and thought, “Nope.”

So next I turned to my trusty friend, clear acrylic double-sided tape. I talk about this stuff so much on this blog, one might think I am a paid shill for the company, but no…I can only hope that someday my loyalty will earn me a free lifetime supply of the stuff. Because my 37-foot roll has almost run out.
So here’s how this stuff works….
First you wrap it around the top and bottom of the lamp shade.


Then you peel off the red plastic backing. The actual tape is stretchy and gel-like, like the stuff that’s used to stick a new credit card to a piece of paper for mailing.

Then, you wrap your cover around the lamp shade and press it down on the sticky parts.
This part was a bit tricky. I kept having to readjust to get it to fit right and lay flat. For some reason it reminded me of putting clothes on a doll.

But I finally got it looking how I wanted it.

And here it is on my lamp.

Step 5: Making Multiple Covers
However, it wasn’t Christmastime yet, so I made another one.

Removing the first cover was very easy, and the acrylic tape was still sticky enough to re-use for the other cover. But if at some point the tape stops being sticky, it’s very easy to pull off and replace.
Ta-da!

Ashley Mann spent three years living full time in a 38-foot, 5th-wheel RV with her husband Josiah and their cat, Kitty. Her favorite thing about RV life is the challenge of finding the perfect way to organize a space, and she loves seeing all the creative and clever ways people come up with to customize their RVs.




How clever! I’ll have to try this. Lamp shades can get so expensive and this is such a great idea. Thanks for sharing!
Glad you found it helpful!
I am going to try this once I can find a fabric that I like. Great idea and thanks for sharing!!
Dear Ashley, I don’t have an RV but sometimes I have the feeling that my apartment might as well be one for the lack of space I contend with (not to mention stuff). Nevertheless, I learned a lot about lampshade structure and construction for which I thank you. I’m also looking forward to reading through your other suggestions for small spaces like RVs.
Hi Ruby, I’ve lived in small apartments before too and actually often think while writing these articles that the ideas could work in any tiny home! I’m glad you found me and that you appreciate the ideas! 🙂
genius! Thanks for providing the solution I was looking for 🙂 lampshades are so expensive and I get bored with stuff – so this is perfect.
So glad my project was helpful to you! 🙂 Thanks for your comment! <3