
The Top 5 Best Options for Skirting for Trailers (Plus 3 Trailer Skirting Ideas We’d NEVER Recommend!)
This post may contain affiliate links.
If you’ll be living in an RV during the cold winter months, you’ve probably started to consider RV skirting options. Skirting for trailers is crucial to block out cold air and keep your camper warm.
So, how do you skirt an RV? In this article about trailer skirting ideas, we’ll share the most popular options, what to avoid, and how much you’ll need to budget. Let’s get started with why this extra step and added cost of RV skirting is worth it.
Why is skirting for trailers important?

While trailers are meant to live outside, it doesn’t mean they are immune to the harsh conditions of winter. Skirting your RV can protect valuable systems and is necessary for anyone living in an RV through the cold season.
The first benefit of skirting is that it will reduce draftiness in your RV. Skirting will prevent cold winds from blowing under your RV and trap warmer air inside. If your RV floors feel cold, skirting can help prevent heat loss and keep you from needing to run your heater.
The second benefit of skirting is protecting your water-related systems. If you live in an RV and need to use hoses and tanks, skirting can keep the undercarriage warmer and protect these systems from freezing.
But the biggest benefit to skirting for trailers is that it can save you on the cost of electricity and propane needed to warm up your RV on a cold winter night. While some skirting options are expensive, you can balance out these costs by saving on your heating bills.
Skirting Options for RVs
We see many different materials recommended for skirting your trailer, but not all skirts are created equal! There are a few we recommend avoiding.
What Not to Use
1. Hay bales or Straw
Hay bales or straw are commonly recommended as the cheapest way to skirt a trailer. However, these options will attract unwanted rodents. Additionally, it’s a major fire hazard. Wet hay can literally “spontaneously combust!” We do not recommend considering this path.
2. Bricks or Cinderblocks
Stacking bricks or cinderblocks is another common recommendation for trailer skirting. However, it’s difficult to seal bricks properly to cut off airflow fully unless you have masonry skills. Any gaps or holes left visible in the blocks or bricks will attract mice.
Plus, bricks or cinderblocks are a more permanent option and would make moving a trailer or accessing an RV’s undercarriage very difficult.
3. Particle board or Plywood

Plywood is an attractive and affordable option for RV skirting. It’s most commonly used by people who live in trailers and never intend to travel.
However, moisture will slowly deteriorate the wood if you’re in an area with lots of rain or snow. Moisture in an RV can cause serious damage, so a moisture-wicking material will be a better option.
Best Trailer Skirting Options
1. Foam Board Skirting
Foam board skirting is one of the least expensive options for RV skirting and is also highly effective. On a budget, this is the option we recommend of all the trailer skirting ideas we’ve come across.
Foam board is inexpensive and can be purchased at your local hardware store (or at Home Depot or Lowes). Before heading off for supplies, take measurements for the parts of your trailer you want to skirt. The biggest thing to remember as you measure is whether you’d like any parts of your undercarriage to be accessible. Pipe or tank access might mean cutting custom sections to allow for maintenance and use.
To get an idea of what this project entails, check out our tutorial video:
This will be a DIY project and will take the better part of a weekend to install, so it’s best to plan on completing this project before the end of October when below-freezing temperatures will make it difficult to adhere the tape.
For a full list of materials needed, costs involved, and how to complete this project on your own, check out our full tutorial on how to create your own foam board skirting (for about $100) here.
The biggest con of foam board skirting is its environmental impact. Foam board cannot be easily recycled, and if you transport your RV, it can be difficult or impossible to pack up and reinstall it at your next location.
But if you’re planning to keep your trailer in one place, foam board is durable to last multiple seasons and can even help keep your RV cooler in the summer.
2. Vinyl Skirting
There are multiple approaches to vinyl skirting: professionally installed kits, self-installed custom kits, and a DIY option. All will effectively seal off your RV and keep your RV warmer, but each has its pros and cons.
Professional Custom Vinyl Skirting
For professionally created and installed RV skirting, you’ll want to look at companies like TheSkirtingPros.com, CustomSkirting.com, RVSkirting.com, or CustomCanvasUnlimited.com. Because these companies install the skirting themselves, you’ll need to be located near them, willing to travel, or find a local skirting company. Just Google search “custom RV skirting near me” to find options.

These professionally installed kits typically start around $1,500, making it one of the most expensive skirting options.
Being professionally created and installed also means your skirt will be easier to remove and reuse year after year, and there’s less of a risk of damage to your RV during installation. The high cost may be worth it if you regularly move your trailer or move it seasonally. With the custom option, you can also guarantee access to which part of the trailer you may need to use throughout the winter.
These high-end skirts will be the most attractive, so you shouldn’t hear any pushback from RV parks about your RV skirting. Some parks can be peculiar about approving or allowing only certain types of skirts!
It may be expensive, but it can save you hours of labor and hold up for years, which may justify the cost.
To learn more about this option and get a quote, we recommend starting with The Skirting Co. Use the code RVinspiration at checkout for $100 off your order.
Self-Installed Custom Vinyl Skirting Kits
For this option, look at companies like EZ Snap Skirting or The Skirting Co. These companies will ship you the supplies you need to install the skirting on your RV.

This is a great way to avoid the stress, hassle, and risk of figuring everything out on your own, and it’s a good middle-of-the-road price point. These skirting experts know the process and will support you to ensure you end up with a successfully insulated RV.
However, you’ll still need to install the skirting yourself, which can take a significant amount of time. Plus, these kits will still cost you around $1,000 to start.
These two companies also have two different approaches to consider. EZ Snap Skirting will send you the materials, but you are still responsible for much of the measuring and cutting.
With a business like The Skirting Co., which only installs within a 250-mile radius of their shop in Indiana, you can order the same professional kit but install it yourself no matter where you’re located. Everything is already measured and cut for you, making the process simpler even though you’ll do much of the work yourself.
DIY Vinyl Skirting for Trailers
DIY vinyl skirting can be very affordable and costs only a couple hundred dollars for a large RV.

For DIY vinyl skirting, you can find old billboards and recycle them into your RV skirting. Check out this article for a full tutorial on how RVer Ashley Mann turned an old Cracker Barrel billboard into skirting for her home.
When discussing the best way to skirt her RV, Ashley shared that while this DIY approach was affordable, it was also challenging.
“It’s a lot of work—not just physical work, but mental work—figuring out exactly what sizes and shapes of vinyl to order to fit around all of the slide-outs and areas of different heights. It’s easy to make mistakes when measuring and cutting that can end up being costly if you have to order more material and pay shipping charges again…don’t ask me how I know!”
Ashley shared that she twice created DIY vinyl skirting for her RV and paid around $500. In addition to the long hours it took to create her own skirting, the vinyl did not last the season and needed to be redone year after year. This is another pro for professional skirting, which can be of better quality and durability.
Each type of trailer skirting has pros and cons. If you opt for DIY vinyl skirting, this tutorial will help you gather the tools and supplies you’ll need.
3. Insulated Tarps
Similar to DIY vinyl skirting, insulated tarps would be highly effective at trapping heat and keeping your camper warm.
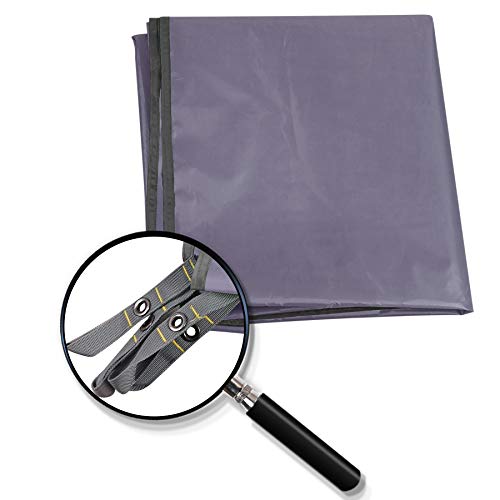
- Reinforced: Tent footprint is equipped with 10 rust proof grommets. Double layer corner tech and heavy duty security stiching to ensure strength and superior quality.
However, insulated tarps are more expensive than vinyl, which can handle cold temperatures well on its own. Vinyl is a good option for below-freezing temperatures, but if you’re frequently encountering temperatures below 0º Fahrenheit, you may want additional insulation or even a heater.
4. Reflectix
Ever popular for keeping the sun out of camper windows, Reflectix is an option for RV skirting. The reflective material will reflect heat back into the undercarriage of your RV and block wind.

- EFFECTIVE RADIANT HEAT REFLECTION – Reflectix Reflective Radiant Barrier Insulation Roll reflects up to 97% of radiant heat, helping maintain temperature control in your home or garage, and reducing energy costs year-round.
But Reflectix also tears easily and can be more easily punctured than foam board or vinyl. Because of its reflective nature, Reflectix may not be allowed in RV parks. (Check with the front office before installing any type of RV skirting to make sure the property manager will allow your chosen type of skirting before you purchase everything!)
You would need quite a few panels of Reflectix to completely enclose a large trailer, so this option can also be more costly.
5. Inflatable Skirting (for Travelers!)
This last option is the best trailer skirting idea we’ve seen for travelers. None of the above-listed skirting options is conducive to someone actively traveling in an RV. In fact, for many years, there were no travel skirting options.
But a recent player in the game came up with an inflatable trailer skirt called AirSkirts. These inflatable skirts are made of heavy-duty, puncture-resistant vinyl that takes the shape of your trailer as it’s inflated. You inflate the skirting with electrical pumps, and the product will conform around the space under your RV, protecting pipes and trapping heat.
Because of this process, the skirt is held in place from the pressure of the RV. This means no tools are needed, and you won’t be drilling or adhering anything into the frame of your RV. Breaking out the power tools or even heavy-duty adhesives can be stressful and lead to damage (especially if you go the DIY route). Avoiding that hassle and potential damage easily makes AirSkirts the least invasive skirting option.
AirSkirts can be the most expensive option on this list. However, if your RV needs to travel regularly throughout the winter, this is the best and only realistic option for skirting.
You can find an AirSkirt to fit your particular brand and type of RV on their website here.
The Best Skirting for Trailers
Based on cost alone, foam board skirting is the clear winner of all the trailer skirting ideas we’ve seen. However, the measuring, cutting, and installation labor can take days of work.
To save time and hassle, choosing an AirSkirt or a professionally installed vinyl skirt can ensure that your RV is protected from damage.
And if you’re traveling, there’s only one reliable option: an AirSkirt.
If you choose to move forward with DIY RV skirting, check out our how-to guides:
- How to Make Camper Skirting Out of Foam Board Insulation
- How We Made $200 Vinyl DIY RV Skirting for Winter
- Airskirts: The Best RV Skirting on the Market?
Read Next: How to Prepare Your RV for Cold Weather


Alyssa Padgett is the author of the best-selling book, A Beginner’s Guide to Living in an RV. She loves all things #RVlife and travels full-time around the globe with her family of four.


We love AirSkirts for how easy they are and EZ Snaps for the low cost!
Could one inch foam pipe insulation be used to snug up the foam board by setting it into the pipe insulation creating a protective wrap around the board at ground contact?