How to Handle the Slide-Out Transition When Flooring an RV
This post may contain affiliate links.
One of the most common projects in an RV renovation is replacing the flooring with luxury vinyl planks. But one thing can make installation particularly tricky: finishing the flooring transition at the edge of an RV slide-out.
When we had new flooring installed in our motorhome, we had to figure out how to install flooring on three different types of slide transitions. It wasn’t easy! In this article I’ll share the solutions we came up with, with pictures of several different types of RV slide-outs and exactly how the flooring was installed on each.
Hopefully one of these five solutions for RV slide out flooring will work for you!
How Other People Handled RV Slide-Out Flooring Transitions
Before I show you how we handled flooring the slide transition in our RV, I’ll share some two common options for addressing this area: carpet.
1. Cover the Transition with a Strip of Carpet
The people who installed vinyl flooring in our motorhome before we owned it used construction adhesive to glue down a wide strip of carpeted plywood paneling to cover the slide transition. You can see how it looked in the photo below:
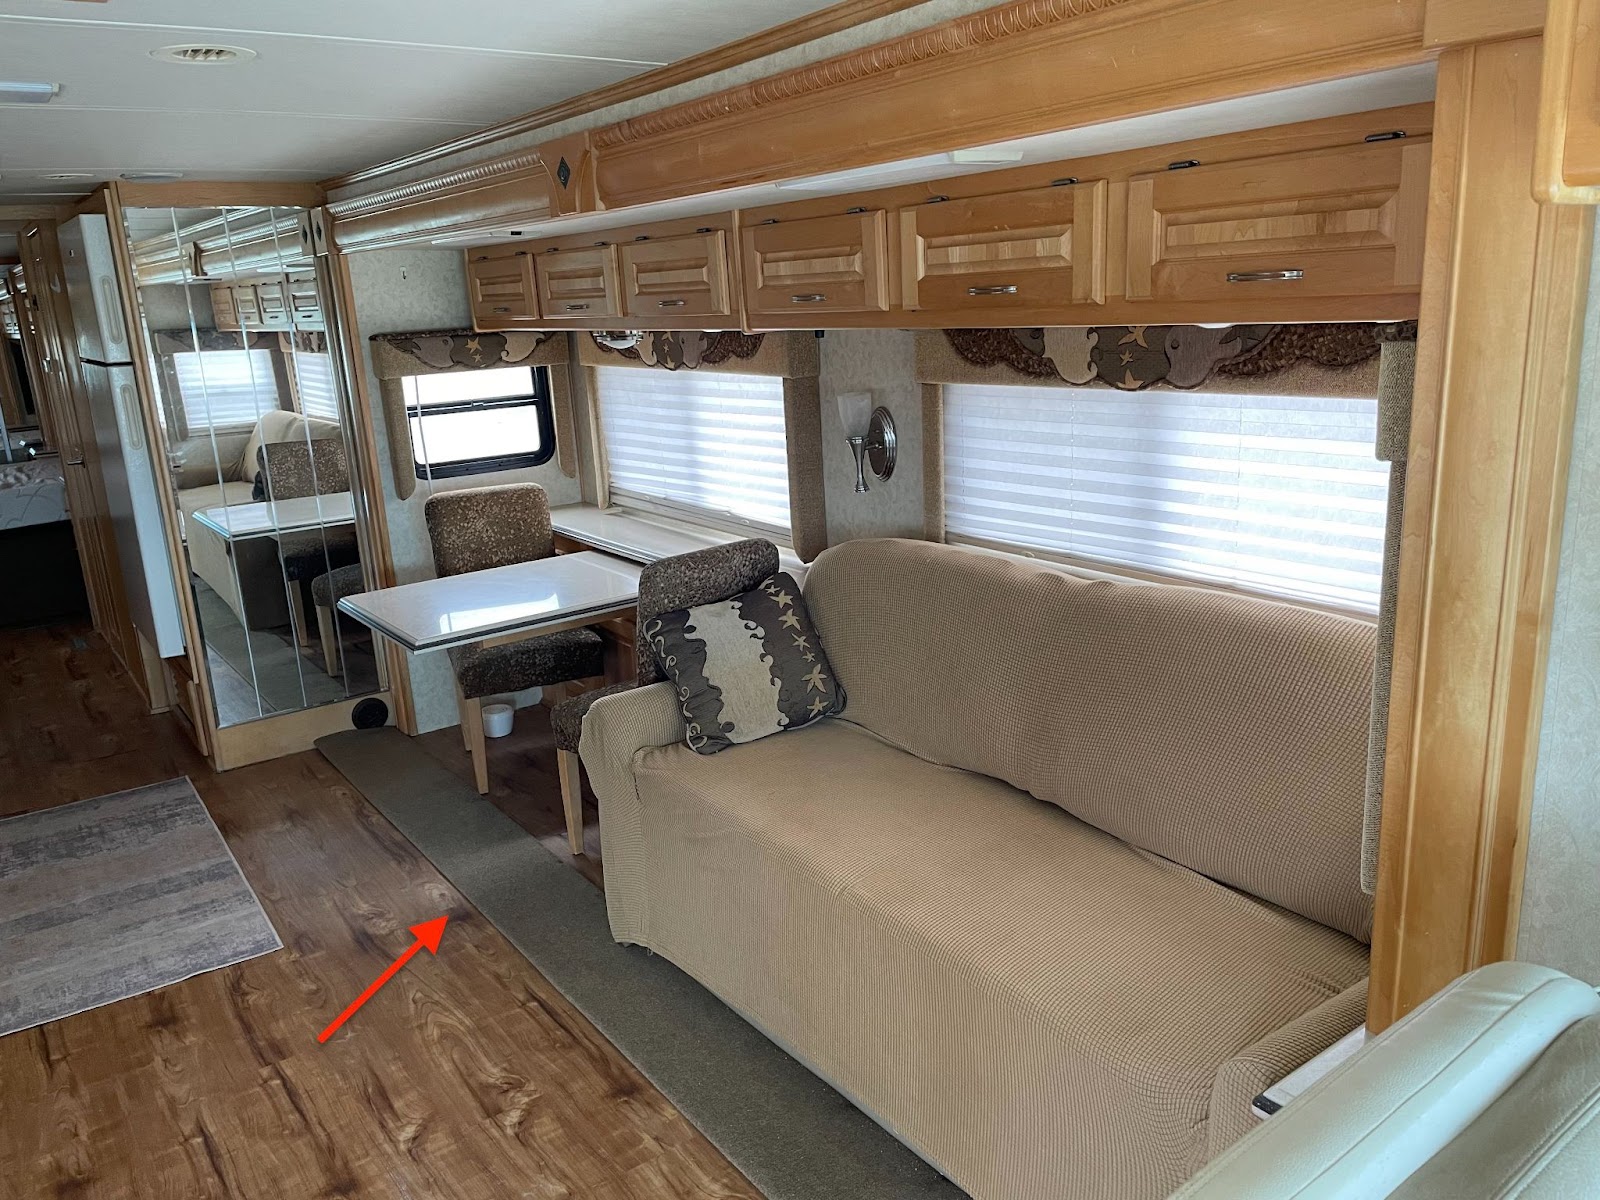
This solution offers an easy way to cover the gap between the main floor of the RV and the floor of the slide-out.
2. Carpeting the Floor of the Slide-Out
Another way to avoid the flooring transition problem altogether is to leave the original carpet in the slides or install new carpet in those areas.
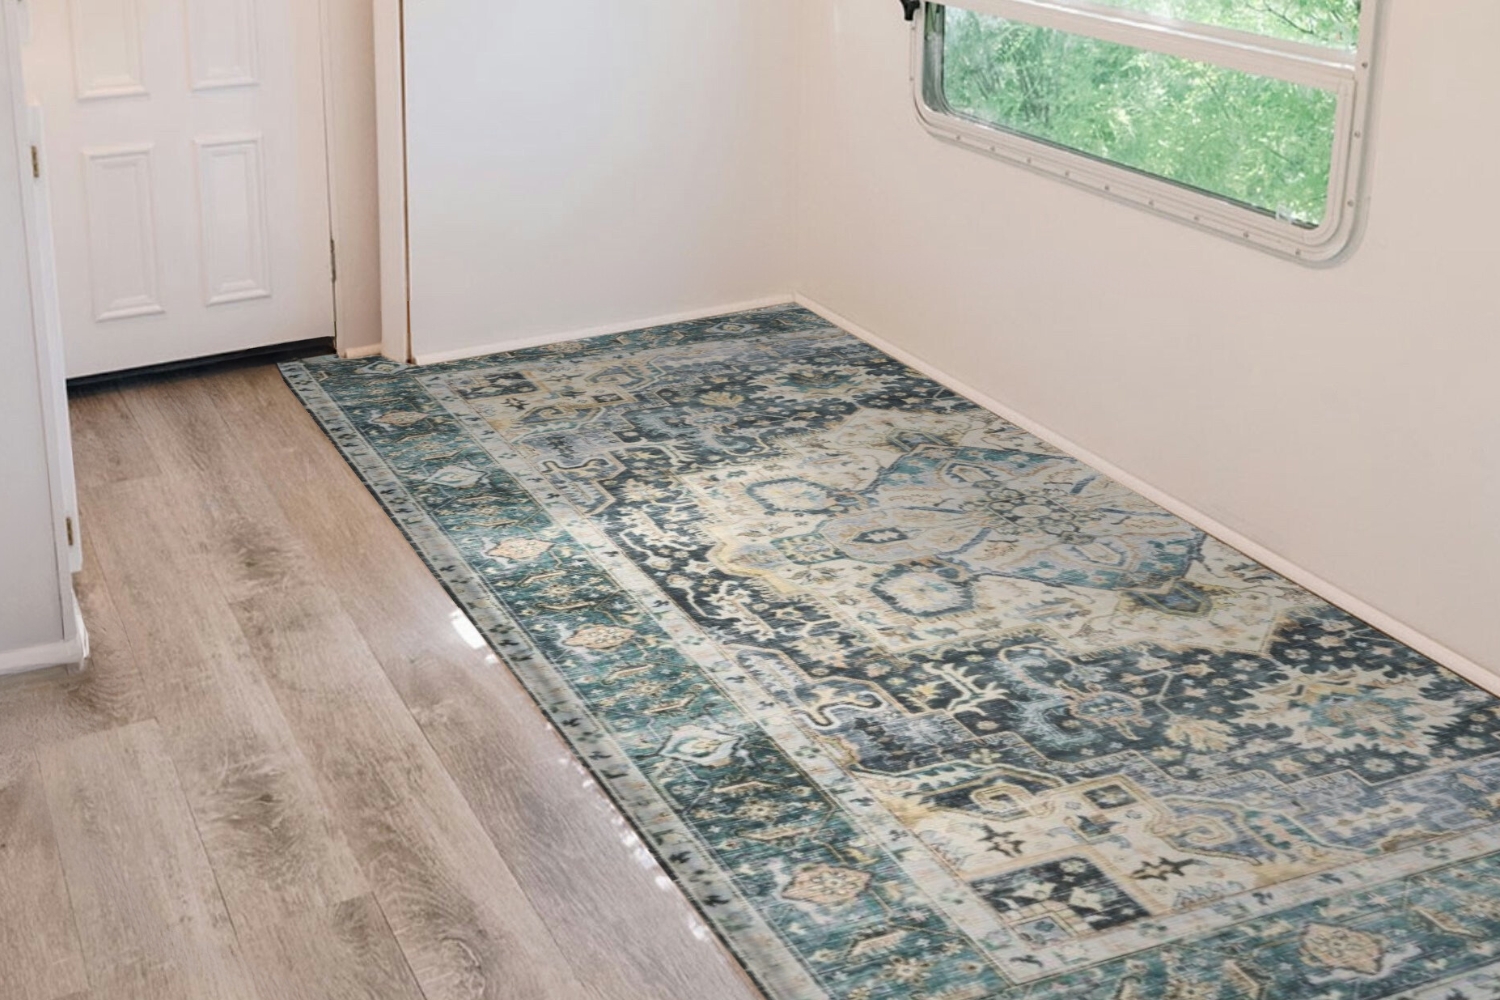
At first, I didn’t love this idea, but I later realized it could be an opportunity to give the illusion of an area rug. One could cut a large decorative area rug to fit inside the slide-out instead of a carpet. Place one of the finished edges of the rug running along the front of the slide.
Here’s a picture I digitally altered to help visualize my idea:
Flooring the Edge of a Raised Slide-Out
A raised slide-out, which I believe is more common, can get a little more tricky.
1. Slightly Raised Slide-Out
One of the types of slide transitions we had in our motorhome was one where the floor of the slide-out was a couple of inches higher than the main floor of the RV. Trimming along the edge to make this transition look good wasn’t terribly difficult.
In this case, the installers were able to run the flooring all the way to the edge of the subfloor and attach stair nose trim along the front edge of the slide-out floor using construction adhesive and a few trim nails.
Here’s the finished result:
2. Step Slide-Out
Slide-out transitions where there is a greater height difference between the slide floor and the main floor can be treated the same as steps by installing flooring on the front of the step and a piece of stair nose trim along the edge.
In the photo below, you can see an example of this type of slide-out transition before the flooring was replaced:
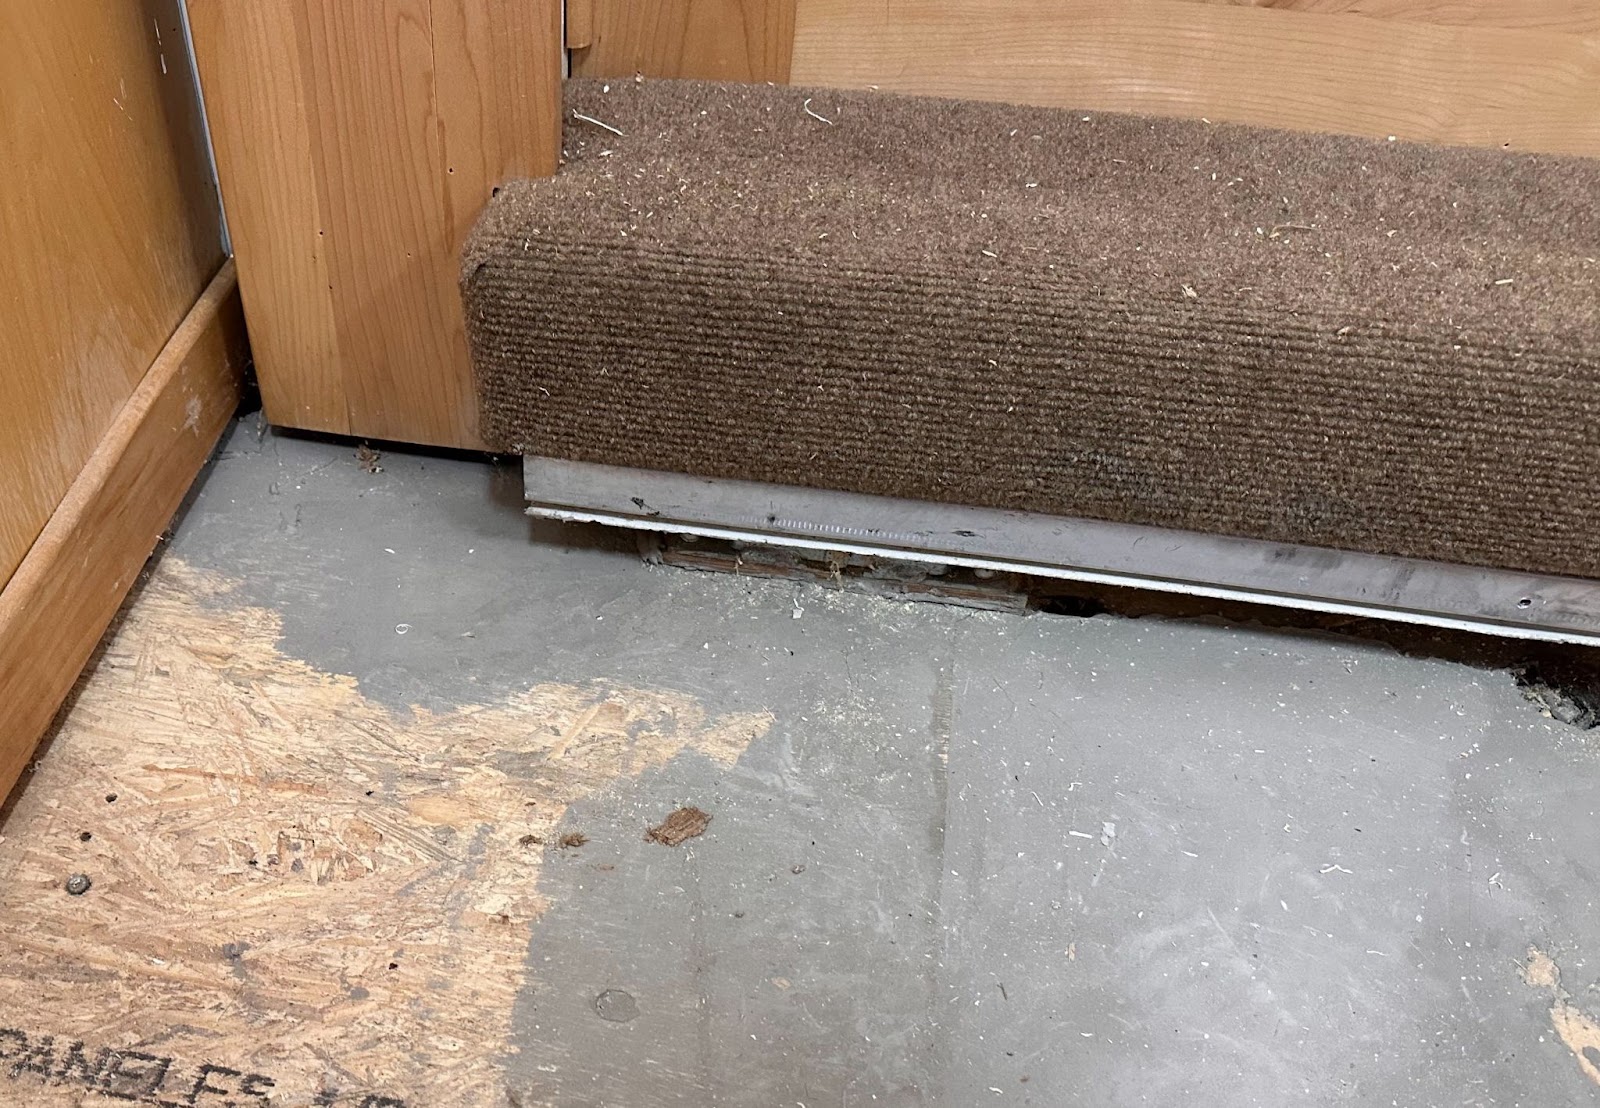
To replace the flooring on this carpeted step, the flooring installers simply removed the carpet, used construction adhesive to apply vinyl flooring to the top and front of the step, then added a strip of stair nosing along the top edge.
Here’s an after photo:

Note: It’s important to cut the piece of flooring that goes on the front of the step short enough that it won’t scratch the floor below it as the slide comes in but not so short that it leaves too wide of a gap.
Flooring a Flush Slide-Out
A flush RV slide-out is the trickiest type of transition to handle because of the gap that the slide-out must travel over, often without much clearance. Here’s a photo that shows an example of what I mean:
What to Do if Your Slide Doesn’t Have Enough Clearance
A problem some people have encountered when replacing the flooring in an RV is when the thickness of the new flooring is too tall for the slide to clear the top of it when coming in.
The best way to avoid this problem is to measure and determine the clearance needed when you shop. Then, you won’t pick a type of flooring that’s too thick.
If you’ve encountered this problem after you’ve already started installing your flooring, you have a couple of options. One option is to raise the height of the trim piece that runs along the edge of the subfloor. If this trim piece sits under the edge of the slide, you may unfortunately have to lift the whole slide-out to access this area, as demonstrated in this video.
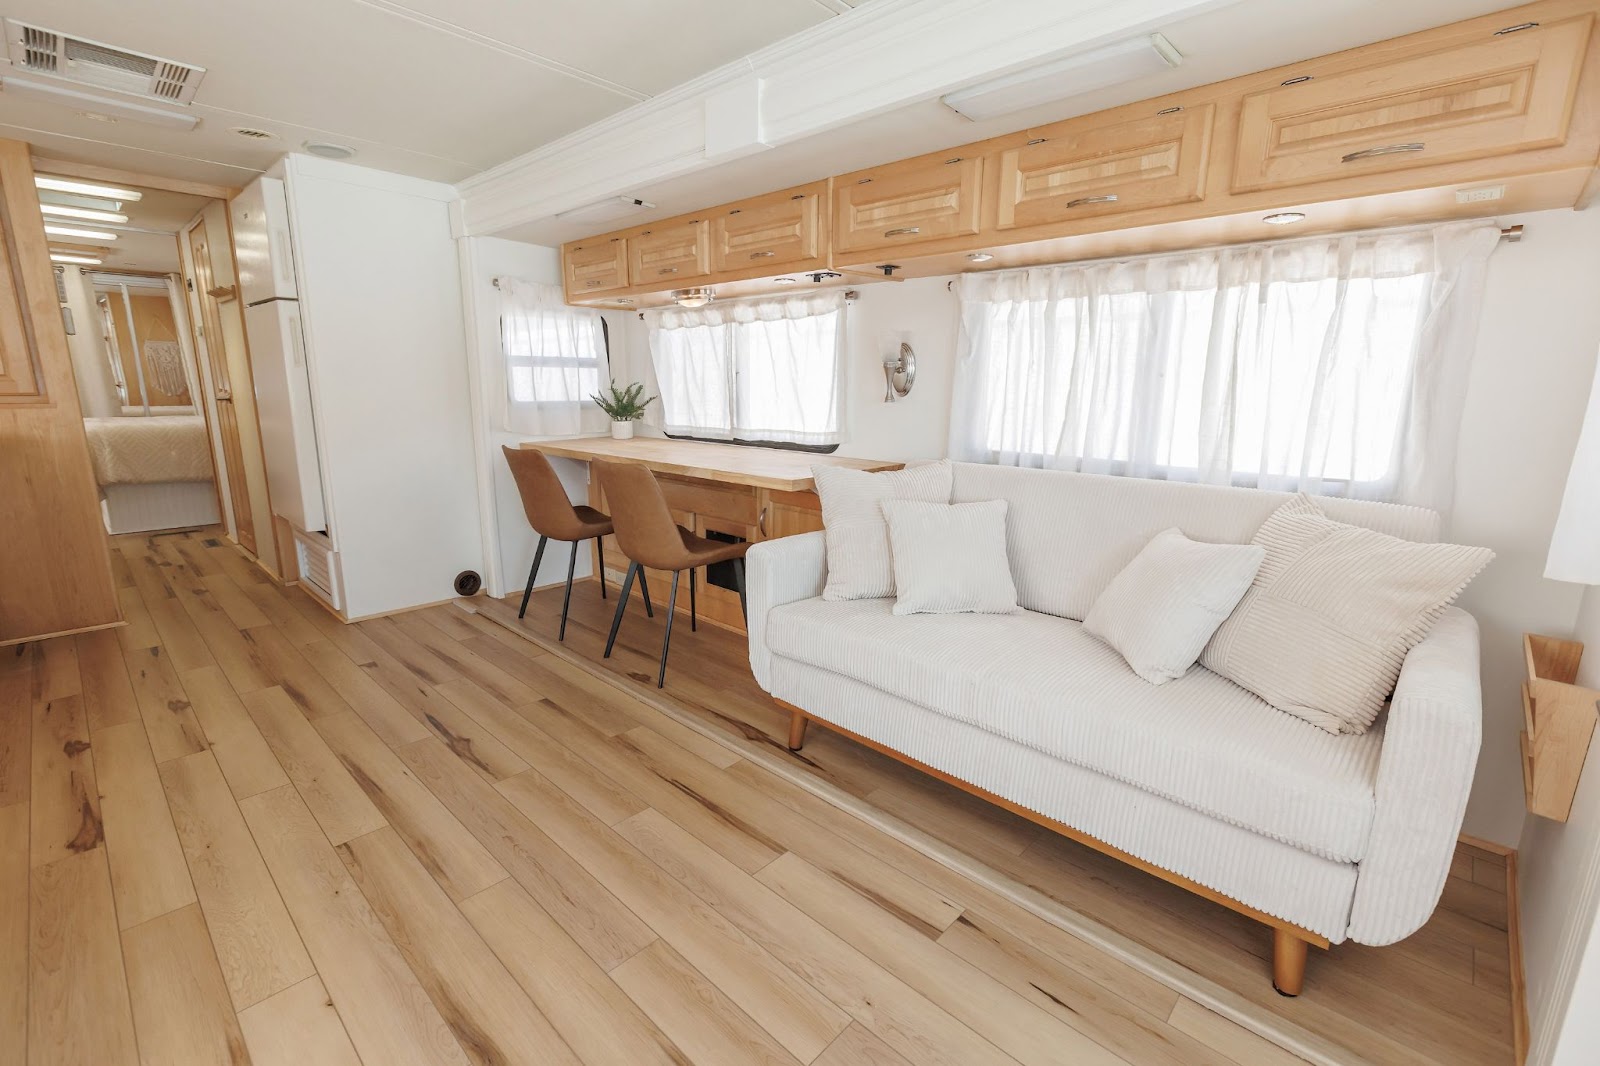
How We Finished the Flush Slide-Out Transition in Our Motorhome
Fortunately, we didn’t have a clearance problem in our RV. Our flooring was thin enough, and there was just enough of a height difference that the slide-out could travel over it without scraping.
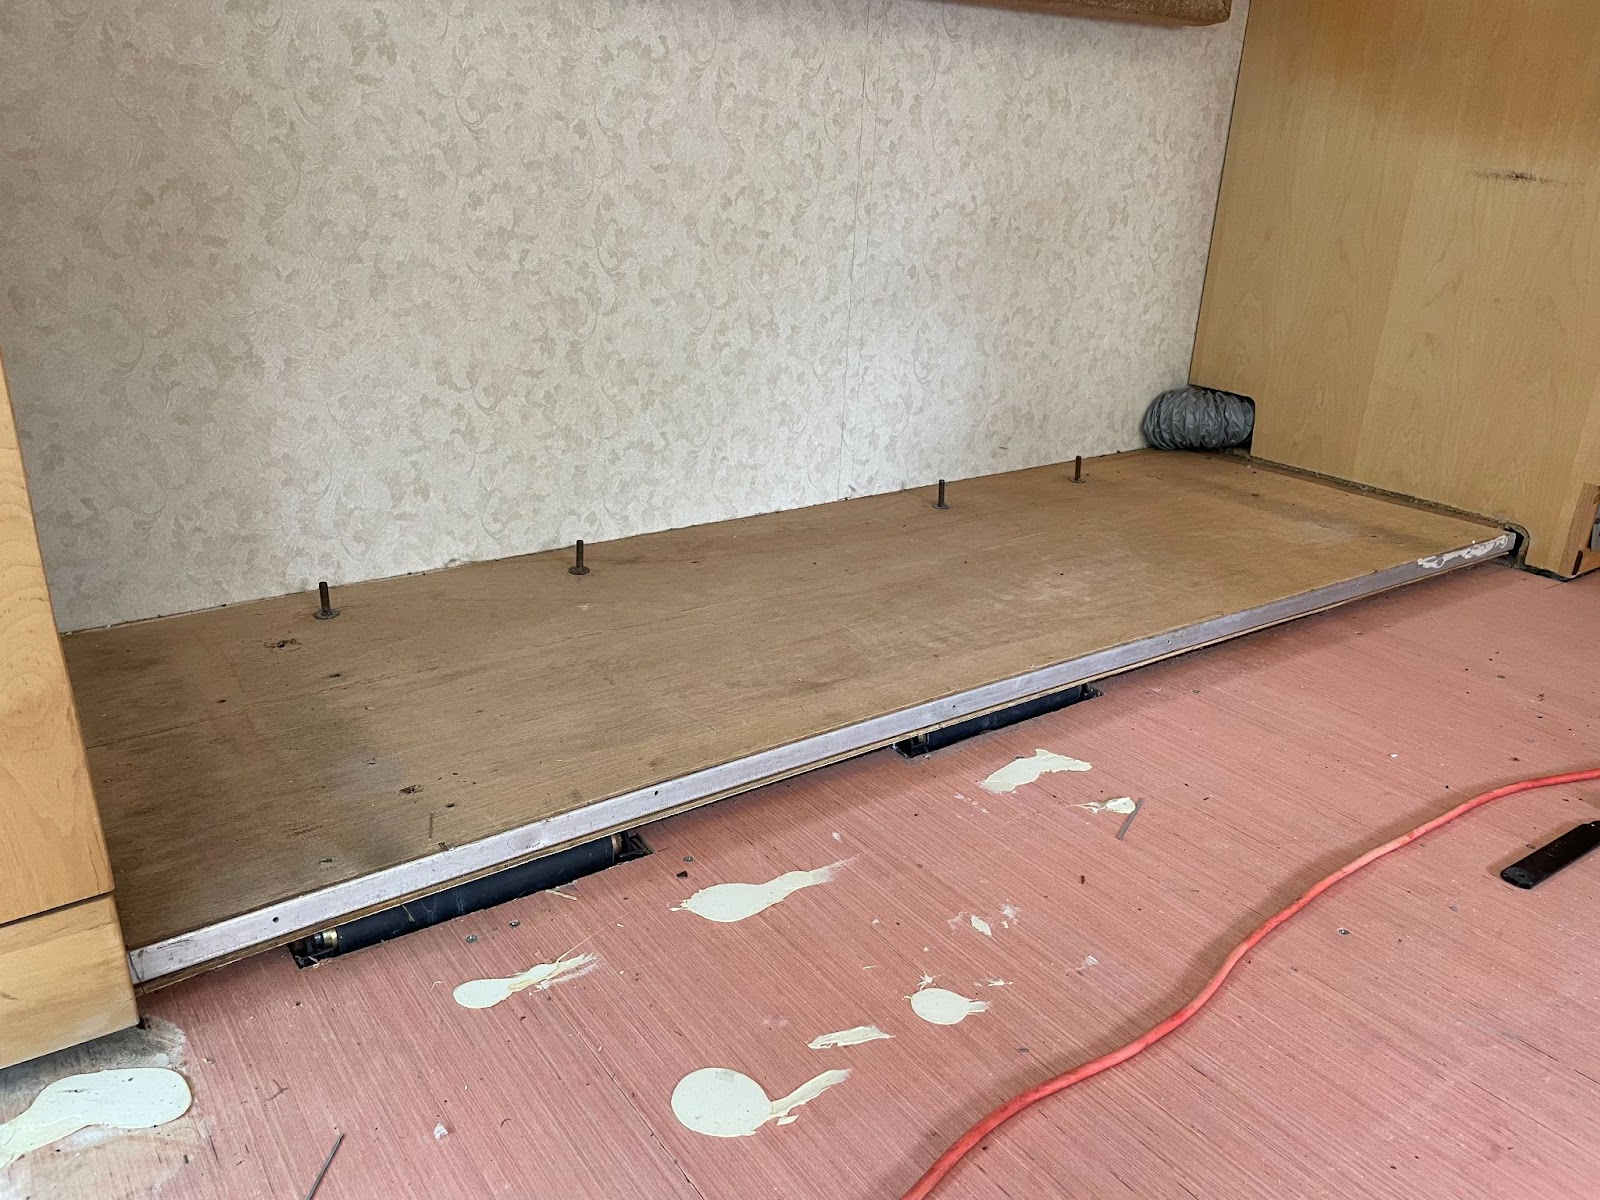
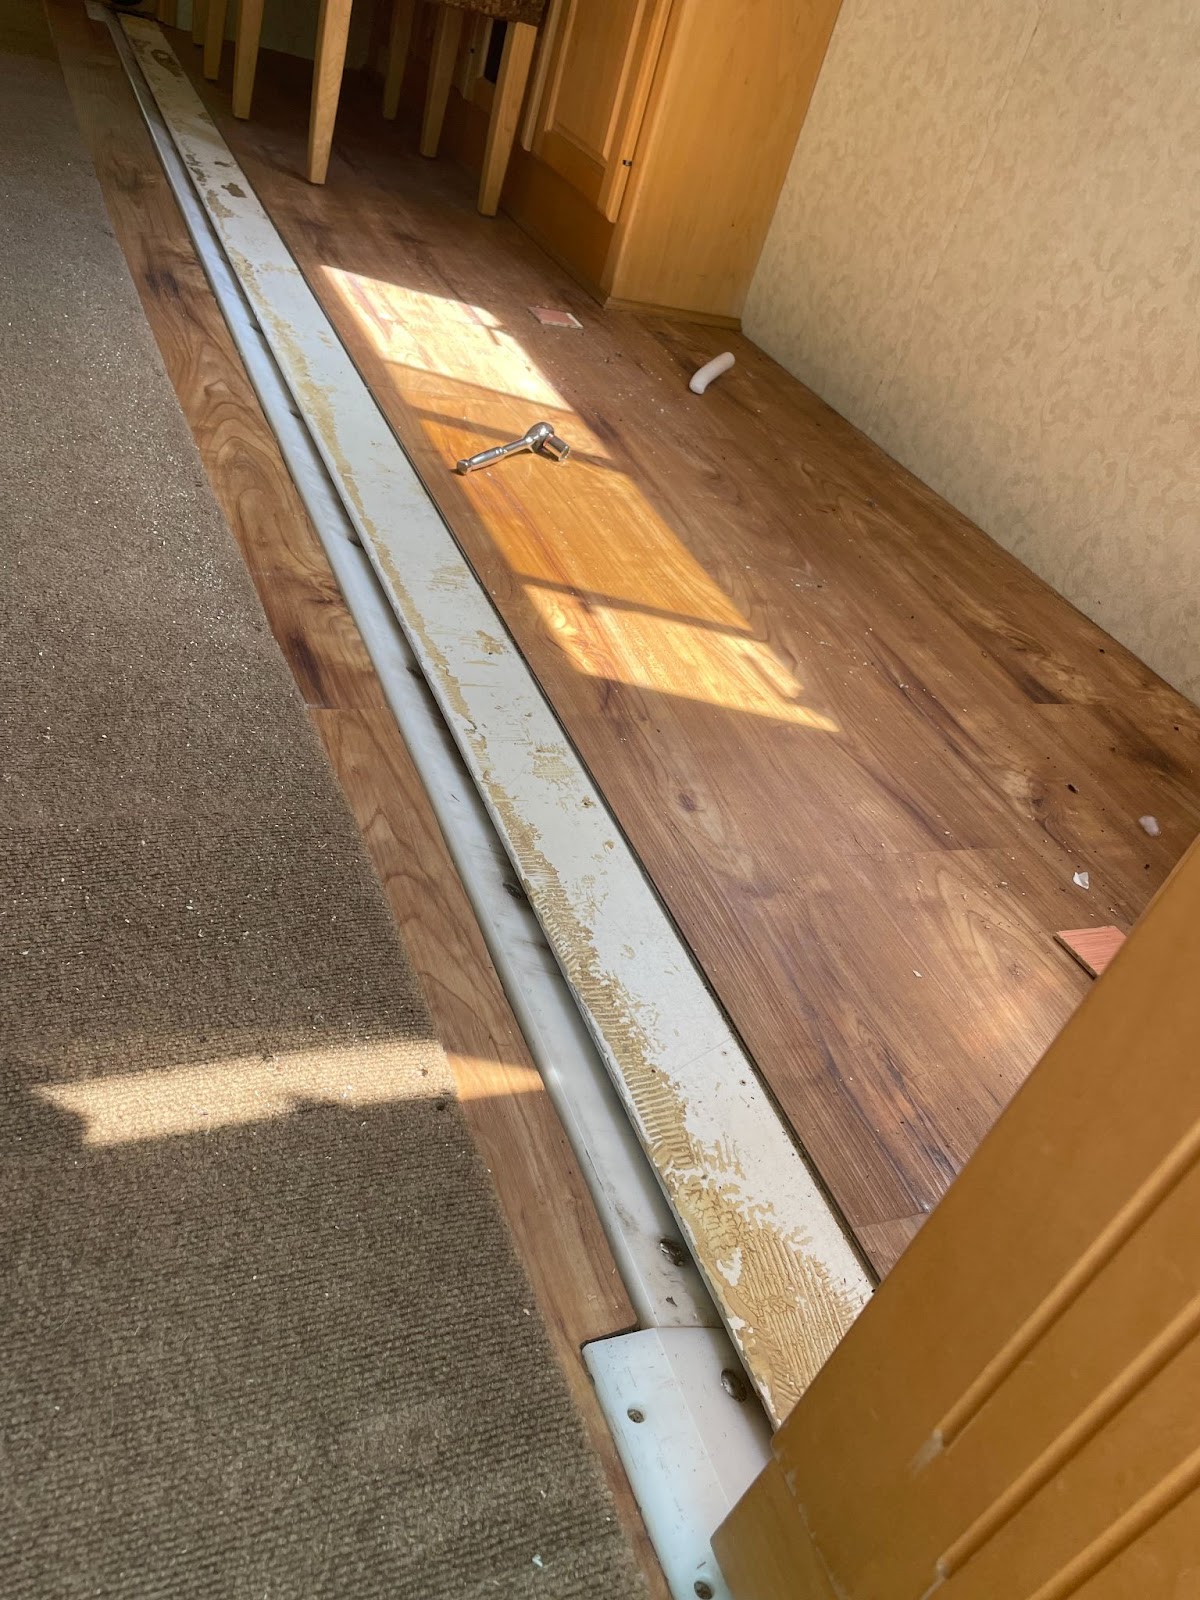
Our flooring installers bolted the flooring to the metal strip that runs along the edge of the RV’s main floor using the original bolts. This made sure there was nothing for the slide to catch on as it came in.
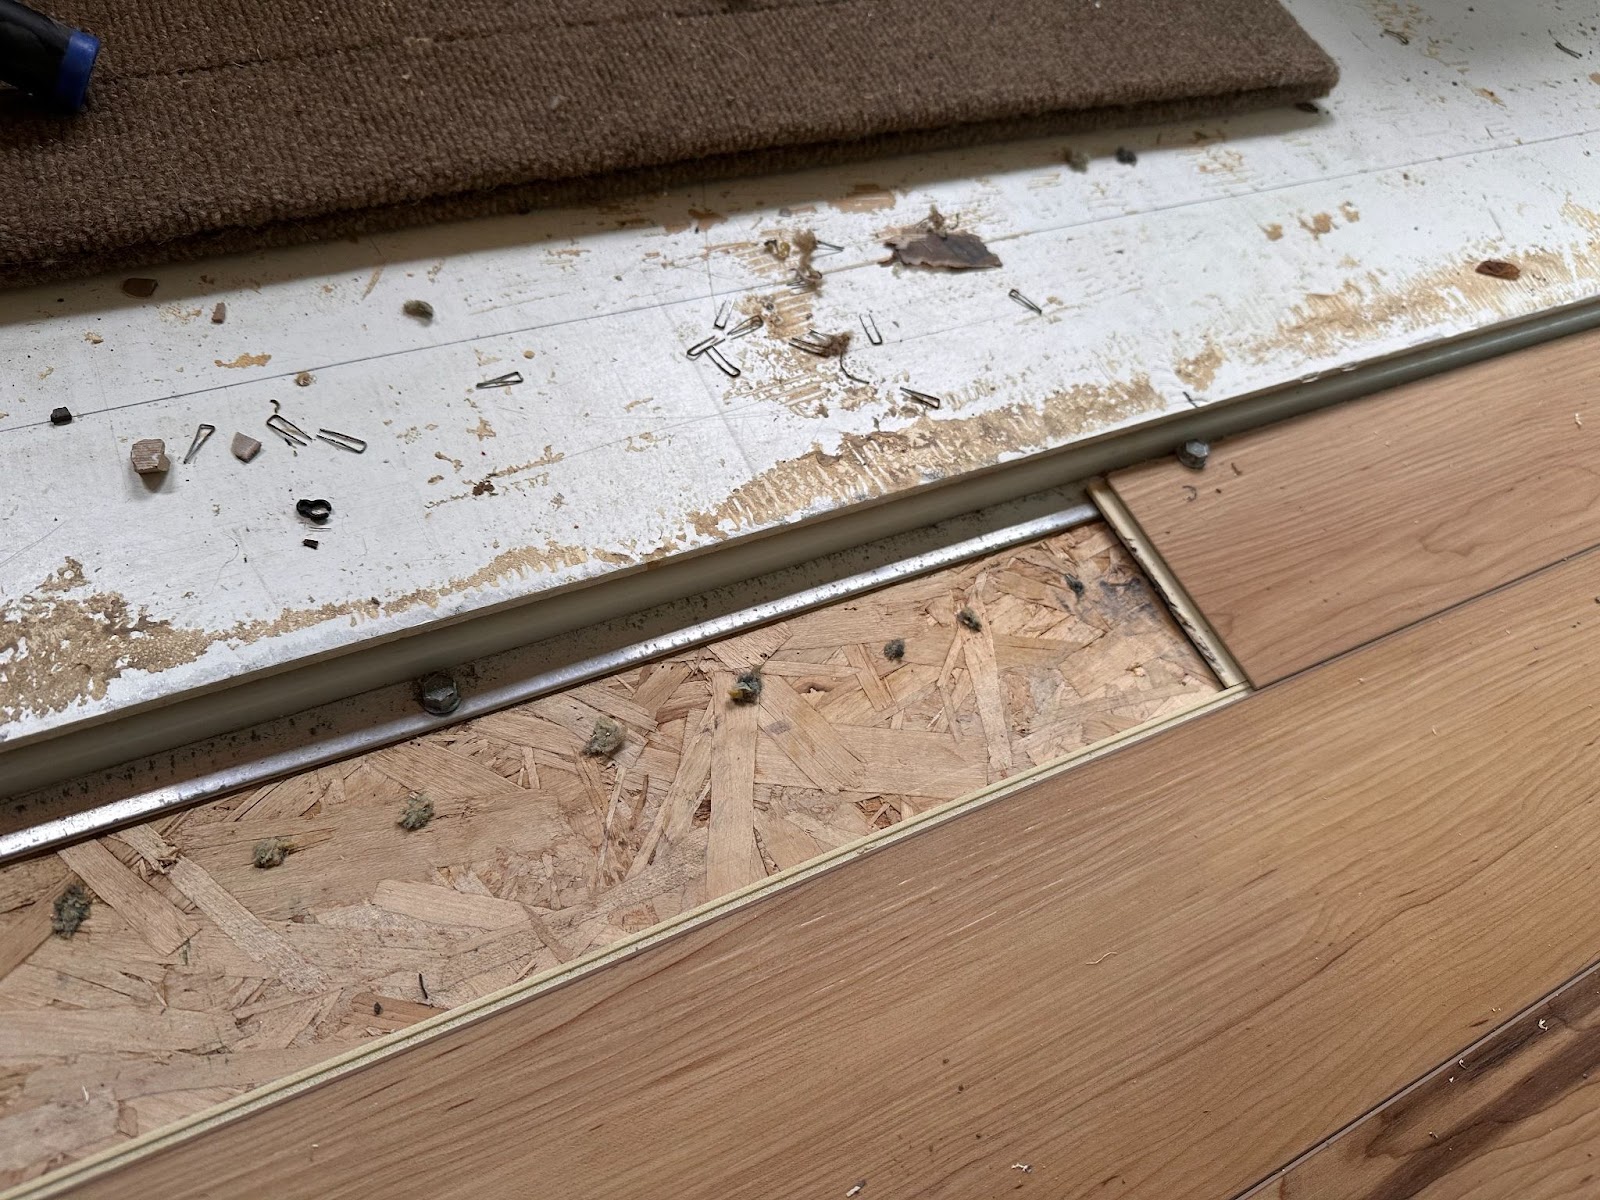
Next, we had to figure out the best way to cover the wide gap between the edge of the slide-out floor and the main subfloor of the RV, as seen in this next photo:
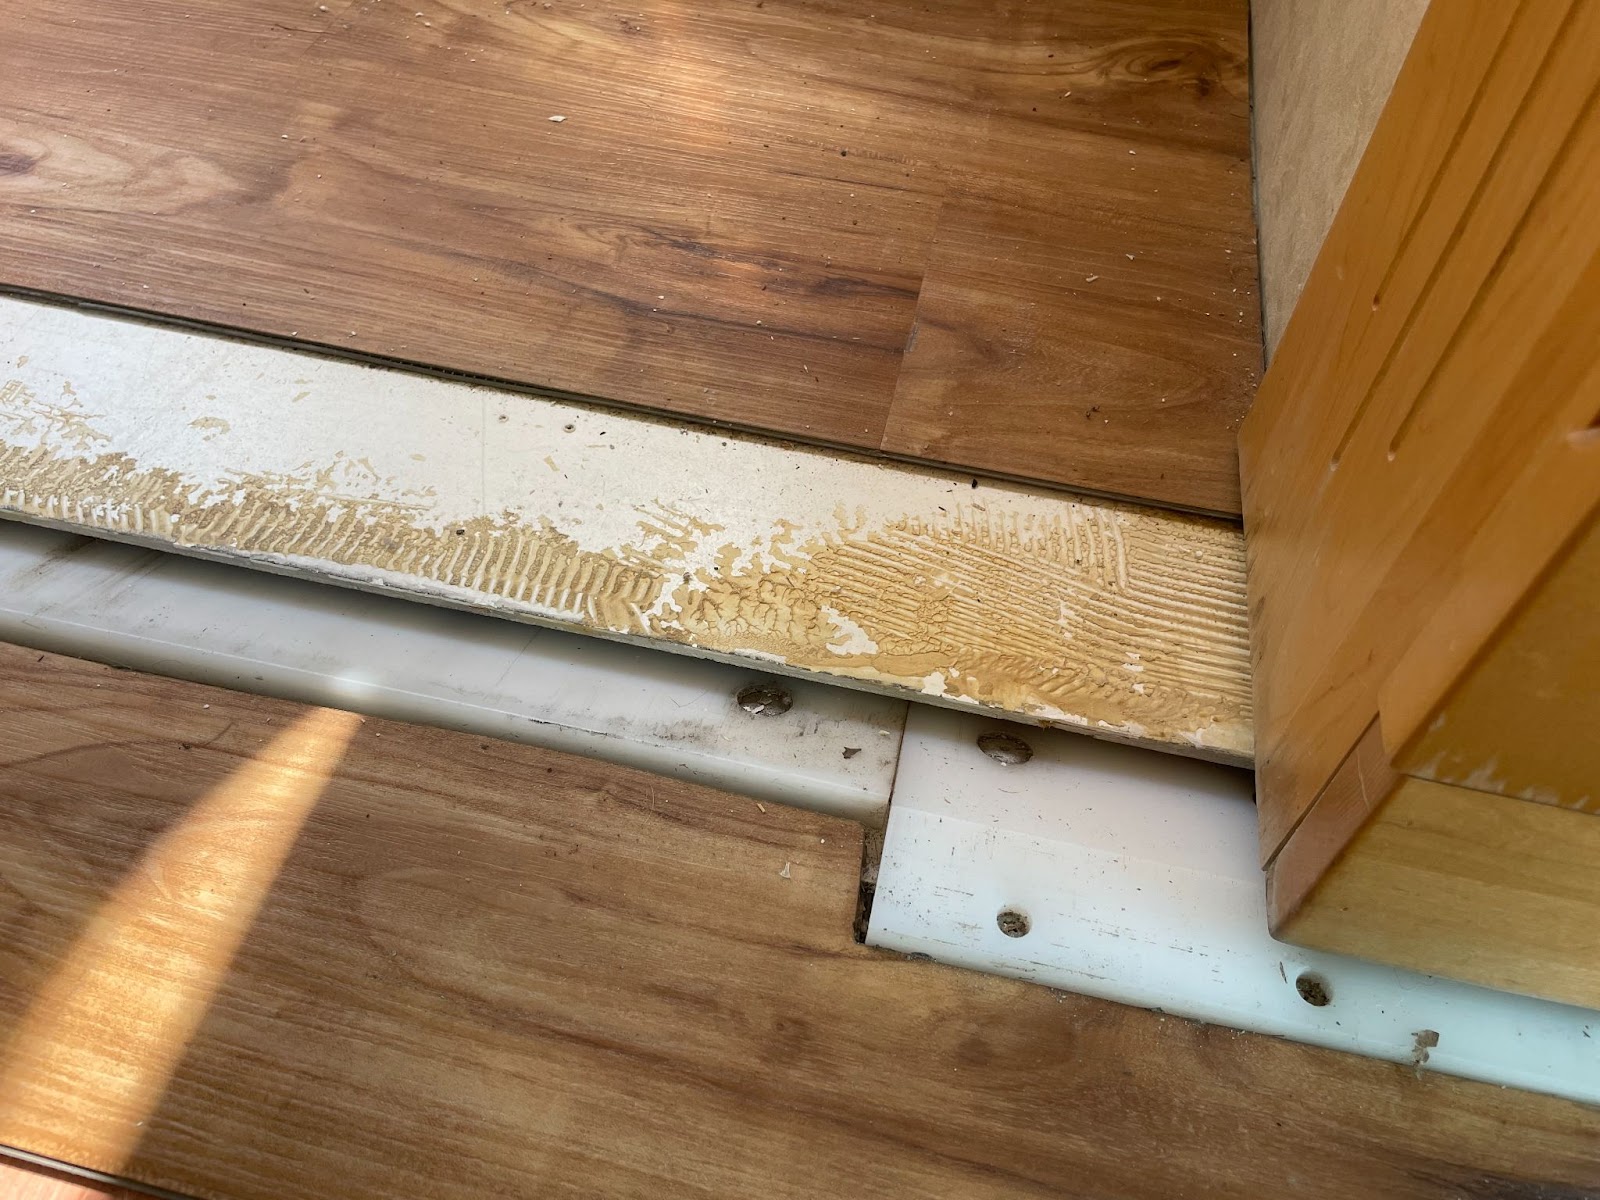
After discussing various ideas, we decided to cut a piece of flooring wide enough that would extend slightly over the edge and cover the gap. Then we would glue that piece of flooring down using construction adhesive to make sure it wouldn’t pop off when stepped on.
In retrospect, I think we should have simply left the edge that piece of flooring uncut and unfinished. I later saw a video on YouTube where someone decided to do that in an RV, and it looked just fine to me.
But at the time, we had the idea of adding a trim piece along the edge of the slide to match the other slides. So, our flooring installers glued a piece of the same stair nosing we used elsewhere in the RV along the edge of the slide.
Unfortunately, this was not a good choice of trim material for the flush slide-out! There was not quite enough clearance under the bottom edge of the trim, and it ended up popping off as soon as we brought in the slide.
Finding a Makeshift Solution
At this point, we probably should have looked for a different type of trim to run along the edge of the slide.
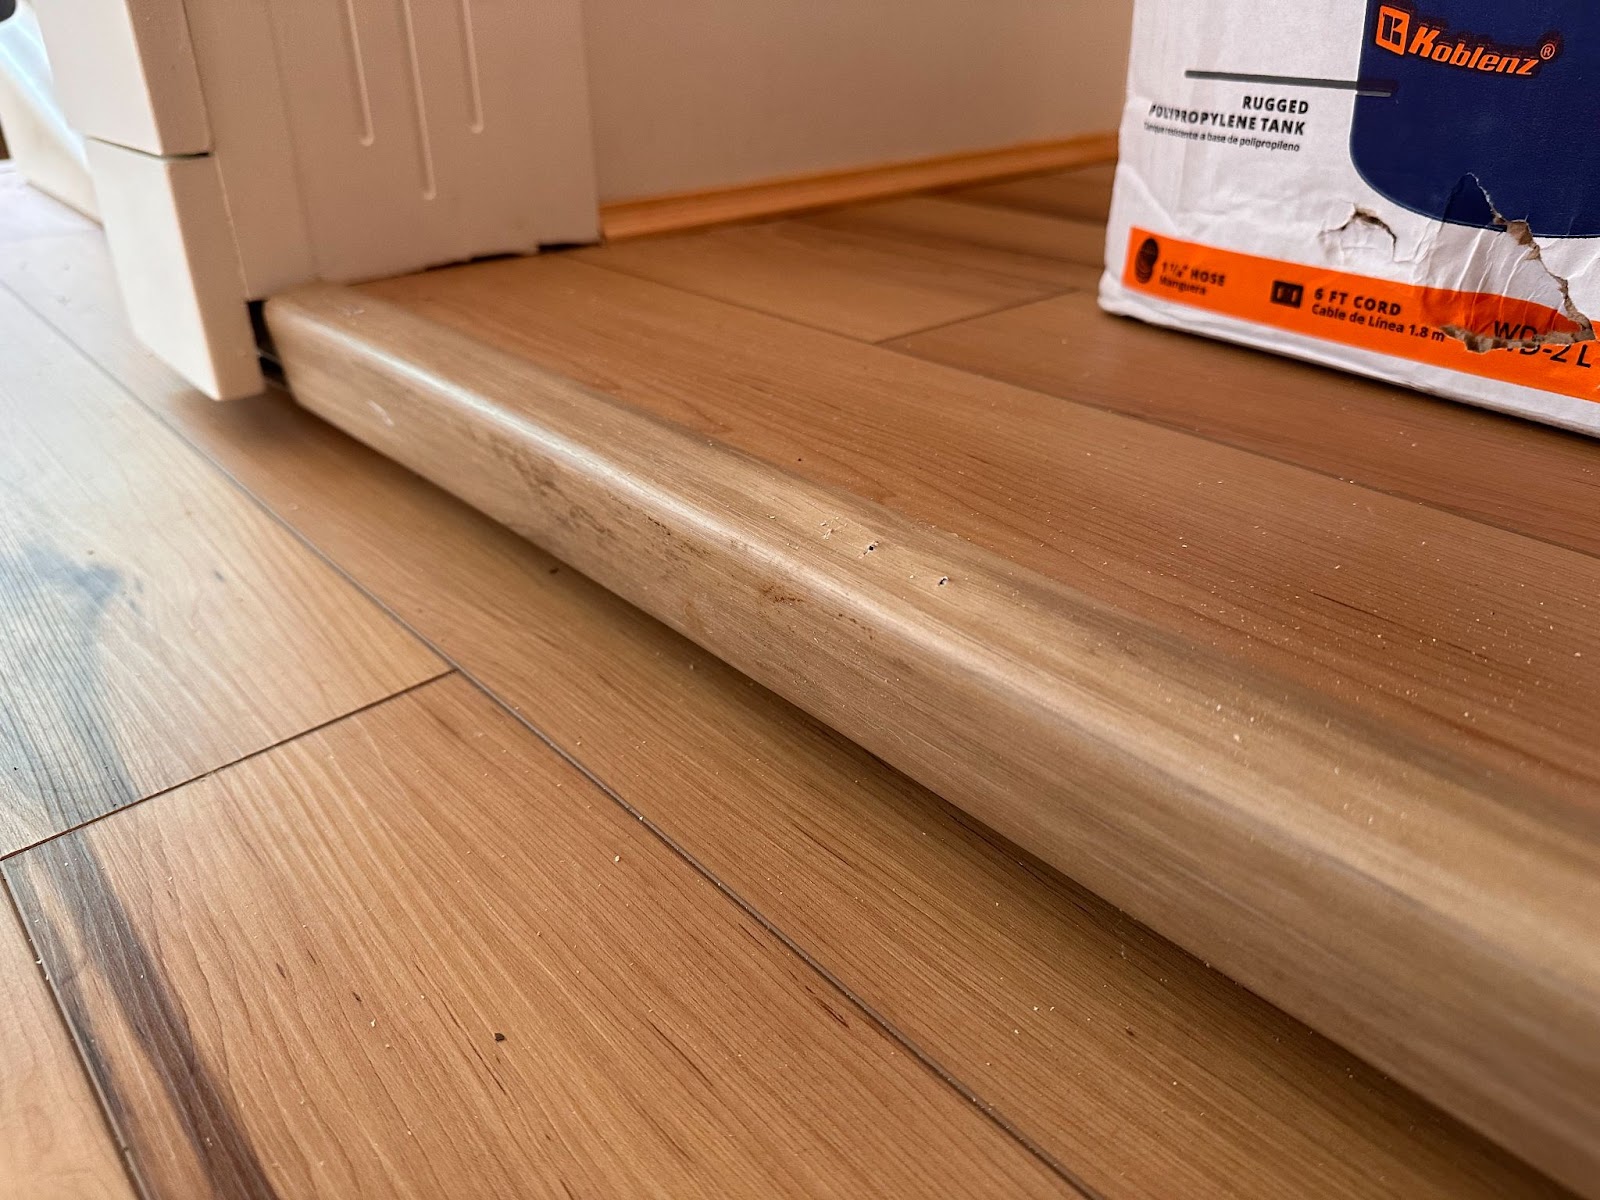
Our installers glued a narrow strip of wood along the edge of the slideout and added the stair nosing. This raised the height just enough for the bottom edge of the trim to clear the floor below.
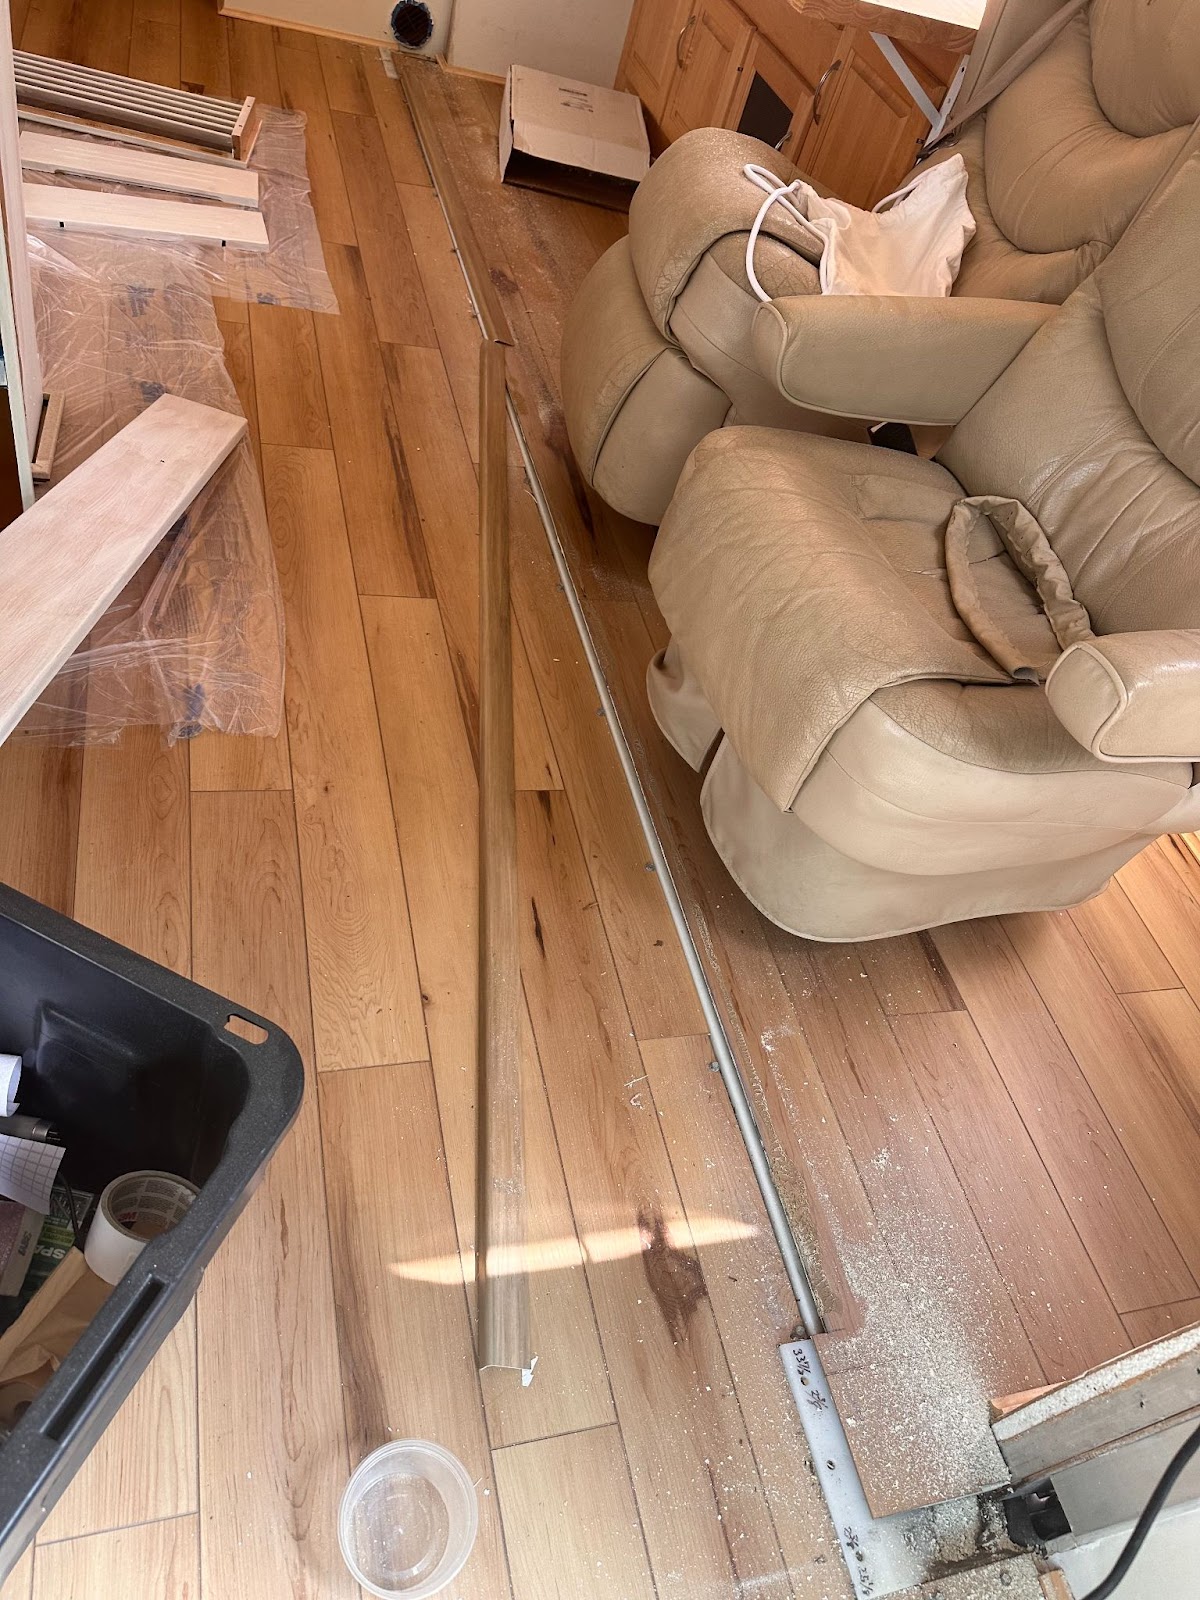
Here’s a photo that shows what I mean. This is looking at the back of the stair nosing from the inside of the slide-out:
I would not recommend this method as it’s a slight tripping hazard, and the glue could fail. But since the edge of this slide-out runs under a table and along the edge of a sofa, I decided it would be okay.
The only remaining issue was this area that wasn’t covered by the flooring:
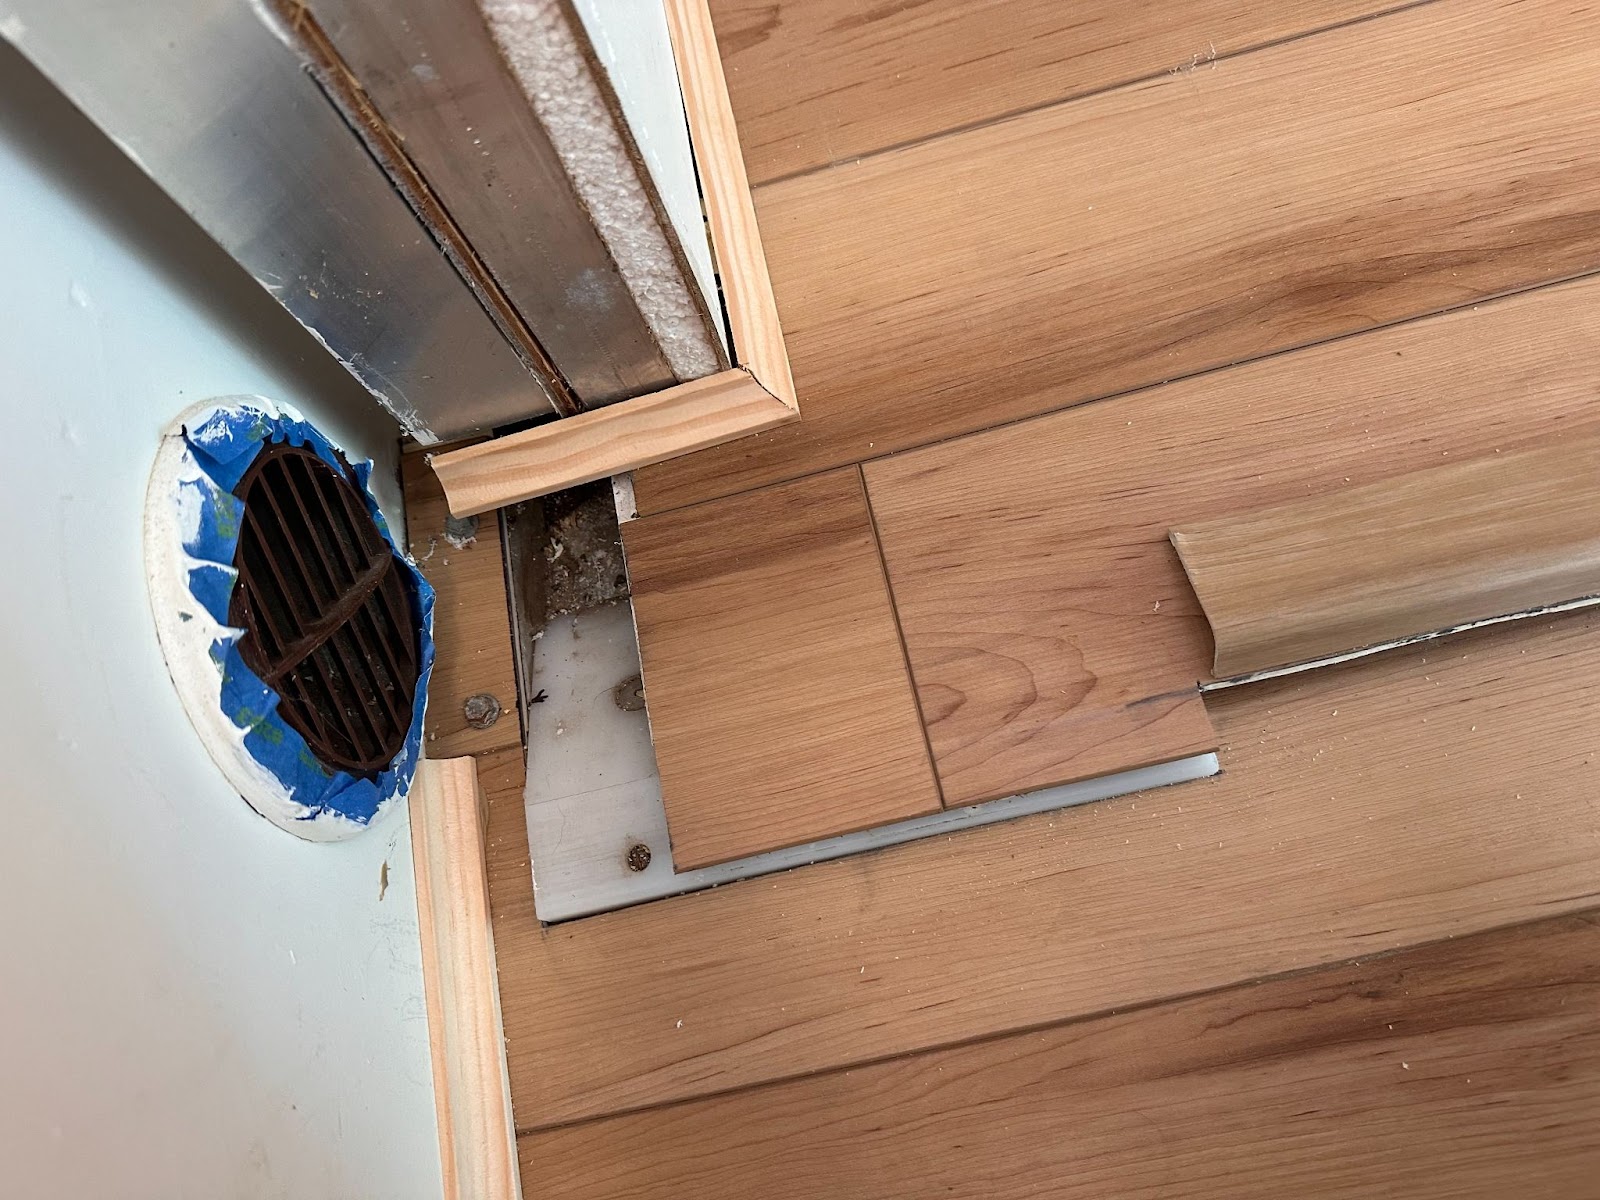
I ended up cutting a piece of adhesive vinyl floor trim I found on Amazon to cover that area. Unfortunately, I forgot to take a close-up picture of it. I don’t love how using two different types of trim looks up close. But I think it looks good enough that it doesn’t draw attention.
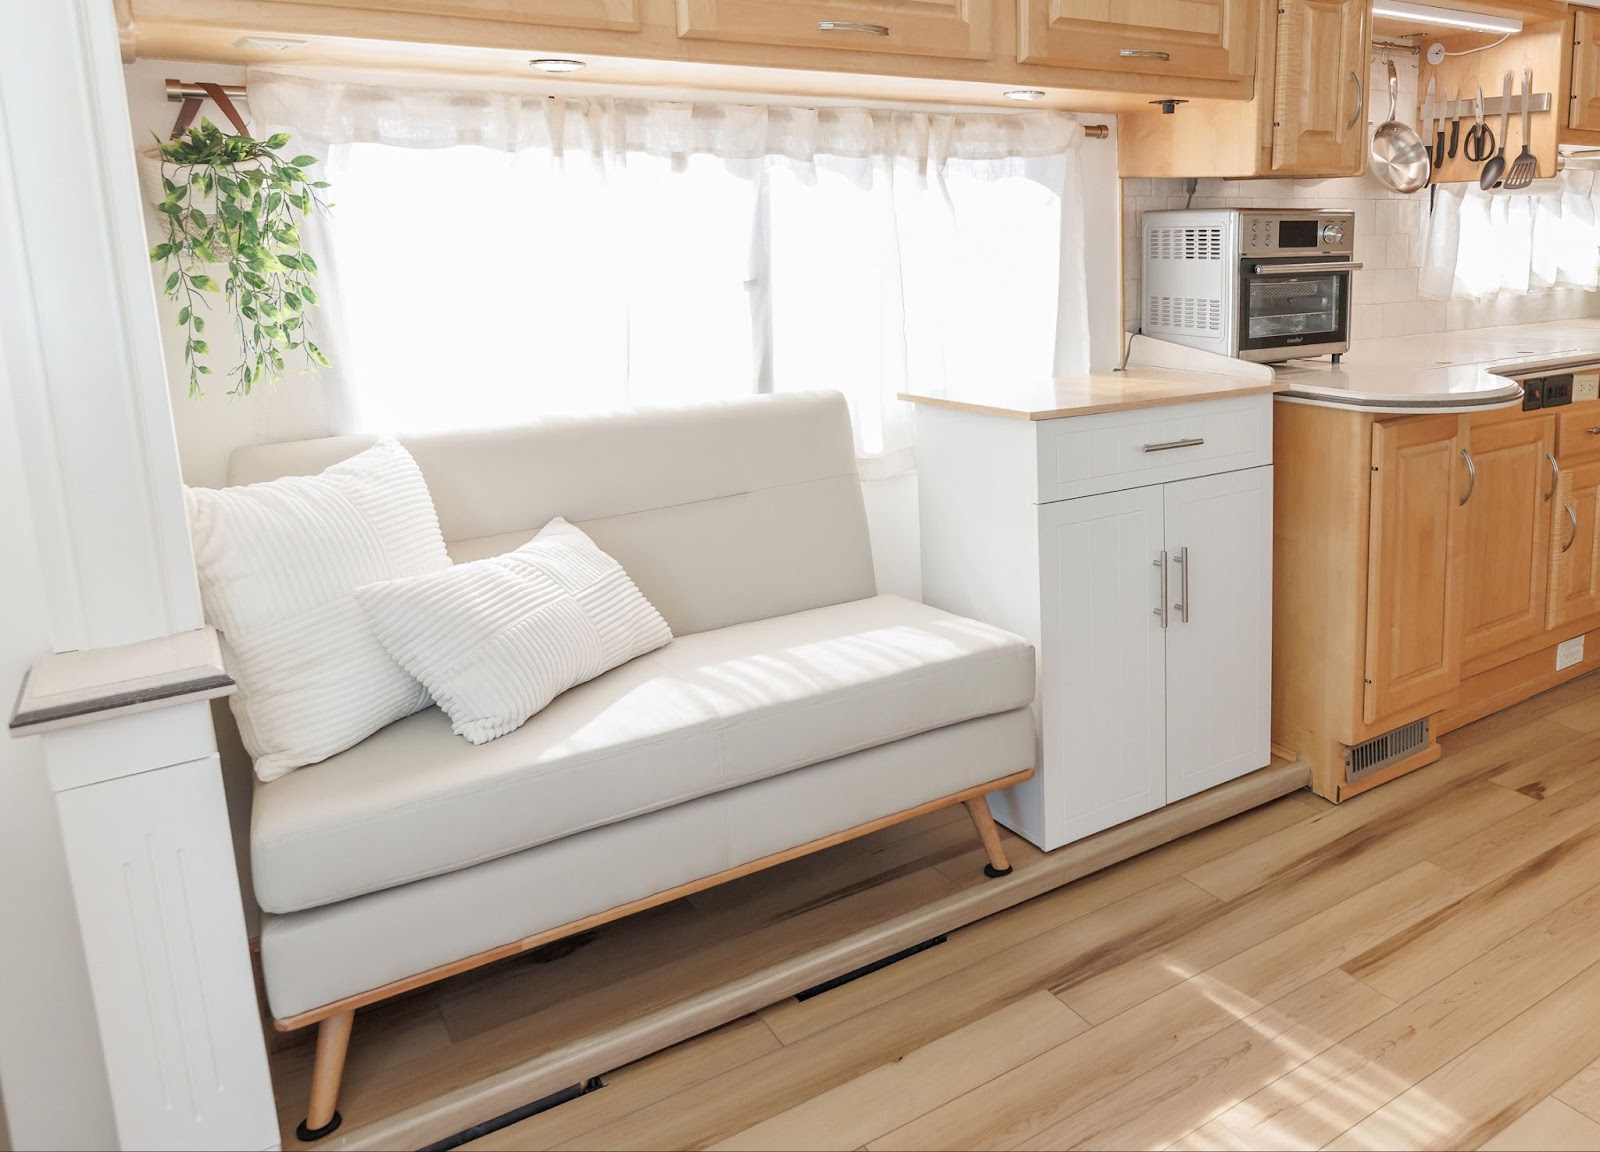
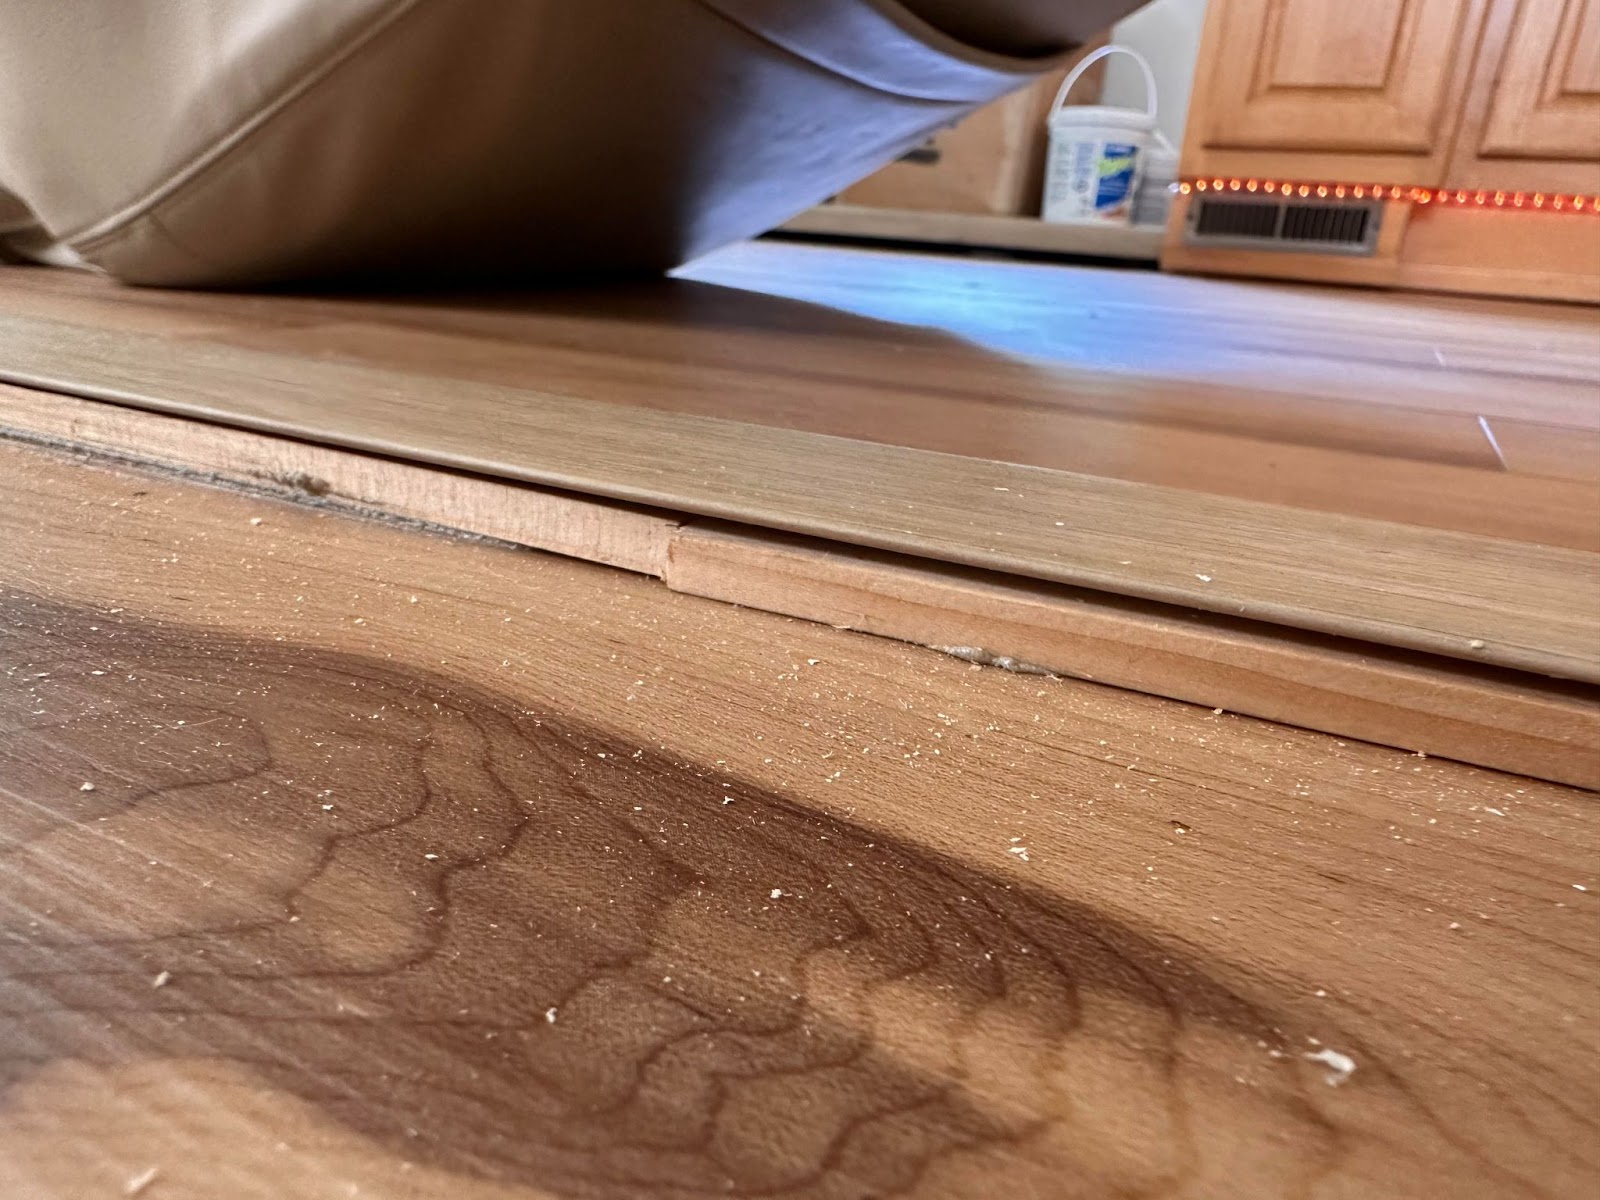
Here’s what that slide-out looks like after we finished:
Other Types of Slide Transition Flooring Trim Products
As I said earlier, I wish we found a different type of trim to cover the transition along our flush slide-out.
Below are some products I found after we had already finished our project that I think would have been better alternatives.
1. Two Piece Slide Transition Strip
In one video I found on YouTube, a two-piece flooring transition like this one from Home Depot was used along the edge of a flush RV slide-out.

Even though this transition strip is designed to go between flooring materials of equal height, the gap left under one side is very minimal. It creates a nice finished look to the edge of the RV slide-out.
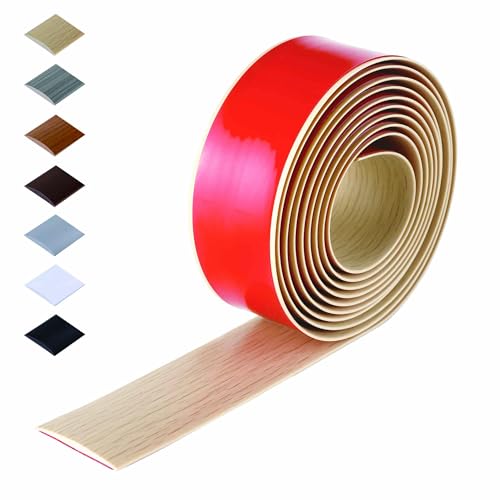
2. Self-Adhesive Floor Trim
If I had it to do over again, I would have finished the edge of the slide-out with this self-adhesive flexible vinyl flooring strip. It would have been the easiest option and seems to be designed for this very purpose.
RV Slide Out Flooring Solutions
Still, even with its imperfections, I’m happy with how our flooring project turned out. Everyone who has seen our motorhome in person or in pictures has said nothing other than how nice it looks overall.
Love this RV as much as we do? This motorhome is currently for sale on the Renovated RVs for Sale Marketplace.


Ashley Mann founded RVinspiration.com in 2017. She handed off the website to new owners in 2022 to launch a new business as an online entrepreneur coach, but she still helps out as the blog editor. Ashley spent three years living full time in a 38-foot, 5th-wheel RV with her husband Josiah and their cat, Kitty. Her favorite thing about RV life is the challenge of finding the perfect way to organize a space, and she loves seeing all the creative and clever ways people come up with to customize their RVs.


Hello,
How did you handle the very large bolts sticking up in the slide-out?