What to Know Before Installing a Mini Split in an RV
This post may contain affiliate links.

If you’ve ever struggled to keep your RV cool in the summer or warm in the winter, you’re not alone. Factory-installed air conditioners and propane furnaces can only do so much—especially in extreme temperatures. That’s why many RVers are turning to mini split air conditioning and heating systems as a more efficient, cost-effective solution. Installing a mini split in an RV can be a game-changer, but it’s important to understand the process, costs, and technical requirements before jumping in. In this guide, we’ll walk you through everything you need to know, from whether a mini-split is right for you to how to install one yourself or if you should hire a pro.
What is a Mini Split?
A mini split is a ductless heating and cooling system that consists of two main components: an outdoor compressor unit and an indoor air-handling unit. These systems are known for their energy efficiency, quiet operation, and ability to provide both heating and cooling.
What Set a Mini Split Apart from Regular RV HVAC Systems?
So maybe you’re thinking – what about the HVAC system that came with my rig when I bought it? Here are the key differences. Unlike traditional RV air conditioners and propane furnaces, mini splits:
- Allow for zoned temperature control, so you can heat or cool specific areas as needed.
- Are more energy-efficient, often using less power than a standard RV air conditioner.
- Operate quietly, reducing the loud fan noise common with factory-installed ACs.
- Provide both heating and cooling, making them a great year-round option.
Why Installing a Mini Split in an RV Might Be a Good Idea

There are several situations where installing a mini split in an RV makes a lot of sense!
1. Struggling to Stay Cool in Hot Weather
Many RVers find that their factory-installed AC units can’t keep up with extreme summer temperatures. For example, RV owner Ashley Mann shared her experience of staying in an RV park in Nashville during the middle of summer, where even with two air conditioners running, her Class A motorhome couldn’t stay below 80 degrees in the afternoon. This made it unsafe to leave her cat inside. A mini split could provide more efficient cooling in such situations. Read more about staying cool in an RV.
2. Avoiding Expensive Propane Costs in the Winter
Heating an RV with propane can be costly, and some RVers look for alternative heating methods. Mini splits with heat pump technology can provide consistent warmth at a fraction of the cost.
P.S. Learn more here on how to prepare your RV for cold weather living!
3. Converting a Toy Hauler Garage into a Bedroom
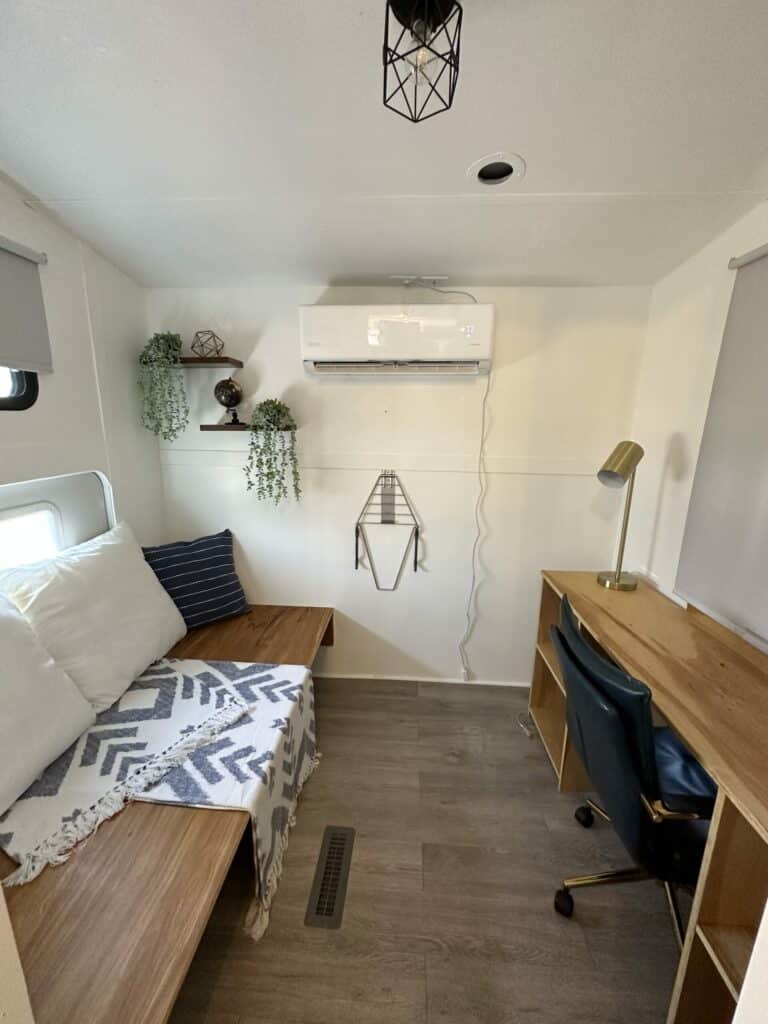
If you’ve converted an unheated toy hauler garage into a bedroom, a mini split is a great way to keep the space comfortable year-round. Check out this guide to converting a toy hauler garage into a bedroom!
Can You Put a Mini Split in an RV?
If you’re handy, chances are you can do this! But there are a few things you need to consider before jumping into a project like this.
- Electrical System Requirements – Mini splits require a steady power source. Running a mini split on solar power alone might not be possible, and you may need to manage your power usage if you have other high-draw appliances. One option might be to plug in your mini split directly to the power source instead of plugging into your RV, but that would prevent you from using it off grid.
- Weight Impact – While mini splits aren’t extremely heavy, you’ll need to consider their weight and how it affects your RV’s total load distribution.
- Modifications for Installation – You’ll need to create an opening for the refrigerant lines and mount the exterior compressor unit securely. This means drilling a hole in the side of your RV, and making sure you’ve properly sealed it afterward.
- Mounting Considerations – Some RVers mount the exterior unit on the back bumper, others attach it to the tongue of the trailer, and some secure it underneath the RV. Wherever you decide to mount it, you’ll want to make sure you take into account any extra height or width added when driving through tight spaces.
- Cost vs. Savings – While a mini split requires an upfront investment, the energy efficiency can save money in the long run, especially compared to running propane heat.
- DIY Skill Requirements – Installing a mini split yourself requires that you be somewhat handy, having knowledge of electrical work and the ability to mount the components. If that sounds daunting, hiring a professional may be the best option.
- Could Void Your RV Warranty – Read on for more about that.

Will Installing a Mini Split in an RV Void the Warranty?
Any modifications to an RV’s systems done by you or anyone other than a certified RV mechanic will void the warranty for that system. For example, modifications to the electrical system will void the warranty for the electrical system, and drilling a hole in your RV’s exterior will likely void any warranty coverage related to water intrusion. That doesn’t mean your warranty will be voided entirely, however. Parts and systems completely unaffected by the mini split installation may still be covered by your RV warranty. If in doubt, call your warranty provider to ask before making any permanent modifications.
An Important Note About Refrigerant Charging
When you start shopping for a mini split for an RV, you’ll notice there are some kits that are very expensive and some that are pretty affordable. You may think ordering one of the cheaper kits would be the obvious way to go, but there’s an important distinction between the two types of mini split kits available for purchase, and that is whether the refrigerant lines come “pre-charged” or not.
Mini split kits come in two varieties: pre-charged ‘DIY’ kits and standard kits requiring professional charging. This is more than a matter of technical ability and specialized equipment; in the United States it’s actually a legal requirement. While standard kits are less expensive upfront, you’ll need to factor in the cost of having an HVAC technician charge the system with refrigerant (typically $200-500). Pre-charged kits cost more initially but don’t require professional installation. Consider this difference when budgeting for your project.
How to Install a Mini Split in an RV
Okay, so you want to go for it and do it yourself! Kudos. Let’s break it down for you.
Step-by-Step DIY Mini Split Installation Overview:
- Choose the Right Mini Split – Select a pre-charged DIY mini split kit with quick-connect fittings and the appropriate BTU rating for your RV size.
- Determine the Mounting Location – Decide where the indoor and outdoor units will be installed, keeping in mind the length limitations of pre-charged line sets (typically 15-25 feet).
- Secure the Outdoor Unit – Mount the condenser unit on the back, tongue, or under the RV using an appropriate mounting bracket.
- Install the Indoor Unit – Mount it inside, usually on an interior wall or above a window, following the mounting template provided.
- Drill the Line Set Hole – Use a 3-3.5″ hole saw to create an opening through the RV wall, angling slightly downward toward the exterior. Install the wall sleeve and seal with RV-approved sealant.
- Run Electrical Wiring – Connect the power supply and communication wiring between units, ensuring your RV’s electrical system can handle the load.
- Connect the Line Set – Remove the protective caps and connect the pre-charged refrigerant lines using the quick-connect fittings. These should screw together by hand and then be tightened with wrenches to the specified torque.
- Install the Drain Line – Connect and route the condensate drain line with a downward slope.
- Final Sealing and Testing – Seal all exterior penetrations with appropriate RV sealant, then test the system operation.
For a detailed walkthrough, checkout out this helpful installation video!
RV Mini Split Install: DIY or Hire Someone Else?
There are two paths to installing a mini split in your RV: using a pre-charged DIY kit or having a professional install a standard system. Here’s what to consider:
- DIY with Pre-Charged Kit:
- Higher upfront equipment cost
- Saves on labor costs
- No special equipment or EPA certification required
- Limited to shorter line lengths (15-25 feet)
- Quick-connect fittings make installation simpler
- Still requires basic electrical and mounting skills
- Professional Installation:
- Certified HVAC technician handles refrigerant charging
- More flexibility with equipment choices and placement
- Expert installation and testing
- Often better warranty coverage
- Higher labor costs
- Lower equipment costs but additional charging fees
Cost Comparison:
DIY Mini Split Installation:
- Mini Split System & Components: $1,200 – $1,800
- DIY Installation Supplies: $100 – $200 (Hole saw, mounting brackets, sealant, etc.)
Professional Mini Split Installation:
- Standard Mini Split Kit: $500 – $900
- Professional labor costs: $1,500-$2,500 (this is a ballpark estimate based on a quote from a local HVAC company)
If you’re unsure which option to choose, we would recommend getting a quote from a professional and comparing that to the cost and time involved with the DIY mini split installation.
How to Get Started with an RV Mini Split Installation
If you’re ready to install a mini split in your RV, here’s where to start:
- For DIY Installation: You can find highly-rated mini split systems on Amazon. Look for models designed for small spaces with energy-efficient ratings.
- For Professional Installation: Contact a local HVAC professional or an RV service center that specializes in mini split installations.

Final Thoughts
A mini split can be a fantastic upgrade for your RV, providing efficient heating and cooling while reducing energy costs. Whether you choose to install it yourself or hire a pro, it’s important to plan ahead, ensure your RV can support the system, and invest in quality equipment!


