Small RV Changes with Big Results
This post may contain affiliate links.
With relatively minor updates that are easy on the budget and your time, you can give your RV a facelift, extra functionality, or a whole new vibe.
I’ve been a full-time nomad for about six years now. I’m on my third travel trailer. When I first got on the road, I had very little idea what I was doing. But I knew one thing: I wanted a home that was physically comfortable, functioned in a way that fit my lifestyle, and reflected my personal sense of style (such as it is). So that’s how I designed even the woefully small, poorly laid-out rig I started with.
I’m getting ready to sell my current rig and upsize to a new one, but I will carry over the best of the design changes I’ve made, as I have with every new rig I’ve gotten. The cumulative effect of that intentional design process has been that I live in a space that increasingly pleases me and now even garners compliments from people who visit.
Since I primarily got on the road because I discovered after a divorce that I couldn’t afford to live on my own in my longtime hometown, one thing has been consistent from rig to rig: I’ve made all upgrades on a stupidly tight budget. That has meant that by and large, most of the design changes I’ve made have been small, DIY projects that I could tackle a little at a time. Since we all live in limited space to begin with, and I don’t know anyone with more budget than they can use, it’s the ideal way to bring your RV from off the shelf to off the hook!th
You Can Do It!
As you will see in this post, I have completed several projects over the years. Most of them require a minimum of tools and materials. You only need to be mildly handy to tackle them. Really, I estimate that at least ¾ of these I did without having any prior similar experience. When I had an idea and didn’t know how to go about it, I simply consulted Professor Google and YouTube University. There’s almost nothing you can’t learn how to do on those two channels!
A basic set of hand tools should do it:
- Claw hammer
- A decent set of various-size screwdrivers (and yes, those multi-bit, handle-storing models you can get at Harbor Freight absolutely count)
- Accurate measuring tape
- 45° triangle, regular pliers
- Needlenose pliers
- A pair of Channel Lock-style pliers
- Replaceable blade box cutter
- Hand saw
It does help to have a saw that can cut wood and metal. Or at least have a friend you can borrow them from. Plenty of smaller tools will help you along the way, but I’ll mention those if they’re relevant.
The one power tool I would not be without on the road is a good-quality cordless drill/driver. You can get along without it, but I guarantee you’ll find it of great help in just about every project you try. I personally love my Hercules from Harbor Freight. It cost around $100. I believe it’s some of the best money I’ve ever spent in terms of return on investment. But if all you can afford is a five-dollar special from a thrift store and a decent pack of drill/driver bits, that’ll work. You’ll know if and when you’re ready to move up to something more serious.
Make It Your Own
I think you’ll find at least some of these projects will serve you as well as they have me as you put your own spin on them. And honestly, that’s always the best part of a DIY project. No matter how well you follow the directions or photos, your version of the upgrade always reflects a little bit of you. And isn’t that a large part of why we chose to live this unconventional life?
In this post, I’ll cover an abbreviated list of small DIY projects I’ve done that have given me a great deal of satisfaction, often even joy. I’ve divided them into two categories: Primarily functional and primarily aesthetic/comfort-enhancing. I’m neurodiverse, so these two categories usually influence each other quite a bit: There’s very little I do that’s strictly one or the other unless there’s been some irritating little itch in functionality I just have to scratch.
I’m far more comfortable in a space that functions well for how my brain works. Still, my brain is also sensitive to things like light and color, so usually, these two categories are equally important in why I choose to do the projects in the first place. There is no right or wrong about this—you do you. Just be aware that changing out a single element in a room can make it much more useful, comfortable, or visually pleasing. That’s what this whole post is about.
Functional Storage, Upgrade, and Addition Projects
First, we’ll start with storage projects. It’s the rare nomad—at least of the full-time kind—that would argue that efficient storage is one of the more significant ongoing challenges of living in an RV. I can’t count how often this has been a campfire discussion topic among my crowd. And if there’s one really nagging issue about storage space usage in an RV, it’s that there are too many tall, narrow cabinets and cupboards that waste vertical space.
Pantry Shelves

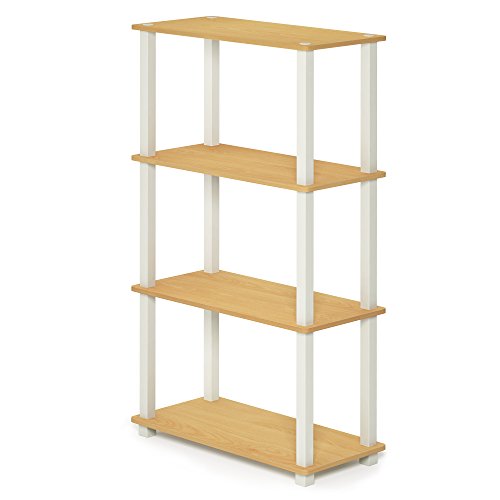
My major project around the pantry was to buy a tall, narrow, lightweight but strong shelving unit and install it in what was designed to be a hanging clothes closet.…in the kitchen. (Who designs these things?) But there it was, and I wanted to turn it into a pantry. So I diligently measured the interior three or four times, then haunted online retailers till I found the perfect one. You can see from the photo that it really IS perfect.
So much so that the dimensions were tight enough that I had to carefully pound a few of the shelf corners down to seat it properly. The good part is that the shelf does not move even a half-inch in any direction, even on the worst roads. The potentially bad thing is that shelf is NEVER coming out of that pantry…at least not in any functional form. It’ll have to be broken up and pulled out. Good thing I spent enough on it to get a quality-built unit that won’t fall apart. Bonus: I only needed a screwdriver and a dead blow hammer to assemble it.
- SIMPLE & MODERN DESIGN: This book shelf features a clean open style with square tube supports, making it a functional storage unit for living rooms, bedrooms, or offices
Cupboards and Cabinets

The same wasted vertical space happens in overhead cupboards and cabinets, but how I use and reconfigure them often changes enough that I wasn’t comfortable installing such immovable shelving. I opted instead for some sturdy but lightweight wire and aluminum panel shelves that you just pick up to move. To save space, I got ones with skinny legs and doubled up on them to gain more height when needed toward the back. If you choose well, you can reconfigure them endlessly, as needed.
I have a mixture of these Amazon Basics stackable white wire shelves and these sliding expandable organizer units. (And yes, most of my examples are from Amazon because I buy a lot online, and you still really can’t beat free Prime shipping.)
- Set of 2 metal wire racks for kitchen and cabinet organization
- EXPANDABLE: You may expand the width of this freestanding cabinet shelf to your desires. It can easily vary from 13.4 inches to 24.5 inches in width depending on how you want to organize your space. Specification: 8.6’’D * 13.4-24.5’’W * 9.5’’H
If plates and bowls slide around on these, simply cut pieces of that rubber non-slip shelf liner and place them on top before setting anything on them. If you’re worried about the shelves themselves sliding around, I strongly recommend putting a ¼” ball of Quakehold under each leg and pressing down when you find the placement you like.
- Removable, reusable and non-toxic
Unless you’re unnecessarily rough, those shelves won’t go anywhere until you want them to. I did find an off-brand of this poster-stick-putty-on-steroids that costs about half what Quakehold does and performs just as well.
Open Shelving

This is really one of those half-functional, half-aesthetic projects. After getting into my current rig, I had worked out a lot of the functional issues and now started focusing on ones that would just look nice but still be useful. I wanted some simple but good-looking small shelves to hold the few knickknacks I’ve allowed myself. I also wanted a bit larger one to hold my all-important weather radio in a place that was usually out of the way but easily accessible when needed.

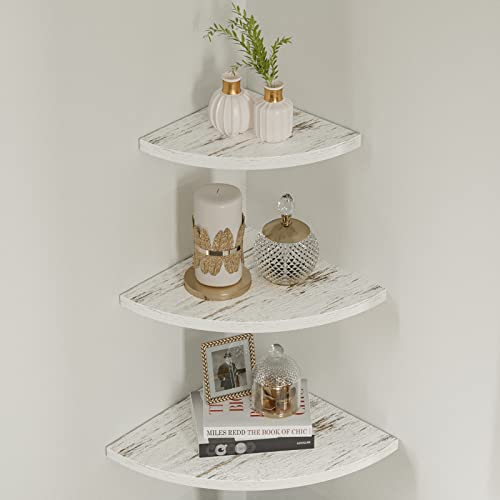
The solution to both was found in three quarter-round shelves of graduated sizes. One full set wound up in the corner of my bedroom. I got a second set; the largest one was made for my low-profile weather radio. That one is tucked up in the corner under the overhead shelves against the wall between the kitchen and bedroom. I gave the other two smaller shelves from that second set away.
These installed easily with two screws apiece and are solid, serviceable, and good-looking. I couldn’t be happier with them; they cost less than $30 a set. These are the ones I got, but they are no longer available on Amazon. Still, when you click on it, they will recommend similar items.
Folding Shelf
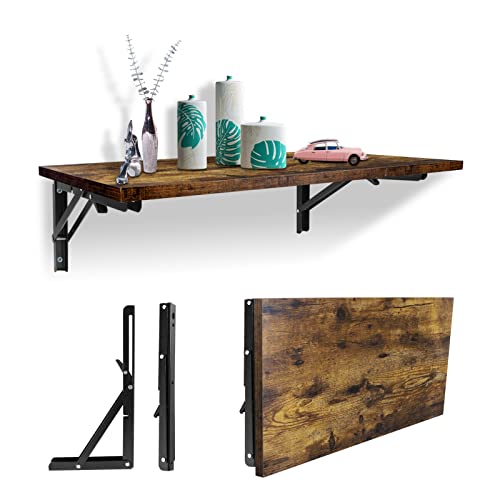
I absolutely love my current rig, with one glaring exception: There is next to no kitchen counter space. As we all know, you will never find the perfect rig, and this was one place I felt I could compromise because I knew I could extend the counter if needed. And needed it was, so I bought a nifty fold-down/pull-up shelf whose brackets lock in place to give me a little more than a square foot of extra counter space. I use it to support my bamboo dish draining rack. Before using it, I gave it an extra coat of clear acrylic enamel, as I knew it would get wet often. I always use it with a thick cotton drying pad underneath. It’s very serviceable and so convenient that I rarely put it down.
Spice Rack
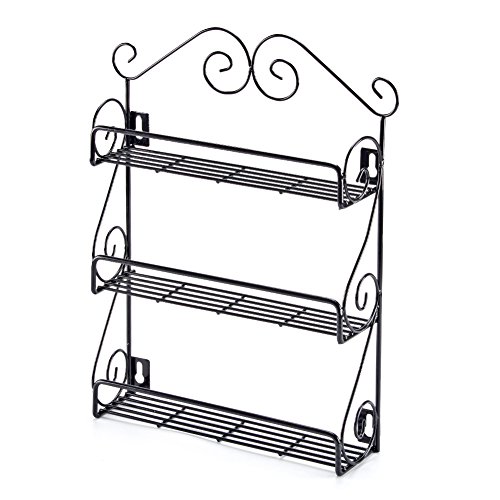
The first shelf I bought was for my first rig, and it has accompanied me through all subsequent travel trailers. It’s a simple but decorative, lightweight black wire spice rack, and I just love it. It has always occupied the end of the overhead cupboard over the kitchen sink. It was cheap and rugged, and it remains one of the longest-lasting pieces of décor I’ve had.
- KITCHEN & HOME ORGANIZER – 3-Tier Wall Mounted Rack offers organized space compatible with the majority of glass or plastic bottles, shakers, jars, and smaller canisters.
One tip: Make sure you have enough spice jars to fit them tightly into the racks, or they’ll jump out and take a dive when you hit rough roads. I have friends who cover theirs with a small cargo net in transit, but I’ve never found I needed that.
I also like those little lightweight steel spice jars that cling to a magnetic base. They, too, are an elegant solution, but are more modern-looking, while I prefer a more antique look. Also, they tend to be more expensive, but then you get the jars, not just the magnet rack. Also, the magnets sometimes aren’t strong enough to hold them over rough roads and potholes. However, they’re still a very popular solution.
- Magnetic Spice Mastery: Elevate your kitchen with Talented Kitchen’s 24 magnetic spice tins, each crafted from 3 oz stainless steel for durability. These magnetic spice jars with labels transform ordinary kitchens into organized culinary spaces
Over-Bed Shelving

This one was a real game-changer for me, to the point where, after I discovered it could be done in my second rig, I re-created it in my third. This won’t work for every floor plan. Still, if you have a bed that stretches essentially from one side of your trailer to the other, accessible only from one side, and has an overhead cabinet along the front or back, you can do this.
Said overhead cabinet is usually so shallow as to be almost useless, so I use it for seasonal stuff I don’t use much, or just bed sheets. Then, I extend it into an over-bed shelf. Bonus: It can be a perfect place to hang sheets or blankets to form a fort for kids, or even to hold in heat on those cold nights boondocking in the desert!
Option One
If your cabinet front drops down to form a “bunk bed” (Oh, please – they only hold 100 lbs., and I’d be scared to put a kid young enough to weigh that little up there anyway!), drop it and use it with the cabinet doors closed (they’ll usually stay that way) to form a shelf. Then get some of those ubiquitous collapsible fabric cubes and use them to organize clothes or whatever to sit up there. If you don’t overload it, you can sleep under it. I did for years and still do. Just make sure you build it strong enough to hold what’s up there.
Option Two
If your lame built-in cupboards don’t drop down, that’s even better. Buy a length of strong aluminum L-bracket and ask the hardware store to cut it to size to fit between the cupboard and however deep you’re comfortable reaching over the side windows. Measure carefully to screw them into the wall studs along the top and bottom of the bed at the same level as the bottom of the cabinets (see photo).

Then get a 7- or 8-foot length of steel L-bracket (depending on your rig width), and attach it with strong screws every 8 inches to the bottom of the cupboards along the whole length of the bed. This will support a piece of quarter- or half-inch plywood (depending on what you need the shelf to hold; see photo).

Then, use those fabric cubes to store clothes, linens, or whatever you need up there.

Additional Tips
Tip #1: Get these ultra-lightweight type of cubes. They can be found in various colors and patterns, so they’re decorative and useful. The clothes will weigh enough on their own, so you don’t want to add any weight to them if unnecessary.
- INCLUDES SIX CUBES: Keep your home tidy and organized with this set of six cloth storage cubes
Tip #2: Label the cubes for contents and stick to what those labels say, or change them when you change what you’re using them for. It’ll save time and frustration when you constantly have to get them down and put them back up. It sounds like a pain in the butt, but believe me: I wouldn’t give up that labeled extra clothing storage for anything!
Aesthetic & Comfort-Enhancing Projects
In the first part of this article, I explained how one of my huge priorities when becoming a full-time nomad almost six years ago was creating a home-on-wheels that was physically comfortable, functioned to fit my lifestyle, and reflected my personal aesthetic. That included upgrades and additions to my RV’s storage areas, which were primarily functional in nature.
This next segment will tackle functional projects that also influence my physical comfort, whether related to space, temperature, or anything else that makes my rig feel more like a real home.
I’ve done a few significant projects, such as installing a solar power system, but this post is about little things you can do. I will now discuss some tiny efforts that will pay off big in personal comfort.
Warm Thoughts
I usually spend my winters boondocking in the desert in Quartzsite, Arizona. I tell everyone who will listen that the BLM Long Term Visitor Areas (LTVAs) offer the cheapest rent in America. However, there are rumors about the price rising next season. Right now, you can stay in BLM LTVAs there from Sept. 15 to April 15—that’s seven whole months if you wish—for a total of $180. That comes out to just 85¢ a night! And when you understand that this gives you access to potable water, trash disposal, gray and black tank sanitary dumps, and vault toilets if you need them, you realize what a fabulous deal it is!
The only issue is that you need to be self-contained with your own onboard toilet facilities or park within 500 feet of a vault toilet, and you have to have a way to power any electrical gear you need. Some may consider it another issue to be able to cool or warm yourself as needed. And even though you are in the deep Desert Southwest there, it still gets plenty cold at night, usually in the 40s but infrequently as low as the high 20s. So, it’s obvious that anything you can do to provide thermal insulation is a good idea for your rig.
Under Sink Insulation

I’ve always been on a very tight budget, so I had to be creative about any upgrades I attempted. I DIY as much as possible. One of the more resourceful projects I accomplished in all three of my rigs to date has been to insulate under my kitchen and bathroom sink cabinets so the plumbing won’t freeze during the occasional stretch of three or more days below 32°.
Measure & Source Parts
First, I got underneath and roughly measured the outside wall under the kitchen sink counter and the bathroom vanity. Then I went to one of the big box home improvement stores and asked at the service desk if they had any scraps of one-inch EPS board, more commonly known as Styrofoam™. I tell them I’ll happily take off their hands any scraps, regardless of how small, and I don’t care if it’s mismatched colors or a bit marked with scuffs, crushed areas, or a few chunks out here and there.
Why? Because it won’t be visible to anyone but me or someone digging in those cabinets. And the best part is, these scraps are free, especially if you source them from smaller mom-and-pop hardware stores. Those small scraps just get broken up and spread nuisance beads they have to clean up, so they’re happy to get rid of them. Technically, they don’t break down, so lots of municipalities don’t allow them in regular landfills.
Assembly & Installation
I say I roughly measure because I know I’m not going to get any lovely big pieces, so I am okay with just piecing them all together. And that’s what I do: I start with the large pieces, fitting them together on the floor like a jigsaw puzzle as best I can to fit the needed area. Then I slide them behind the PEX and/or PVC plumbing along the back, squirt a bead of Liquid Nails or acrylic caulk between the board and the wall, and press it on. The adhesive takes right away because the foam is light enough not to drag it down.
But what if I can’t gather enough EPS to cover the entire area? I’ll know ahead of time, from dry piecing it together on the floor, bed, or wherever, so I will first use the big pieces where it’s easiest to place them. For behind the plumbing itself, where it can sometimes be hard to fit the big pieces in, I will use either scraps of bubble wrap (this is handy for another purpose, which I’ll detail next), Reflectix™, dense packing foam saved from shipments, or—my favorite because I’m cheap—padded envelopes from my many Amazon orders.
Yes, really! Those ubiquitous plastic or kraft envelopes filled with padding materials—especially bubble wrap—make excellent thermal insulation…and they don’t cost you a thing! You can just use them whole, sliding them behind the plumbing and squirting a bead of adhesive to attach them to the wall. Or you can even use clear packing tape to affix them. Best of all, you can fold to double or triple them up in areas you really worry about keeping above freezing. Reuse environmental BONUS: All those envelopes are kept out of landfills to continue living useful lives!
Comfy, Pretty Bedroom
My current rig has a bed that runs perpendicular to the front, which has a common backswept nose to be more aerodynamic. Because of this backward angle, that whole front wall is something of a functional wasteland, except for this purpose:

A few years ago, I noticed that the wall tended to be really cold in cool weather and kept me uncomfortable when I tried to sleep. So I went online to one of the many discount home décor retailers and bought a bunch of cheap but attractive, colorful throw pillow covers. Then I used a couple of old pillows I had but no longer liked (you can buy some from thrift stores if you wish; just do the sniff test to make sure they don’t have any ingrained stank because you almost certainly won’t be able to get rid of it), and covered them.
- DURABLE AND HIGHER QUALITY: Made of machine washable Polyester, comfortable & soft touch, no bleeding, fading or fraying issue
I still had three new covers when I was out of old pillows. I went to buy more, but there weren’t any. However, I did find a big bag of polyfill used to make stuffed animals for about three bucks. Bingo! I could also have used an old quilt, blanket, or duvet, cut and folded to proper size and thickness; whatever works. I stuffed the remaining throw covers, then arranged my beautiful new pillows along the length of the wall. Not only did they provide some cheery color, but they also served as hella good wall insulation for those cold nights. I noticed a HUGE improvement in the cozy factor after that.
Adding Color
Another place I like to use color is…well, okay…all over my rig. Anyone who knows me knows my bright yellow, retro-look outside paint job. Inside, I like to use little pops of color to liven up the preternaturally brown design schemes that come in most modern RVs or the hideous swirly blues or blocky greens of the 70s and 80s. Those are endurable for a week of camping by vacationers, but if you live full-time in your rig, just…no.
You don’t need to go as nuts with the color as I do. Many people likely find my taste garish, but if you like a more understated look, go for it. The point is, you don’t have to stick with the questionable (as in, “Who thought this was a good look?”) designs that come with the RV. You’re going to live in it; it’s a small space…make it yours.
Assess Your Walls
So take a look around and decide if you really like your interior look. If not, get out a little paint, wallpaper, or even contact paper and cover the ugly walls while adding a touch of your own whimsy or whatever style you like. What’s beautiful about having small RV walls is that you can take advantage of the single gallons of paint missing rejects just about every paint retailer sells for pennies on the dollar!
Small Touches

If you have difficulty committing to such permanent changes, that’s okay. Just cover up as much of the ugly as you can. Go to the dollar store, stationery shop, or any craft store. Find something containing an image you really like. It can be anything from a postcard to a tin sign to a pretty little canvas with an inspirational saying. You can hang it with Quake Hold or foam tape and change it as you wish. These little touches allow you to add a lot of pretty and personality with little money and even less commitment!

Vinyl Tile Backsplash

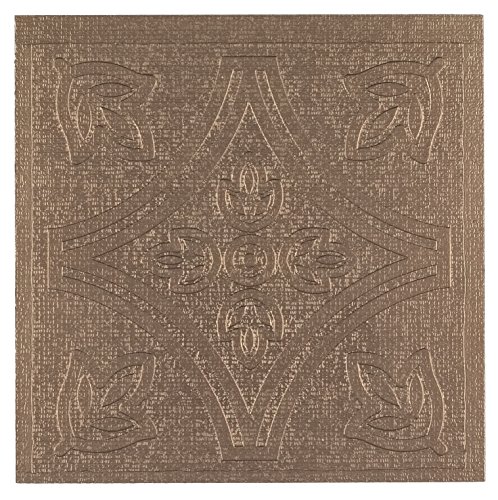
One particularly easy project I did like this was installing custom backsplashes in all my rigs so far. I had over a year to prepare for the first one, so I went all out, using some beautiful vinyl tiles that looked like bronze and finishing the edges with a bit of cheap quarter-round molding that I pre-stained before installing with Liquid Nails adhesive.
- Achim home furnishings metallo peel & stick vinyl wall tiles, 4 by 4-inch
TIP: Really think about how much Liquid Nails you’ll need, and only buy that much. You don’t need to get a whole caulking tube full of it. They sell it in convenient smaller tubes, as well. You’ll almost certainly not use it all, so try to think of other projects to do around the same time that will use it up before it hardens in the tube (you’ve got about six months before that happens).
Faux Tile Backsplash

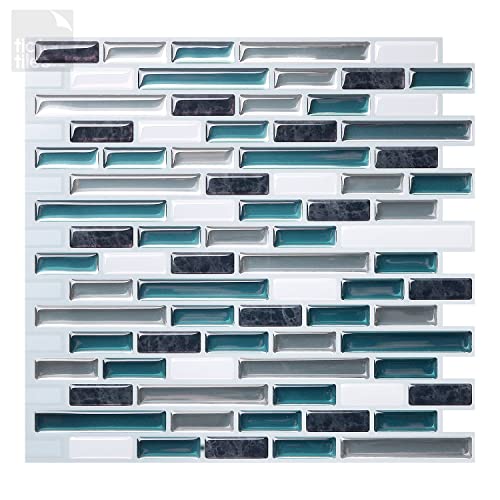
I installed lightweight, three-dimensional, and very attractive stick-on faux tile panels for the subsequent two rigs. These are so easy to install—just peel and stick—that my first one took me about three hours and the last one, less than two. These tiles are transparent, so they not only add dimension, livening up an otherwise dull area, but many have foil backing reflecting light back through, lending a sophisticated look. In fact, the installed tiles looked SO much richer than they did in the photos. I was thrilled with the final effect in both rigs!

- 🖽[ECONOMICAL] Sized 10″x10″ with grout; the tiles do not yellow or crack over time.
Police Your Doors
One of the biggest annoyances of traveling in an RV is having your cupboard doors open up and spill their contents all over because you hit some bumps in the road. You can use those spring-loaded spacer bars to try to corral your cans, bottles, and tableware. I do some of that. But the game-changer for me in that effort was buying some plastic straps that new parents use to baby-proof their lower cabinets. They attach with strong adhesive, and if you carefully install them according to the instructions, they stay put.

They’re not the loveliest things to look at, but there are several styles available. Doing this has saved me countless broken dishes, dented cans, and spilled containers, not to mention all the aggravation of having to clean up the floor before I can go rest after a long day of driving. Here are the ones I got, which were cheap, really work, and don’t look all that bad.
- [ PROTECT YOUR CHILD FROM DANGER ] – Baby proof cupboard latches are easy to use for adults, but nearly impossible for a child to figure out – and even if they can, they lack the finger strength to easily depress the buttons.Protect baby and pets from getting injured while are explore your home
It’s the Little Things
One thing I’ve learned in my time as a nomad is how important it is to pay attention to those little things that, when you must do them time and again, become nagging annoyances if they don’t work right or if they seem to require an outsize amount of time, effort or attention. I learned quickly to notice these things and made a rule for myself: If the same little thing annoys me three times, I change it.
Tissue Box

The first such thing was never being able to find a facial tissue when I needed it. As soon as I could, I ordered a few plastic dispensers that screw into the wall and hold the boutique size squarish box. All you have to do is mount it and drop a box in. Voila! Immediate gratification. I ALWAYS know where I can find a tissue now, as long as I refill them right away when they run out (and you can almost always find more at the dollar store). LOVE these things!
Fruit Hammock
Then there was the reality that I kept having fruit go bad because I kept it in my fridge and forgot I had it. The third instance of throwing out what had been perfectly good fresh fruit that wasn’t cheap, BOOM! I bought myself a fruit hammock. Now, my apples, onions, and avocados are in plain view, and I usually use them up before they go bad.
TIP: Take these down and stash them on a dinette cushion or someplace soft while traveling, or they’ll get beat up by swinging while in transit. Ask me how I know…
- Solid 14-inch hardwood rod conveniently mounts under kitchen cabinet
Small Drawers

I’m a professional writer. I have lots of office supplies lying all over the place where I work at the dinette table. But the third time, I got annoyed by all the clutter when I just wanted to sit down to eat or work on a puzzle. I ordered some small drawers to corral all that stuff and screwed them into the bottom of the tabletop. These are so beloved that I even bought a couple of larger ones for things like staplers, tape dispensers, and other bulky items.
- Easy installate under monitor pen holder for desk:We provide enhanced non-marking adhesive tape.You can stick anywhere easily and quickly without tools and drilling holes
I also put one on the underside of my kitchen overhead cupboard to hold rubber bands and twist ties from plastic bags. It’s SO handy! Every time I find what I need right away in that one, I silently congratulate myself.
Tool Grippers

I didn’t wait to be annoyed by not being able to find a broom, toilet scrubber, hand brush, or dustpan when I needed it. I knew that would happen, so before I got on the road, I bought some of the very well-designed Command tool grippers from Scotch/3M.
- BROOM AND MOP HOLDER: Each package includes adhesive strips and the white Command Broom and Mop Gripper. Each Gripper holds a broom or mop up to 4 pounds with a 0.8- to 1-inch diameter handle
These well-designed items are lightweight, affordable, and easy to attach to a wall with either the provided peel-and-stick pads or screws. You can also use these for walking sticks, fishing poles, or anything else that can be clamped around to hang when it’s not in use. Every time I use it, I am thankful that I don’t have to hunt for what I need. None of my long tools are in my way because they lie around with no place to call home.
There are cheaper, no-name versions of these wall holders, but I haven’t tried them, so I can’t vouch for their effectiveness or long-term performance.
Conclusion: It’s Your Rig, Treat It That Way!
One final thought for this article. SO many people ask me, “Aren’t you afraid to put all those screw holes in your walls?”
Nope.
I bought this RV for my use as my full-time home. I didn’t buy it for the person who may buy it from me when I’m done with it. So, while it’s mine, I will treat it that way and modify it to perform as well for me as possible.
Yes, screws put holes in the walls or other surfaces. So what? If you end up selling it, take the time to carefully fill those holes (with caulk or some other material that will remain pliable, not spackle, which will dry out, crumble, and fall out, or wood filler on cabinets). If you need to paint or stain over them, do it. No one’s gonna die. I don’t know one nomad who, on their deathbed, said, “I wish I hadn’t put all those screw holes in my rig’s walls to make it more pleasant for me to live there.”
Seriously, just get past all that. A few screw holes aren’t going to be a dealbreaker. Just do what you need to make your RV a home you are proud of and comfortable using. Enjoy!
Read Next:










Thos was such a refreshingly straight up article. I really enjoyed the read, and learned a lot on the process. And the attitude that this rig is mone and I can do what I want with it, is excellent advice. Thank you for not being frilly and girly. A true woman of the road. Happy Nomading Stormy Shafer.
Thanks, Andrea! I’m thrilled that you enjoyed my article, and found it useful. I always feel like, when I get the chance to share my experiences like this, their benefits accrue to way more people than just me, and that’s a great feeling!