Discover 10 Effective Ways to Makeover Your RV Ceiling
This post may contain affiliate links.
When it comes to renovating an RV, most owners stick with the basics—fresh paint, new floors, maybe even wallpaper, or a fun backsplash. But the renovators in this article took it a step further and renovated their RV ceiling!
Check out these ten ways you can completely transform your camper ceiling—from difficult to easy!
1. Natural Beadboard
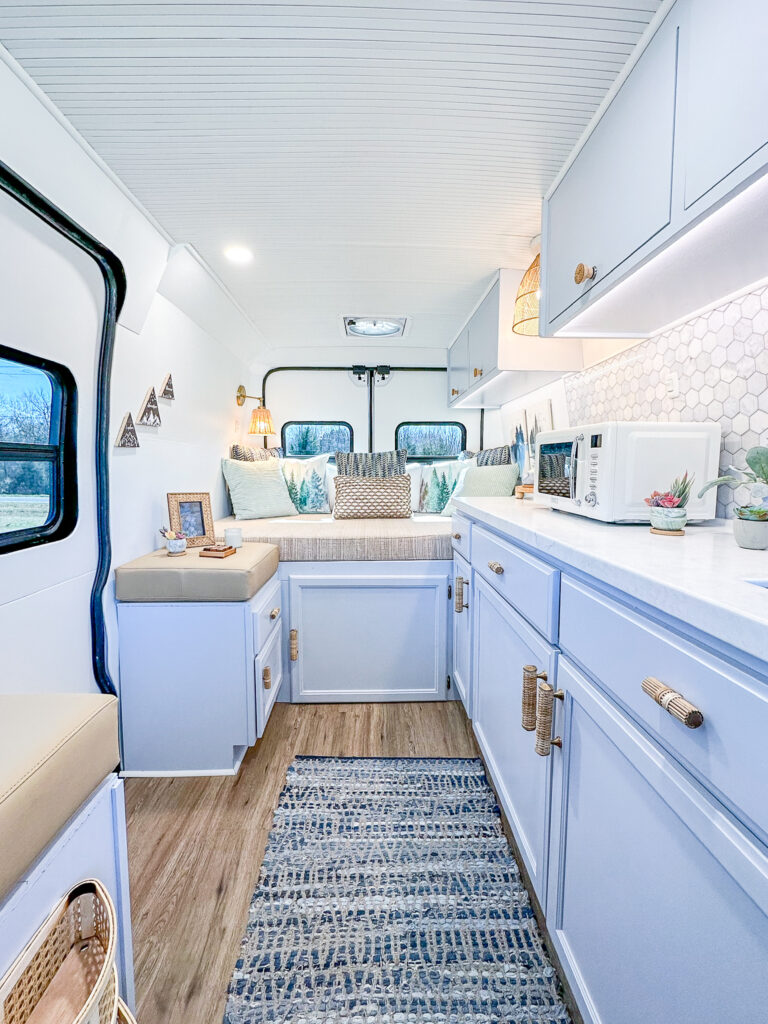
In this RV renovation, the entire ceiling was covered with an unfinished beadboard for a natural look.

You can see this look was continued throughout the RV, with holes cut out for vents, A/C, and lights.


You can give your ceiling vents an easy update by removing them and spray painting them with Rust-Oleum in any color you choose. You can also spraypaint the plastic around your skylights if they have begun to yellow with age.
2. Painted Beadboard
Even more popular than unfinished beadboard is painted beadboard! You can usually find beadboard in white at your local Home Depot or Lowes, but for this dark and moody RV, the designers chose black.

The horizontal beadboard was continued even down the angled back of the RV, creating a headboard in the bedroom.
3. White Beadboard with Wood Planks
Everything about this ceiling screams “done by professionals!”

Professional renovators, The Flippin Tilbys, not only used beadboard on the ceiling, they installed it on the slide-out ceiling and accent walls.
If you love this motorhome, it’s currently for sale! Check it out here.
Instead of just using beadboard, they added wooden planks to create more dimension and visual interest to the ceiling. This beautifully decorated ceiling looks as luxurious as the rest of this motorhome!
Love the beadboard look?
Want to recreate the look in your own RV? You’ll need a few tools before getting started.
A circular saw and jigsaw are necessary for cutting your beadboard to size and cutting any holes needed to fit light fixtures or air vents.
You can install beadboard with a heavy-duty construction adhesive like Liquid Nails. You’ll want to use some sort of support beam or clamps to hold the beadboard and adhesive into place on the ceiling while the adhesive dries!
“This ceiling,” said the renovator, Renee Tilby, “had aluminum framing, so we used self-tapping screws, as well as the construction adhesive.”
“If the framing was wood, we would have been able to use a nail gun,” Renee noted. “Screws are preferable when hanging anything overhead. As when screwing or nailing anything into the walls or ceiling of an RV, we are always very aware of where all HVAC, wiring, etc, is located, as well as how thick the wall is to not perforate the exterior of the rig.”
Be sure to note the locations of any wiring and existing electrical elements before beginning any ceiling renovation so you don’t cause damage to the RV or yourself during installation.
4. The Epoxy Night Sky
In this motorhome turned spaceship (Yes, you read that right! Tour this incredible renovation here), epoxy was used to create a milky way effect.

Epoxy was poured into molds on the ground before being installed on the ceiling. The rest of the ceiling was painted “Iron Ore” in color and LED rope lights and light wood trim were added.
For more on how you can make your own epoxy elements in your RV, read how this spaceship was built here.
5. Shiplap
This tiny trailer used wood planks to create a shiplap-like effect on the ceiling.

This classic look almost perfectly matches the vinyl wood floors installed!
6. Wooden Beams
A simple way to add texture to your RV ceiling is by adding a few wooden beams like these RVers did:

You can go as large or as small as you want with your beams, but keep in mind how much weight you may be adding to your ceiling. You can also create hollow beams by beating up and staining 1x8s and then framing them together, as one renovator suggested.

In this RV renovated by the pros at Wayland Ventures, simple stained 2x6s create beams that run across the ceiling.

7. Wood Panels
This RV is actually an old school bus in New Zealand! To cover up the naturally curved roof of the bus, owner Andy installed wood paneling across portions of his RV ceiling.

Some of the original ceiling was left exposed for the skylights and for the chimney of his wood stove.
8. Ceiling Tiles
This Argosy renovation used decorative ceiling tiles like this to create a beautiful ceiling.

Here is what the owner, Terri, had to say about this ceiling!
“Tin ceilings are notoriously heavy. We wanted the look but didn’t want the weight so we choose 2’ x 4’ vinyl, glue-up panels in a Victorian style. It fit the bill perfectly.
“That ceiling tile was framed by wood molding down the length of the trailer with a flexible resin molding following the curve of the ceiling. Installation was a challenge. How do you hold these ceiling tiles in place while the glue dries? Solution: you use a great many flexible wooden spring poles to pin each piece to the ceiling while it dries. “
9. Paint
For a basic makeover, just use paint!

This renovator used the same shade of white as her walls. Even if your RV ceiling is already white, it may not match what colors you paint your walls. A bright white on the walls may make the ceiling look dingy, making a ceiling makeover a necessity!
Be sure to prime your ceiling first with Zinsser or a bonding primer before applying paint. 1-2-3 Bullseye by Zinsser is the go-to primer for many DIYers!
- Designed for interior and exterior surfaces
10. Ceiling Fans & Light Fixtures
For an extra simple ceiling renovation, consider adding elements like a ceiling fan or a beautiful light fixture. This can add both beauty and function to your ceiling.

You can use any type of residential light fixture in an RV as long as it is properly installed. This is a great way to add your own personality to your RV without needing to completely overhaul your ceiling.

What do you think?
Would you renovate your RV ceiling? Drop a comment and share which of these designs is your favorite!
Read Next: 23 Ways to Make a Budget RV Makeover Extra Simple!


These are all great ideas and the photos are great illustrations of each being executed perfectly!! You’ve got my gears turning for sure!
May need to try the bead board on the ceiling of my dining room pop out since I’ve a couple of holes left where I removed the stock light fixture.
I have had RV electricians come to my RV and tell the ceilings will hold nothing more that the little can lights which are there now. Help if you can. I’m not trying to hang heavy fixtures, only 4 or 5 pounds. How do I make my ceilings suitable for better fixtures? We have a 2020 FOREST River Puma. It couldn’t be that different from other RV’s. Your help would be so much appreciated. Thank you.